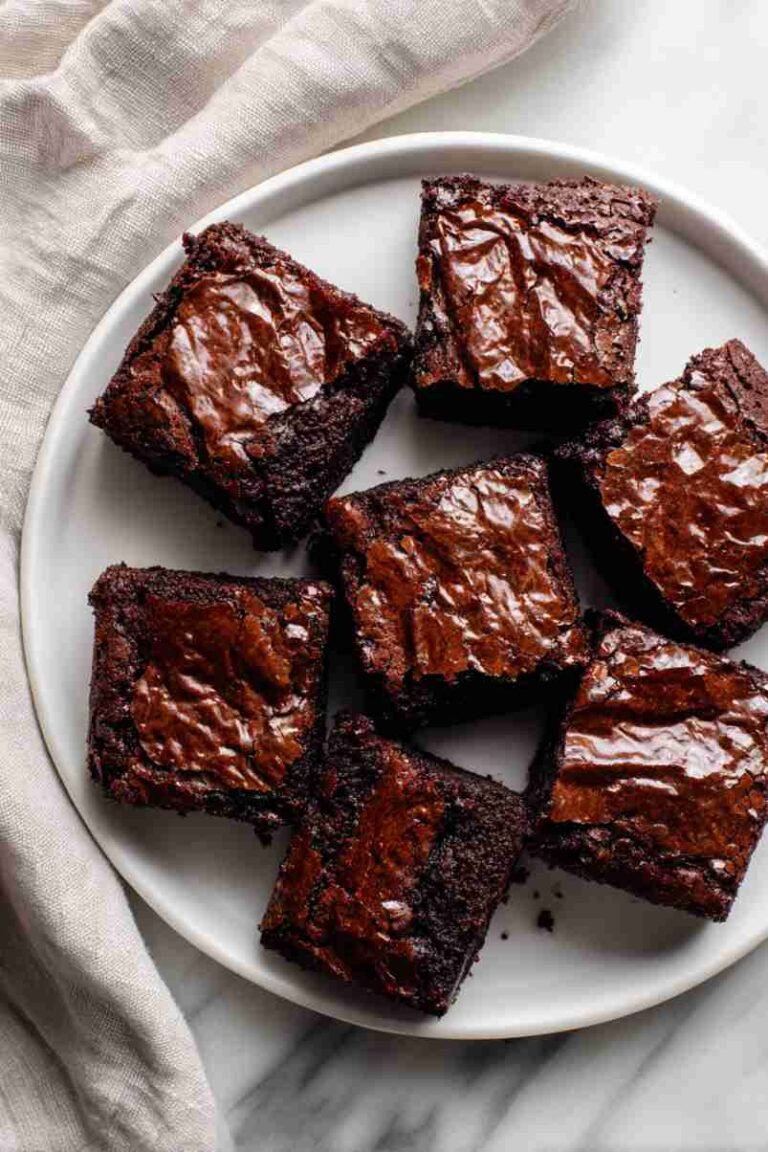
Christmas brownies are my secret weapon when I want something festive and impressive but don’t have time for elaborate cookie decorating sessions. There’s something so satisfying about turning a simple brownie into a holiday masterpiece with just a few festive touches – some peppermint, colorful M&Ms, or cute decorations that make them absolutely perfect for cookie exchanges, holiday parties, or gift-giving. These 10 Christmas brownie recipe ideas prove that brownies deserve a place on your holiday baking list alongside all those cookies, with flavors and decorations that capture the magic of Christmas in every fudgy bite.
The adorable Christmas Tree Brownies are shaped and decorated to look like little trees – so cute on a dessert platter! The Peppermint Brownies bring that classic holiday flavor with crushed candy canes, while the Frosted Christmas Brownies get topped with festive green or red frosting and sprinkles. The fun M&M Christmas Brownies are loaded with red and green candies, and the stunning Red Velvet Christmas Brownies combine two beloved desserts. The Chocolate Mint Brownies taste like those after-dinner mints in brownie form, the Gingerbread Brownies add warm spices to rich chocolate, and the White Chocolate Cranberry Brownies bring gorgeous holiday colors. The Snowman Brownies are decorated to look like cute snowmen faces, while the Candy Cane Brownies are swirled with peppermint and topped with crushed candy canes.
What makes Christmas brownies so perfect is how they’re easier than cookies but just as festive and delicious. They travel well to parties, they look impressive with minimal effort, and honestly, everyone loves brownies. Plus, most can be made ahead and frozen, which is a lifesaver during the crazy holiday season. These festive brownies will make you the hero of every Christmas gathering!
1. Christmas Tree Brownies
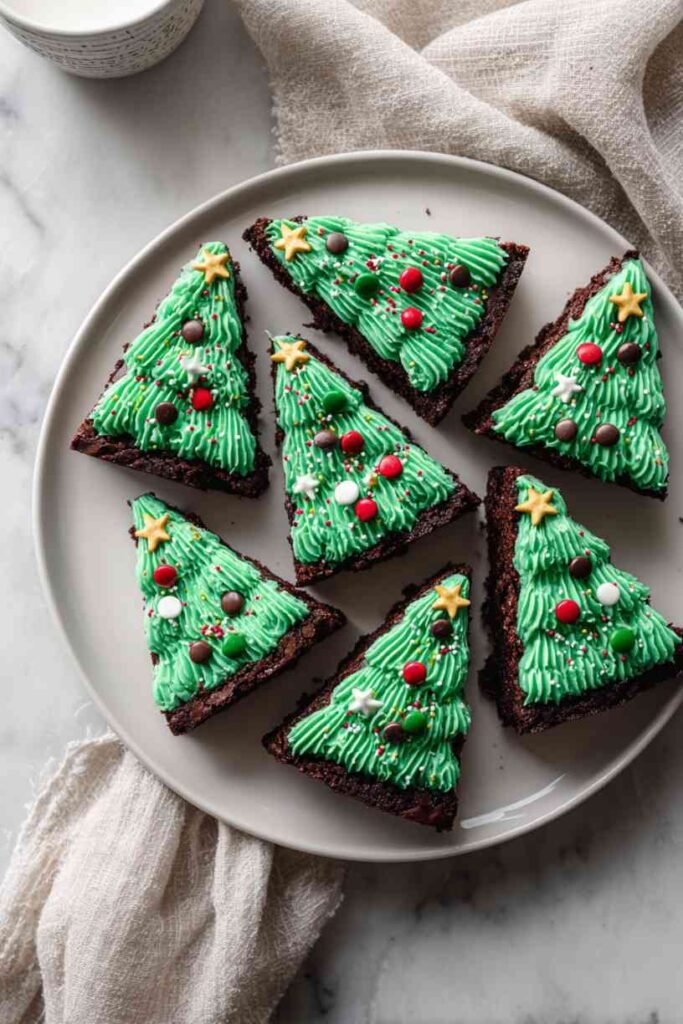
Christmas Tree Brownies are fudgy brownies cut and decorated to look like festive Christmas trees with green frosting and colorful sprinkles. The combination of rich chocolate brownie with vibrant green frosting creates these adorable holiday treats that are perfect for parties and cookie exchanges. I’ve been making these every Christmas for years because they’re not only delicious but also incredibly fun to decorate with kids and always get compliments at holiday gatherings. The key is baking a perfectly fudgy brownie base that’s sturdy enough to hold its tree shape, then decorating with bright green frosting and festive sprinkles to create that classic Christmas tree look. This has become my most-requested holiday dessert because they’re impressive, festive, and taste amazing. Every bite delivers rich, fudgy chocolate with sweet vanilla frosting and crunchy sprinkles.
Ingredients
For the brownies:
- 170g (¾ cup / 1½ sticks) unsalted butter
- 340g (2 cups) semi-sweet chocolate chips
- 300g (1½ cups) granulated sugar
- 3 large eggs
- 2 teaspoons vanilla extract
- 125g (1 cup) all-purpose flour
- 43g (½ cup) unsweetened cocoa powder
- ½ teaspoon salt
For the frosting:
- 226g (1 cup / 2 sticks) unsalted butter, softened
- 480g (4 cups) powdered sugar
- 3-4 tablespoons heavy cream or milk
- 2 teaspoons vanilla extract
- Green gel food coloring
- Christmas sprinkles, red and green M&Ms, mini chocolate chips, or other decorations
Steps
Step 1: Preheat your oven to 350°F (175°C). Line a 9×13 inch baking pan with parchment paper, leaving overhang on the sides for easy removal. In a large microwave-safe bowl, melt the butter and chocolate chips together in 30-second intervals, stirring between each, until completely smooth and melted. Let it cool for about 5 minutes. Stir in the sugar until well combined, then add the eggs one at a time, mixing well after each addition. Add the vanilla extract and stir. The mixture should be thick, glossy, and chocolatey.
Step 2: In a separate bowl, whisk together the flour, cocoa powder, and salt. Add the dry ingredients to the chocolate mixture and fold gently with a rubber spatula until just combined. Don’t overmix – stop as soon as you no longer see streaks of flour. The batter should be thick and fudgy. Pour the batter into the prepared pan and spread evenly.
Step 3: Bake for 25-30 minutes until a toothpick inserted into the center comes out with a few moist crumbs (not wet batter, but not completely clean). Don’t overbake – slightly underdone brownies are fudgier. Let the brownies cool completely in the pan, about 2 hours or refrigerate for 1 hour. Once cool, use the parchment overhang to lift the entire brownie slab out of the pan.
Step 4: Cut the brownies into Christmas tree shapes: Cut the brownie slab into rectangles about 2×3 inches. Then cut each rectangle diagonally from the bottom corners up to a point at the top center, creating a triangle tree shape. You can also use a Christmas tree cookie cutter if you prefer more uniform shapes. Save the scraps for snacking – they’re delicious!
Step 5: Make the frosting: Beat the softened butter for 2-3 minutes until creamy. Gradually add the powdered sugar one cup at a time, alternating with the heavy cream, beating after each addition. Add the vanilla extract. Once all the sugar is incorporated, beat on high speed for 3-4 minutes until light and fluffy. Add green gel food coloring gradually, mixing until you achieve a bright Christmas tree green color. Frost each brownie tree generously, using an offset spatula or piping bag to create texture that looks like tree branches. While the frosting is still soft, decorate with Christmas sprinkles for ornaments, mini chocolate chips, red and green M&Ms, or any festive decorations. You can add a small star sprinkle on top to complete the tree look. These Christmas tree brownies are fudgy, festive, and absolutely adorable. The rich chocolate with sweet green frosting is delicious. They’re perfect for holiday parties and make wonderful edible gifts.
Prep Time: 30 minutes
Baking Time: 30 minutes
Servings: 12-16 tree brownies
2. Peppermint Brownies
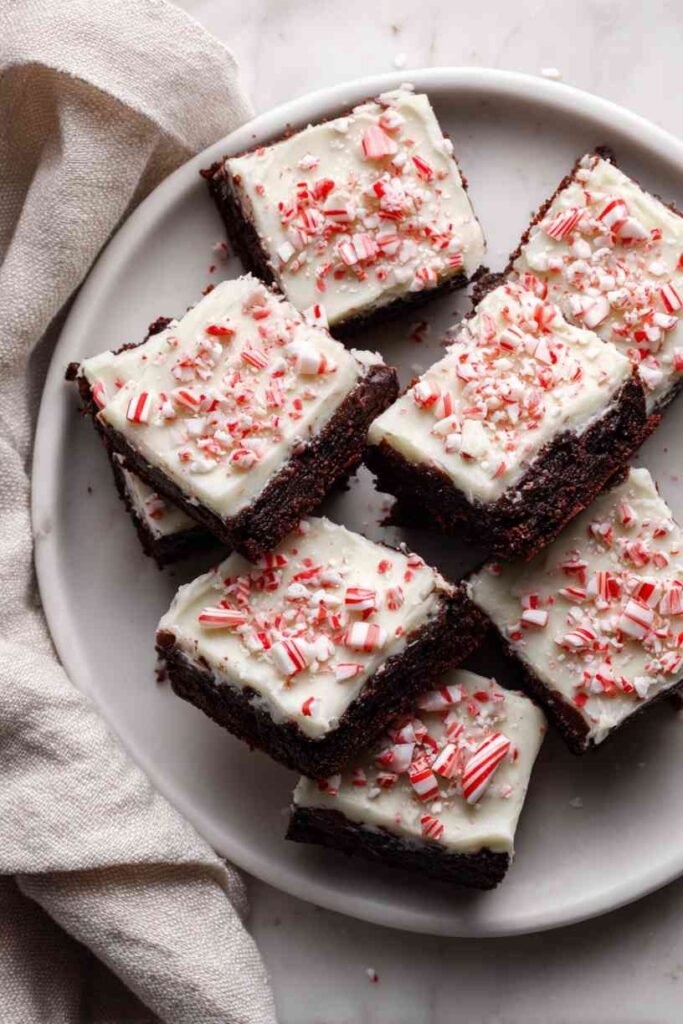
Peppermint Brownies combine rich chocolate with refreshing peppermint creating that classic Christmas flavor combination. The combination of fudgy brownie with cool peppermint is perfect for the holidays. I developed this recipe when I wanted to capture candy cane flavor in brownies. The key is using both peppermint extract and crushed candy canes. This has become my favorite Christmas brownie because the chocolate-mint pairing is so festive. Every bite has refreshing mint with rich chocolate.
Ingredients
For the brownies:
- 170g (¾ cup) unsalted butter
- 340g (2 cups) semi-sweet chocolate chips
- 300g (1½ cups) granulated sugar
- 3 large eggs
- 1 teaspoon vanilla extract
- 1 teaspoon peppermint extract
- 125g (1 cup) all-purpose flour
- 43g (½ cup) unsweetened cocoa powder
- ½ teaspoon salt
- 100g (½ cup) crushed candy canes or peppermint candies
For the peppermint frosting:
- 113g (½ cup) unsalted butter, softened
- 480g (4 cups) powdered sugar
- 3 tablespoons heavy cream
- 1 teaspoon peppermint extract
- Crushed candy canes for topping
Steps
Step 1: Preheat your oven to 350°F and line a 9×13 inch pan with parchment paper. Melt the butter and chocolate chips together until smooth. Stir in the sugar, then add eggs one at a time. Add vanilla and peppermint extract. The peppermint extract creates that signature minty flavor.
Step 2: Whisk together the flour, cocoa powder, and salt. Fold into the chocolate mixture until just combined. Fold in the crushed candy canes. The candy pieces add wonderful peppermint crunch throughout. Pour into the prepared pan and spread evenly.
Step 3: Bake for 25-30 minutes until a toothpick comes out with moist crumbs. Don’t overbake. Let cool completely in the pan. The candy canes will create pockets of minty sweetness throughout the brownies.
Step 4: Make the peppermint frosting: Beat the softened butter until creamy. Gradually add the powdered sugar, alternating with the heavy cream. Add the peppermint extract. Beat until light and fluffy. The frosting should be smooth and taste strongly of peppermint.
Step 5: Spread the peppermint frosting over the cooled brownies. While the frosting is still soft, sprinkle generously with more crushed candy canes. The red and white pieces look festive against the white frosting. Let the frosting set before cutting. These peppermint brownies are refreshing and festive with wonderful mint-chocolate flavor. The crushed candy canes add great crunch. They’re perfect for peppermint lovers.
Prep Time: 25 minutes
Baking Time: 30 minutes
Servings: 16 brownies
3. Frosted Christmas Brownies
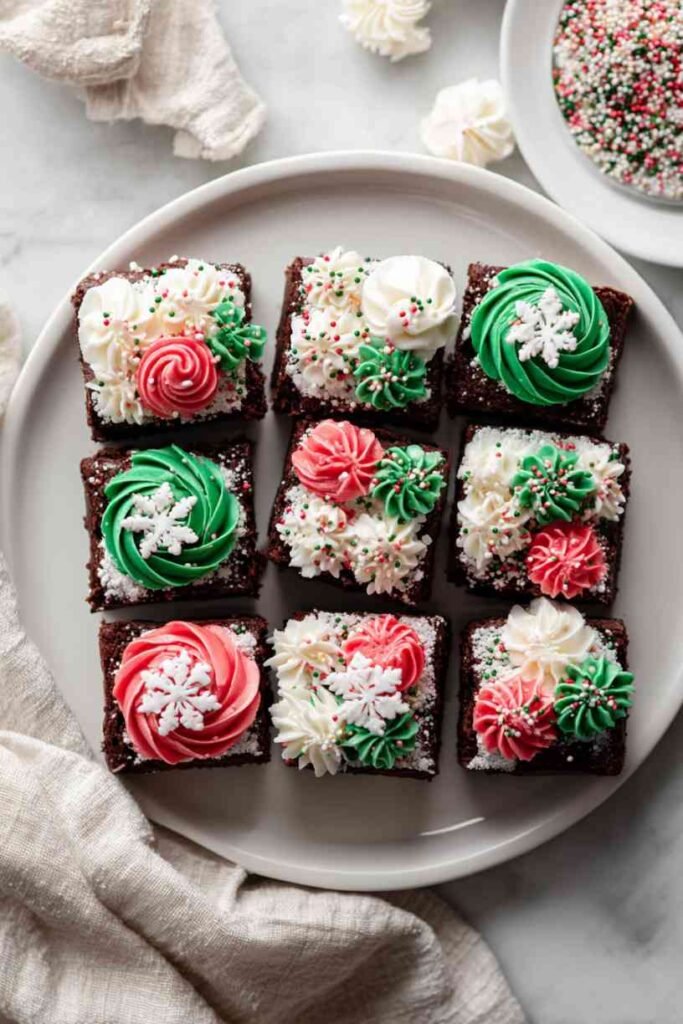
Frosted Christmas Brownies feature rich brownies topped with colorful frosting and festive holiday decorations. The combination of fudgy brownie with sweet vanilla frosting creates these bakery-style treats. I created this recipe when I wanted decorated brownies for parties. The key is the smooth frosting and festive decorations. This has become my favorite decorated version because they look so professional. Every brownie is beautifully frosted.
Ingredients
For the brownies:
- 170g (¾ cup) unsalted butter
- 340g (2 cups) semi-sweet chocolate chips
- 300g (1½ cups) granulated sugar
- 3 large eggs
- 2 teaspoons vanilla extract
- 125g (1 cup) all-purpose flour
- 43g (½ cup) unsweetened cocoa powder
- ½ teaspoon salt
For the frosting:
- 226g (1 cup) unsalted butter, softened
- 480g (4 cups) powdered sugar
- 4 tablespoons heavy cream
- 2 teaspoons vanilla extract
- Red and green gel food coloring
- Holiday sprinkles, edible glitter, snowflake decorations
Steps
Step 1: Preheat your oven to 350°F and line a 9×13 inch pan with parchment paper. Make the brownies following the classic method: melt butter and chocolate, add sugar and eggs, fold in dry ingredients. Bake for 25-30 minutes. Let cool completely.
Step 2: Make the vanilla frosting: Beat the softened butter for 2-3 minutes until creamy. Gradually add the powdered sugar, alternating with the heavy cream. Add the vanilla extract. Beat on high speed for 3-4 minutes until light and fluffy.
Step 3: Divide the frosting into portions. Leave one portion white, tint one red, and tint one green using gel food coloring. You can also create other colors like pink for a more varied look. Transfer each color to separate piping bags fitted with star or round tips.
Step 4: Pipe the different colored frostings onto the cooled brownies in festive patterns. You can create swirls, rosettes, stripes, or any design you like. The multiple colors make them look very festive and professional.
Step 5: While the frosting is still soft, add holiday sprinkles, edible glitter, snowflake decorations, or any other festive toppings. The decorations should be colorful and celebratory. Let the frosting set before cutting. These frosted Christmas brownies are beautiful and festive with colorful decorations. The smooth frosting is bakery-quality. They’re perfect for holiday parties.
Prep Time: 35 minutes
Baking Time: 30 minutes
Servings: 16 brownies
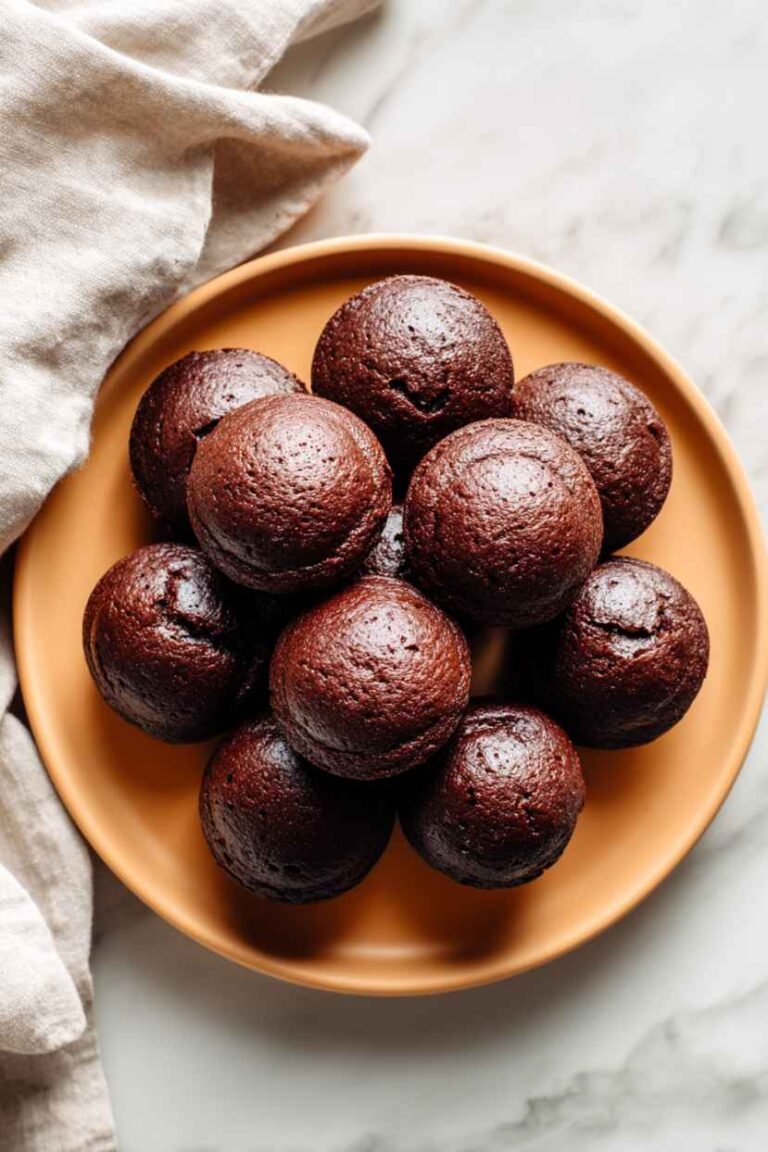
4. M&M Christmas Brownies
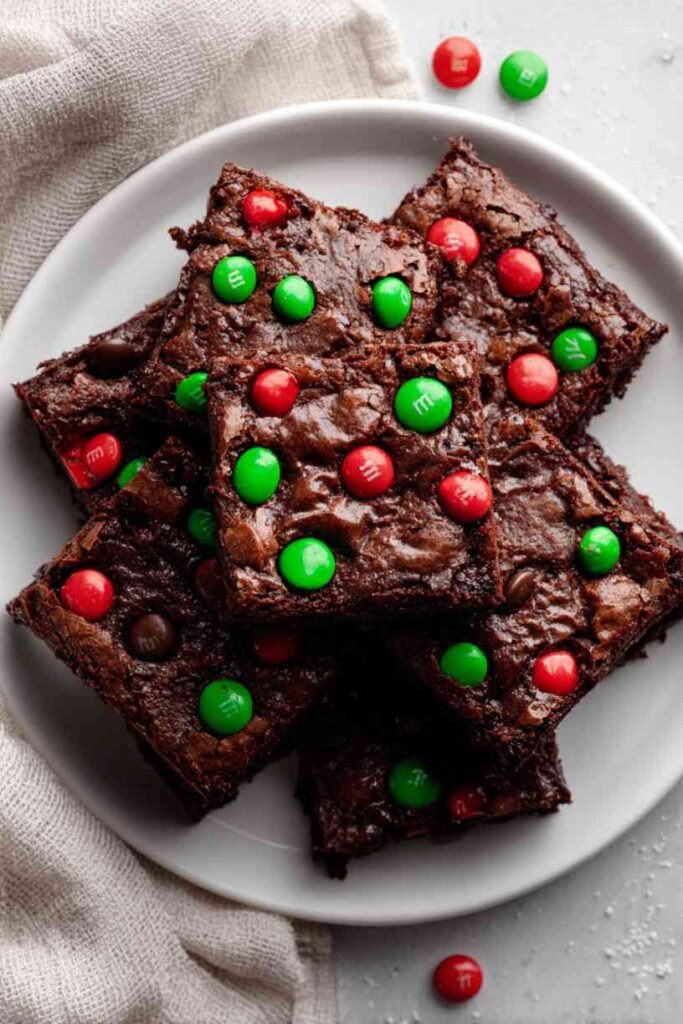
M&M Christmas Brownies are loaded with red and green M&Ms creating colorful, festive treats that kids and adults love. The combination of fudgy brownie with candy creates these fun holiday brownies. I developed this recipe for easy festive brownies. The key is using holiday M&Ms for maximum color impact. This has become my favorite kid-friendly version because the M&Ms make them so fun. Every brownie is loaded with colorful candy.
Ingredients
For the brownies:
- 170g (¾ cup) unsalted butter
- 340g (2 cups) semi-sweet chocolate chips
- 300g (1½ cups) granulated sugar
- 3 large eggs
- 2 teaspoons vanilla extract
- 125g (1 cup) all-purpose flour
- 43g (½ cup) unsweetened cocoa powder
- ½ teaspoon salt
- 270g (1½ cups) red and green M&Ms (plus extra for topping)
Steps
Step 1: Preheat your oven to 350°F and line a 9×13 inch pan with parchment paper. Melt the butter and chocolate chips together until smooth. Stir in the sugar, then add eggs one at a time. Add the vanilla extract.
Step 2: Whisk together the flour, cocoa powder, and salt. Fold into the chocolate mixture until just combined. Reserve about ½ cup of M&Ms for topping. Fold the remaining M&Ms into the batter. The red and green candies look festive throughout the dark chocolate batter.
Step 3: Pour the batter into the prepared pan and spread evenly. Press the reserved M&Ms onto the top of the batter, distributing them evenly. The M&Ms on top will be visible after baking, making them look festive.
Step 4: Bake for 25-30 minutes until a toothpick comes out with moist crumbs. Don’t overbake. The M&Ms will soften slightly but hold their color and shape.
Step 5: Let cool completely in the pan before cutting. The M&Ms throughout create pops of red and green color in every slice. These M&M Christmas brownies are fun and colorful with candy in every bite. The red and green M&Ms make them instantly festive. They’re perfect for kids and easy holiday baking.
Prep Time: 20 minutes
Baking Time: 30 minutes
Servings: 16 brownies
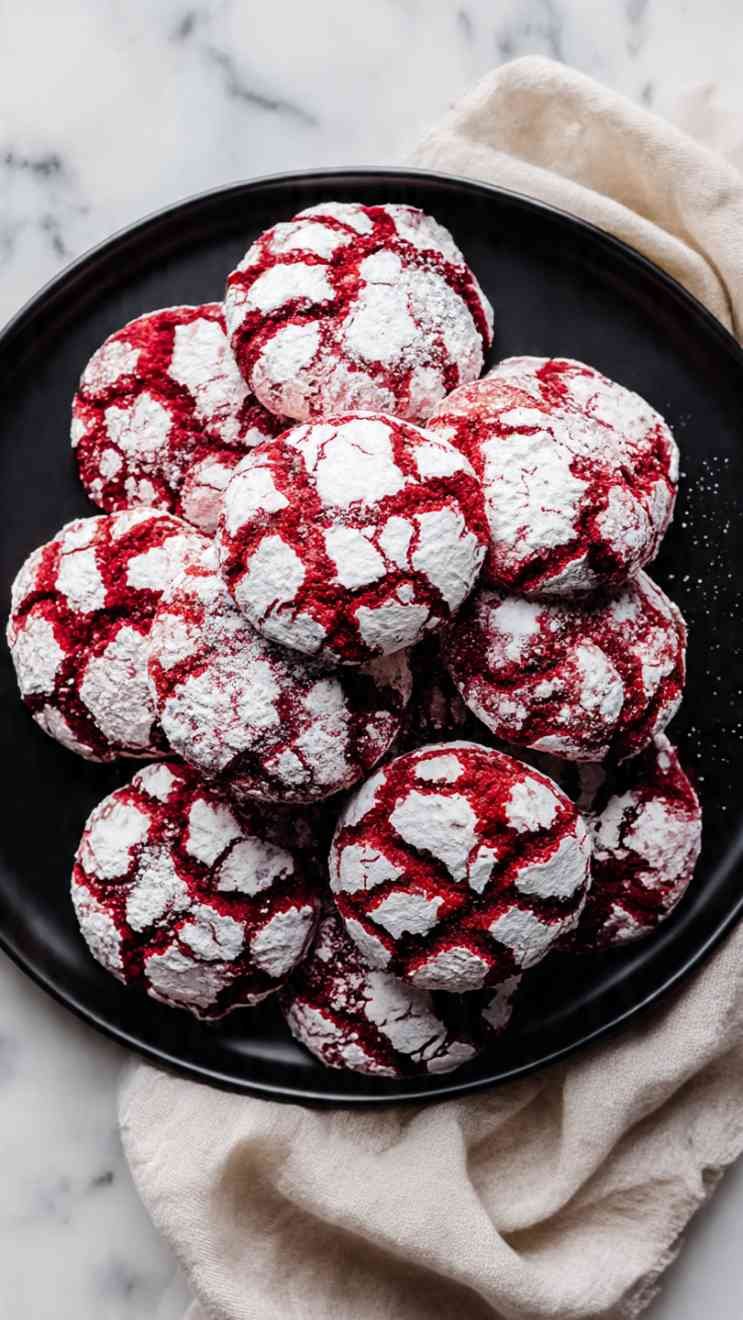
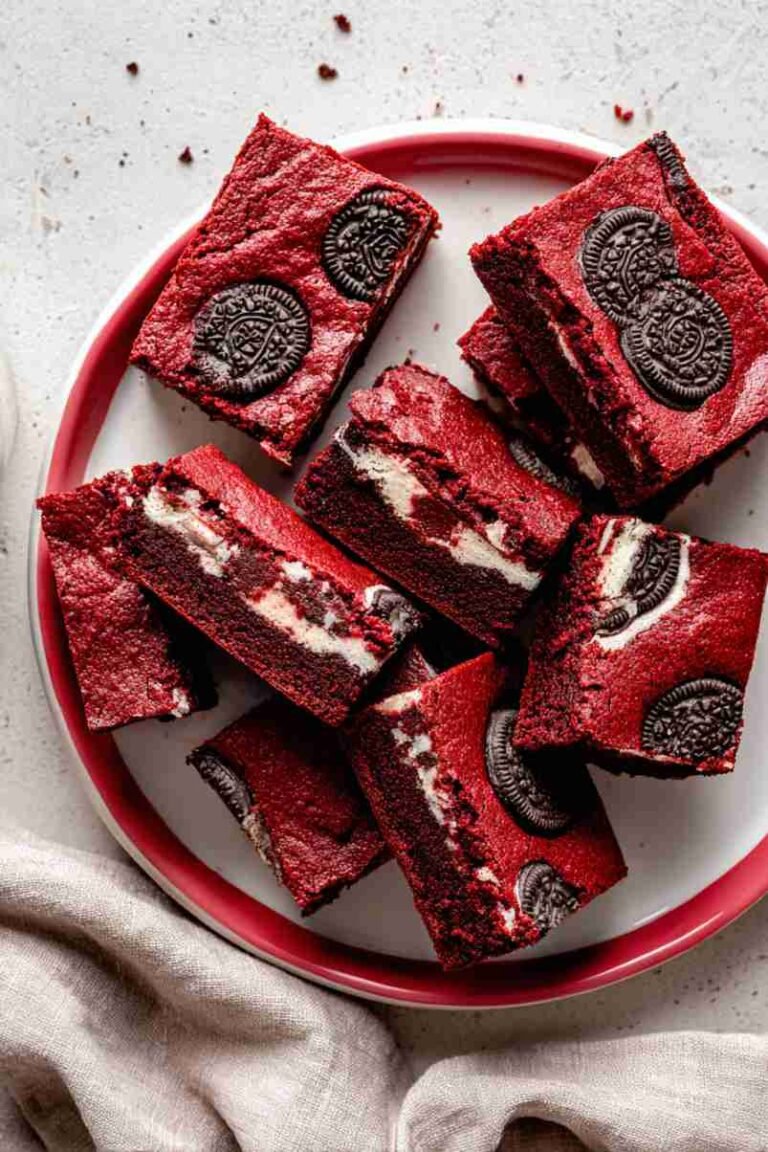
5. Red Velvet Christmas Brownies
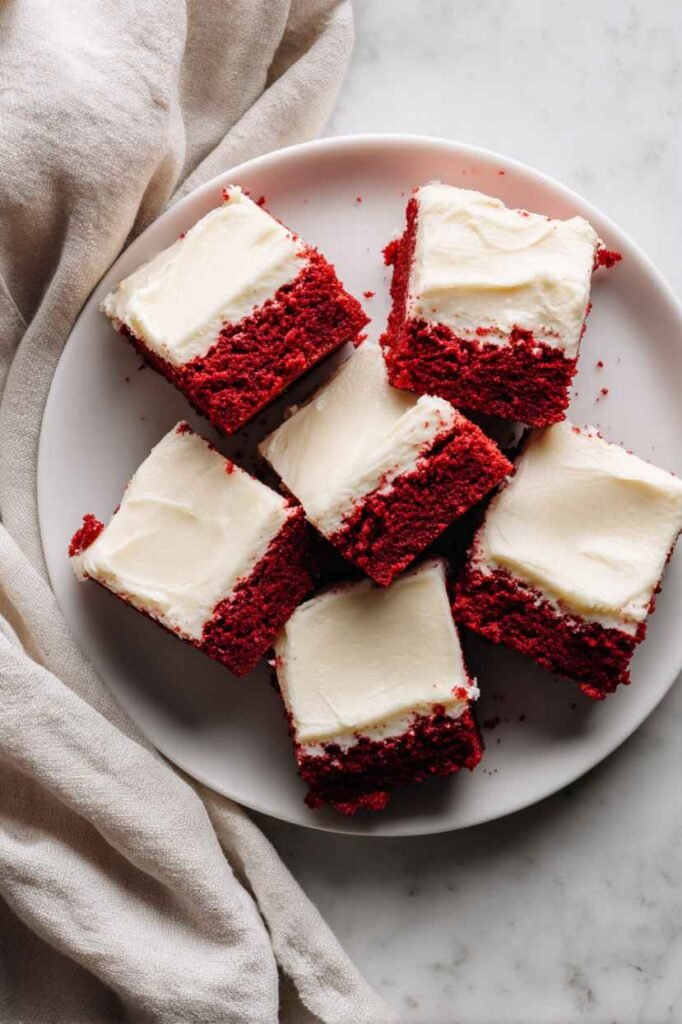
Red Velvet Christmas Brownies combine red velvet flavor with brownie texture creating festive, elegant treats with cream cheese frosting. The combination of red velvet with rich cocoa makes these perfect for Christmas. I created this recipe when I wanted red velvet in brownie form. The key is the vibrant red color and cream cheese frosting. This has become my favorite elegant version because they’re so beautiful. Every brownie has that signature red velvet taste.
Ingredients
For the brownies:
- 170g (¾ cup) unsalted butter, melted
- 300g (1½ cups) granulated sugar
- 3 large eggs
- 2 tablespoons red food coloring
- 1 teaspoon vanilla extract
- 1 teaspoon white vinegar
- 125g (1 cup) all-purpose flour
- 43g (½ cup) unsweetened cocoa powder
- ½ teaspoon salt
For the cream cheese frosting:
- 226g (8 oz) cream cheese, softened
- 113g (½ cup) unsalted butter, softened
- 480g (4 cups) powdered sugar
- 2 teaspoons vanilla extract
Steps
Step 1: Preheat your oven to 350°F and line a 9×13 inch pan with parchment paper. In a large bowl, whisk together the melted butter and sugar. Add the eggs one at a time, whisking well after each. Add the red food coloring, vanilla, and vinegar. The vinegar reacts with cocoa for red velvet flavor. Mix until evenly red.
Step 2: Whisk together the flour, cocoa powder, and salt. The cocoa should be measured carefully – too much makes chocolate brownies, not red velvet. Fold into the wet ingredients until just combined. The batter should be smooth and bright red.
Step 3: Pour into the prepared pan and spread evenly. Bake for 25-28 minutes until a toothpick comes out with moist crumbs. Don’t overbake – red velvet should stay moist. Let cool completely.
Step 4: Make the cream cheese frosting: Beat the cream cheese and butter together for 2 minutes until smooth. Gradually add the powdered sugar, beating until fluffy. Add the vanilla. Beat for 3 minutes until light and fluffy. The cream cheese frosting is essential for red velvet.
Step 5: Spread the cream cheese frosting over the cooled brownies. The white frosting against the red brownie is beautiful and festive. Let the frosting set before cutting. These red velvet Christmas brownies are elegant and festive with classic red velvet flavor. The cream cheese frosting is perfect. They’re beautiful and delicious.
Prep Time: 25 minutes
Baking Time: 28 minutes
Servings: 16 brownies
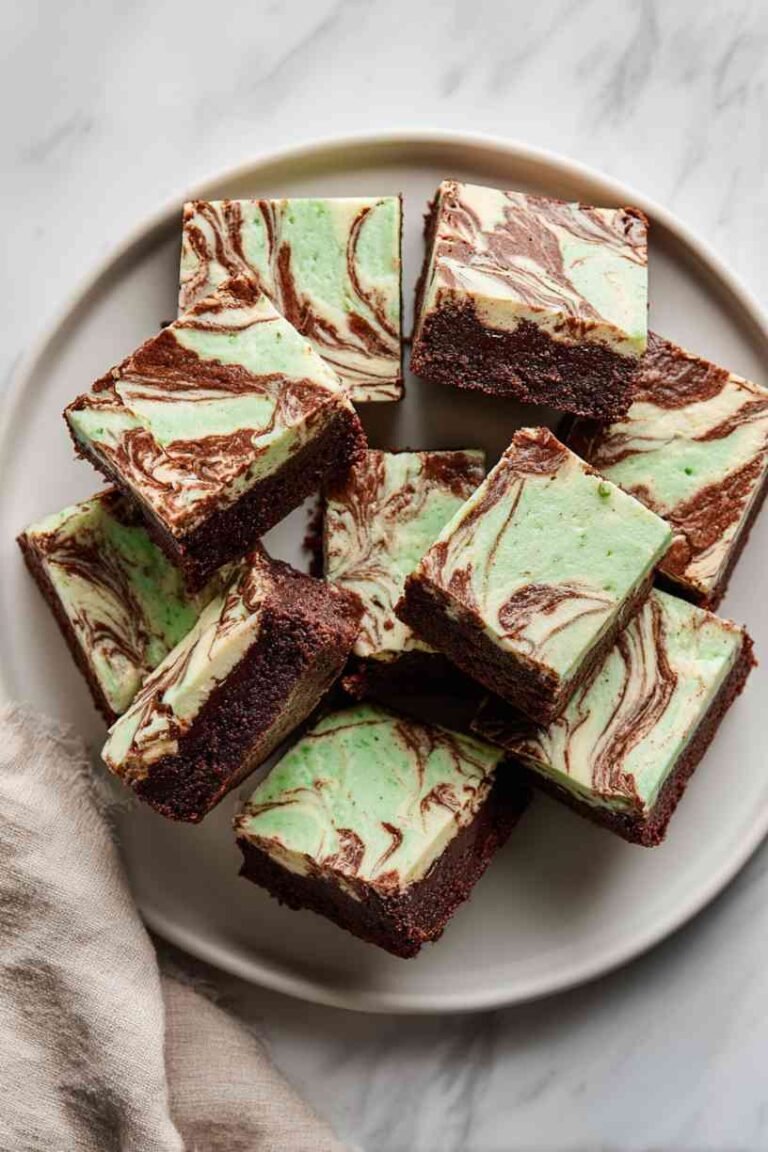
6. Chocolate Mint Brownies
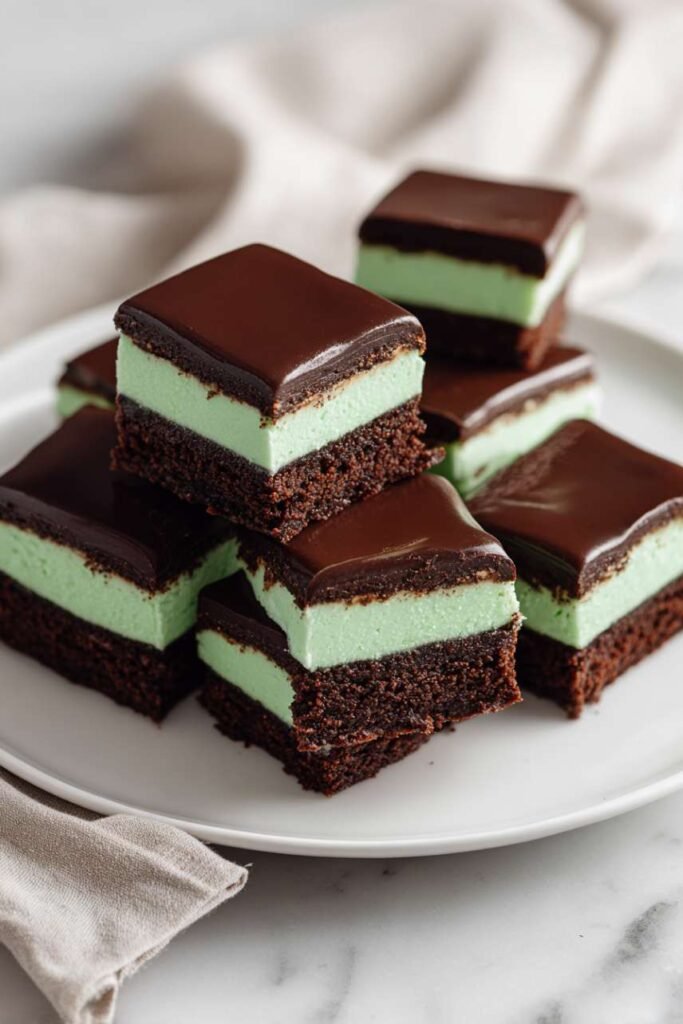
Chocolate Mint Brownies feature layers of fudgy brownie, mint frosting, and chocolate ganache creating the ultimate mint-chocolate treat. The combination of three distinct layers makes these impressive and delicious. I developed this recipe when I wanted elegant layered brownies. The key is the mint layer which adds wonderful flavor and color. This has become my favorite special occasion version because the layers are so impressive. Every bite has chocolate, mint, and more chocolate.
Ingredients
For the brownies:
- 170g (¾ cup) unsalted butter
- 340g (2 cups) semi-sweet chocolate chips
- 300g (1½ cups) granulated sugar
- 3 large eggs
- 2 teaspoons vanilla extract
- 125g (1 cup) all-purpose flour
- 43g (½ cup) cocoa powder
- ½ teaspoon salt
For the mint layer:
- 113g (½ cup) butter, softened
- 360g (3 cups) powdered sugar
- 3 tablespoons heavy cream
- 1 teaspoon peppermint extract
- Green food coloring
For the chocolate ganache:
- 170g (1 cup) semi-sweet chocolate chips
- 120ml (½ cup) heavy cream
Steps
Step 1: Preheat your oven to 350°F and line a 9×13 inch pan with parchment paper. Make the brownies following the classic method. Bake for 25-30 minutes. Let cool completely – the brownies must be completely cool before adding layers.
Step 2: Make the mint layer: Beat the softened butter until creamy. Gradually add the powdered sugar, alternating with the heavy cream. Add the peppermint extract and green food coloring. Beat until smooth and bright green. Spread the mint frosting evenly over the cooled brownies. Refrigerate for 30 minutes to firm up.
Step 3: Make the chocolate ganache: Heat the heavy cream in the microwave until just boiling. Pour over the chocolate chips and let sit for 2 minutes. Stir until smooth and glossy. Let it cool for about 10 minutes until slightly thickened.
Step 4: Pour the ganache over the mint layer, spreading evenly to cover completely. The ganache should create a smooth, shiny chocolate top layer. Refrigerate for at least 1 hour until the ganache is set.
Step 5: Cut into squares using a sharp knife, wiping it clean between cuts for neat edges. The three layers should be distinct – brown brownie, green mint, dark chocolate ganache. These chocolate mint brownies are elegant and impressive with beautiful layers. The mint layer is refreshing between chocolate. They’re perfect for special occasions.
Prep Time: 40 minutes (plus chilling time)
Baking Time: 30 minutes
Servings: 16 brownies
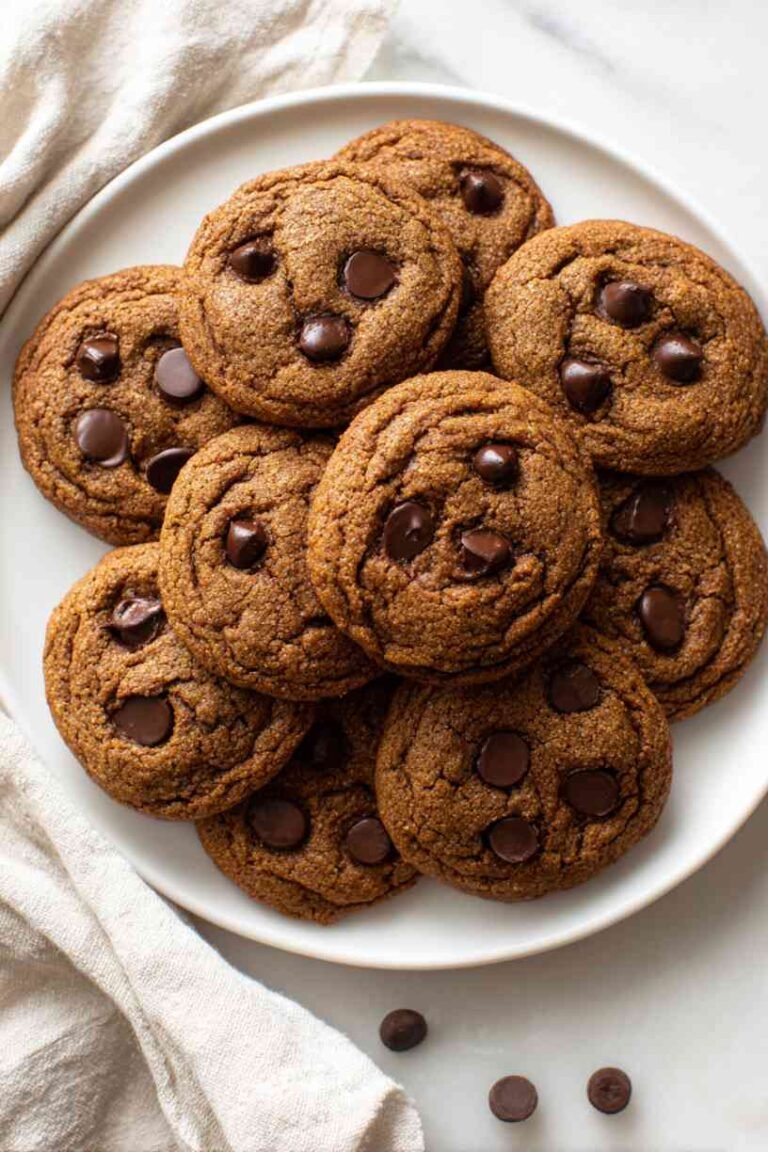
7. Gingerbread Brownies
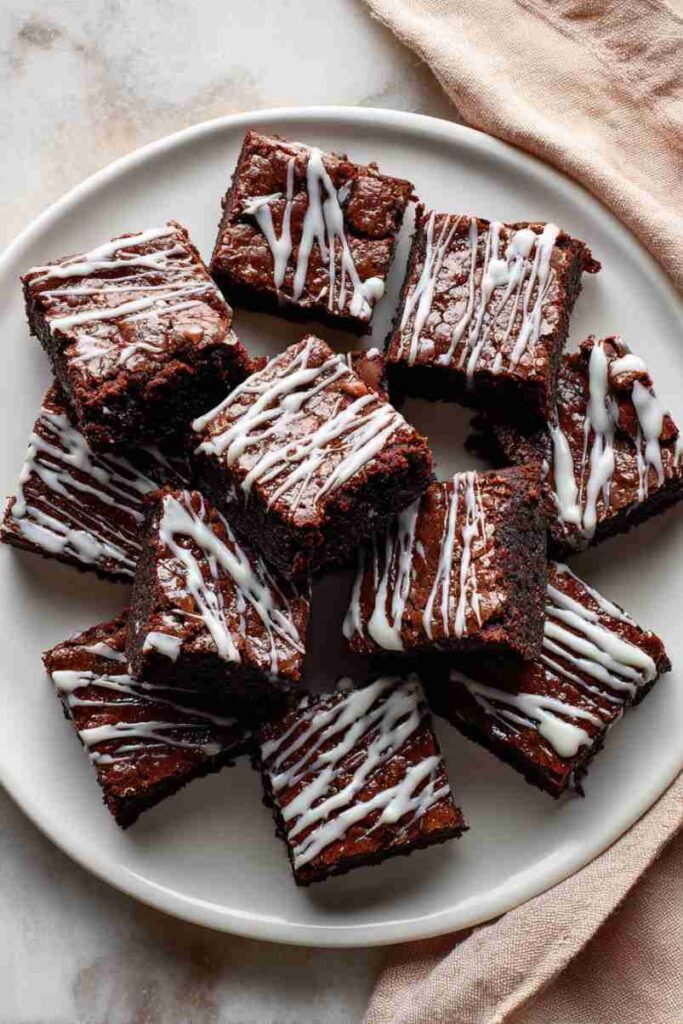
Gingerbread Brownies combine chocolate with warm gingerbread spices creating unique holiday brownies with festive flavor. The combination of chocolate and gingerbread spices is unexpected but delicious. I created this recipe when I wanted something different. The key is the blend of ginger, cinnamon, and molasses. This has become my favorite unique version because the spice blend is so festive. Every bite has chocolate with warm spices.
Ingredients
For the brownies:
- 170g (¾ cup) unsalted butter
- 340g (2 cups) semi-sweet chocolate chips
- 200g (1 cup) granulated sugar
- 100g (½ cup packed) brown sugar
- 3 large eggs
- 80ml (⅓ cup) molasses
- 2 teaspoons vanilla extract
- 125g (1 cup) all-purpose flour
- 43g (½ cup) cocoa powder
- 1 tablespoon ground ginger
- 1 teaspoon ground cinnamon
- ½ teaspoon ground cloves
- ½ teaspoon salt
For the glaze:
- 240g (2 cups) powdered sugar
- 3-4 tablespoons milk
- ½ teaspoon vanilla extract
Steps
Step 1: Preheat your oven to 350°F and line a 9×13 inch pan with parchment paper. Melt the butter and chocolate chips together until smooth. Stir in both sugars and the molasses. The molasses adds authentic gingerbread flavor. Add the eggs one at a time, then the vanilla.
Step 2: Whisk together the flour, cocoa powder, ground ginger, ground cinnamon, ground cloves, and salt. The combination of spices creates that classic gingerbread taste. Fold into the chocolate mixture until just combined.
Step 3: Pour into the prepared pan and spread evenly. Bake for 28-30 minutes until a toothpick comes out with moist crumbs. The brownies should smell like gingerbread cookies with chocolate. Let cool completely.
Step 4: Make the glaze: Whisk together the powdered sugar, milk, and vanilla until smooth. The glaze should be thick but pourable. Drizzle over the cooled brownies in a decorative pattern.
Step 5: Let the glaze set for about 30 minutes before cutting. You can decorate with mini gingerbread men or holiday sprinkles. These gingerbread brownies are unique and delicious with wonderful warm spices. The chocolate-gingerbread combination is festive. They’re perfect for something different.
Prep Time: 25 minutes
Baking Time: 30 minutes
Servings: 16 brownies
8. White Chocolate Cranberry Brownies
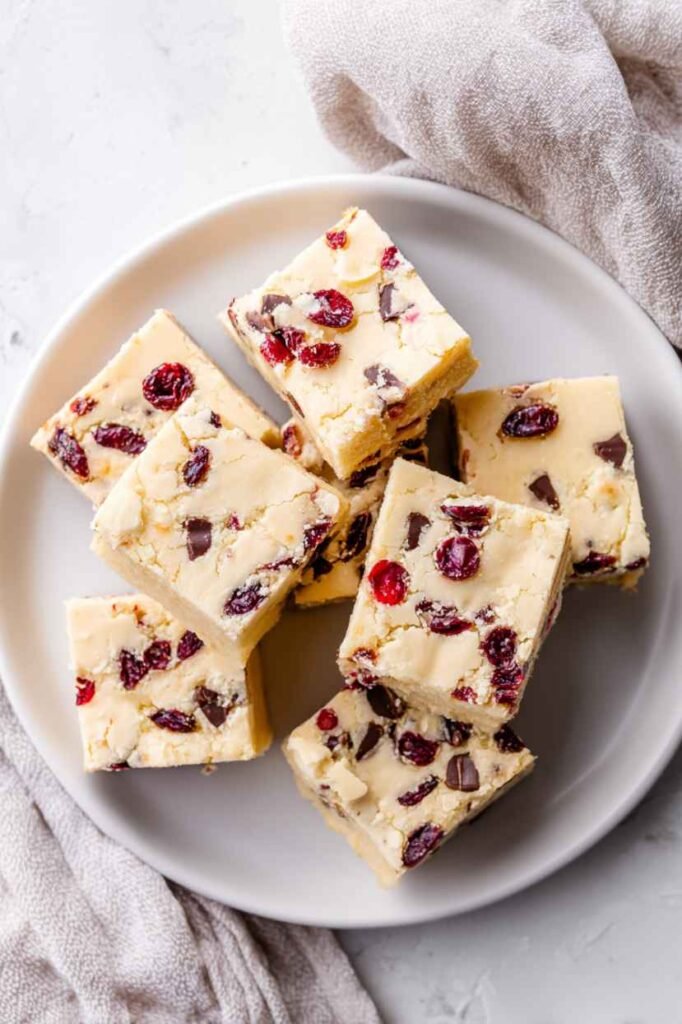
White Chocolate Cranberry Brownies feature white chocolate and tart dried cranberries creating festive color and flavor. The combination of sweet white chocolate with tart cranberry is perfect for Christmas. I developed this recipe when I wanted fruit in brownies. The key is the dried cranberries which add beautiful red color. This has become my favorite fruity version because the colors are so festive. Every brownie has sweet-tart flavor.
Ingredients
For the brownies:
- 170g (¾ cup) unsalted butter
- 340g (2 cups) white chocolate chips (divided)
- 300g (1½ cups) granulated sugar
- 3 large eggs
- 2 teaspoons vanilla extract
- 156g (1¼ cups) all-purpose flour
- ½ teaspoon salt
- 150g (1 cup) dried cranberries, chopped
- 170g (1 cup) semi-sweet chocolate chips
Steps
Step 1: Preheat your oven to 350°F and line a 9×13 inch pan with parchment paper. Melt the butter and 170g (1 cup) of the white chocolate chips together until smooth. Let cool for 5 minutes. Stir in the sugar, then add eggs one at a time. Add the vanilla.
Step 2: Whisk together the flour and salt. Fold into the white chocolate mixture until just combined. The batter will be lighter in color than traditional brownies. Fold in the remaining white chocolate chips, chopped dried cranberries, and semi-sweet chocolate chips. The red cranberries and dark chocolate create festive color contrast.
Step 3: Pour into the prepared pan and spread evenly. The cranberries and chocolate chips should be distributed throughout. Bake for 28-30 minutes until the edges are set but the center is still slightly soft. White chocolate brownies need careful baking – don’t overbake or they’ll be dry.
Step 4: Let cool completely in the pan. The cranberries will be chewy and the white chocolate will be creamy. The combination of flavors is festive and delicious.
Step 5: Cut into squares. The white chocolate base with red cranberries and dark chocolate pieces looks beautiful. These white chocolate cranberry brownies are festive with wonderful sweet-tart flavor. The cranberries add beautiful color. They’re perfect for the holidays.
Prep Time: 20 minutes
Baking Time: 30 minutes
Servings: 16 brownies
9. Snowman Brownies
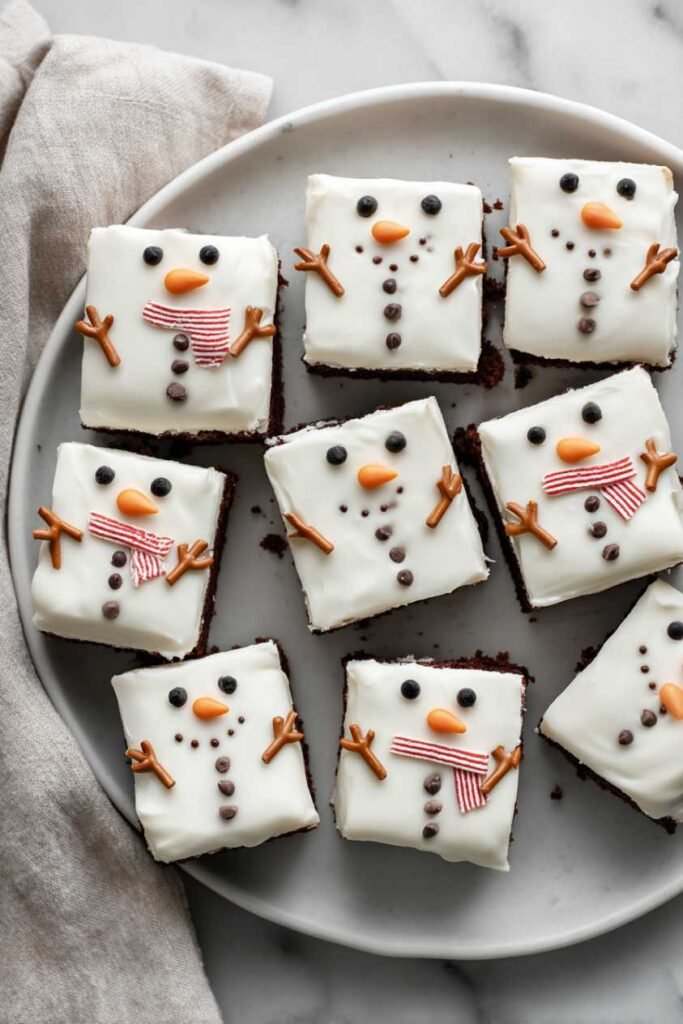
Snowman Brownies are decorated to look like adorable snowmen with white frosting, candy faces, and pretzel arms. The combination of fudgy brownie with creative decorations makes these fun and festive. I created this recipe for kid-friendly holiday baking. The key is the cute snowman decorations. This has become my favorite fun version because kids love decorating them. Every brownie becomes a snowman.
Ingredients
For the brownies:
- 170g (¾ cup) unsalted butter
- 340g (2 cups) semi-sweet chocolate chips
- 300g (1½ cups) granulated sugar
- 3 large eggs
- 2 teaspoons vanilla extract
- 125g (1 cup) all-purpose flour
- 43g (½ cup) cocoa powder
- ½ teaspoon salt
For decorating:
- 480g (4 cups) powdered sugar
- 226g (1 cup) unsalted butter, softened
- 4 tablespoons heavy cream
- 2 teaspoons vanilla extract
- Mini chocolate chips or black decorating gel (for eyes and buttons)
- Orange candy or frosting (for noses)
- Pretzel sticks (for arms)
- Mini candy canes or fruit leather (for scarves)
Steps
Step 1: Preheat your oven to 350°F and line a 9×13 inch pan with parchment paper. Make the brownies following the classic method. Bake for 25-30 minutes. Let cool completely, then cut into circles using a round cookie cutter or into rectangles that you’ll frost to look round.
Step 2: Make the white frosting: Beat the softened butter until creamy. Gradually add the powdered sugar, alternating with the heavy cream. Add the vanilla. Beat until light and fluffy. The frosting should be thick and bright white.
Step 3: Frost each brownie completely with white frosting, creating a smooth surface. The white frosting makes them look like snow-covered snowmen. You can pipe the frosting or spread with an offset spatula.
Step 4: While the frosting is still soft, decorate each brownie to look like a snowman: Add mini chocolate chips or dots of black decorating gel for eyes and buttons down the center. Create a small orange nose using orange candy pieces or orange frosting. Insert pretzel sticks on the sides for arms.
Step 5: Add final touches like a scarf made from mini candy canes or strips of fruit leather. You can also add a small hat made from cookies or candy. Each snowman can have a unique personality. These snowman brownies are adorable and fun with creative decorations. Kids love decorating and eating them. They’re perfect for holiday parties.
Prep Time: 40 minutes
Baking Time: 30 minutes
Servings: 12 snowman brownies
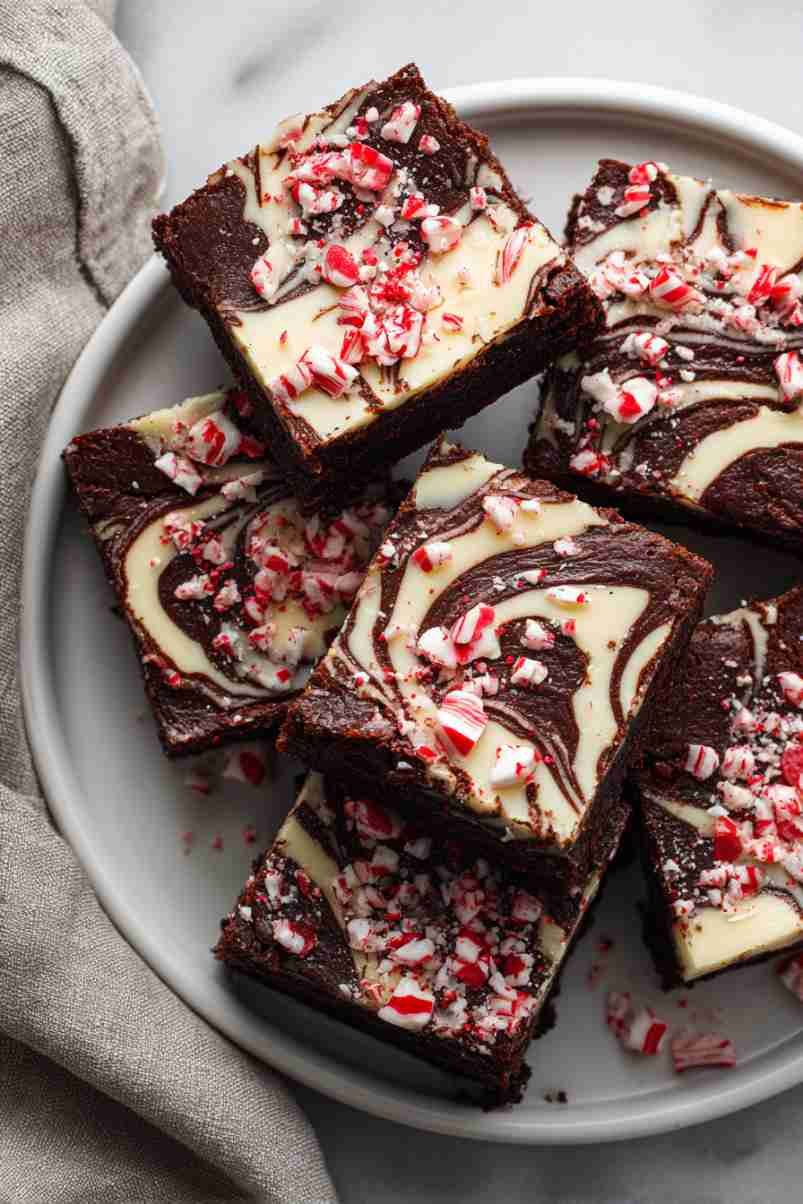
10. Candy Cane Brownies

Candy Cane Brownies are swirled with white chocolate and crushed candy canes creating beautiful marbled brownies with peppermint flavor. The combination of dark and white chocolate swirled together is visually stunning. I developed this recipe when I wanted beautiful marbled brownies. The key is the swirling technique which creates patterns. This has become my favorite beautiful version because the swirls are so pretty. Every brownie has unique marbling.
Ingredients
For the brownies:
- 170g (¾ cup) unsalted butter
- 340g (2 cups) semi-sweet chocolate chips
- 300g (1½ cups) granulated sugar
- 3 large eggs
- 1 teaspoon vanilla extract
- 1 teaspoon peppermint extract
- 125g (1 cup) all-purpose flour
- 43g (½ cup) cocoa powder
- ½ teaspoon salt
For the white chocolate swirl:
- 170g (1 cup) white chocolate chips
- 2 tablespoons heavy cream
- 100g (½ cup) crushed candy canes
Steps
Step 1: Preheat your oven to 350°F and line a 9×13 inch pan with parchment paper. Make the brownie batter following the classic method, adding both vanilla and peppermint extract. Pour the batter into the prepared pan, reserving about ½ cup. Smooth the surface.
Step 2: Melt the white chocolate chips with the heavy cream in the microwave, stirring until smooth. Stir in half of the crushed candy canes. The white chocolate mixture should be smooth and flecked with red candy cane pieces.
Step 3: Drop spoonfuls of the white chocolate mixture randomly over the dark brownie batter. Use a knife or skewer to swirl the white chocolate into the dark batter, creating a marbled effect. Don’t over-swirl – you want distinct white and dark areas, not completely mixed.
Step 4: Sprinkle the remaining crushed candy canes over the top. Bake for 28-30 minutes until a toothpick inserted into a dark area comes out with moist crumbs. The swirled pattern should be visible on top.
Step 5: Let cool completely before cutting. The marbled effect with white and dark chocolate looks beautiful. Each brownie will have a unique swirl pattern. These candy cane brownies are stunning with beautiful marbling and peppermint flavor. The swirls make them impressive. They’re perfect for holiday gifting.
Prep Time: 30 minutes
Baking Time: 30 minutes
Servings: 16 brownies