So here is something I never expected to care this much about – mirror frames. I had this perfectly good large mirror that I picked up at a thrift store for eight dollars and it just had this sad, plain brown plastic frame that made the whole thing look cheap no matter where I put it in my house. I kept moving it from room to room thinking maybe a different wall would help and it never did. The mirror itself was great, the frame was just ruining everything.

That’s when I started looking into what you can actually do to transform a frame without replacing the whole mirror, and I honestly could not believe how many options there are. You can glue things directly onto the existing frame, build a completely new frame around the mirror, paint it in ways that make plastic look like metal or wood, wrap it in rope or fabric, add tiles or mosaic pieces – the list goes on and the results range from subtle and elegant to really dramatic and statement-making.
What I love about mirror frame DIYs specifically is that mirrors are already a focal point in a room. They bounce light, they make spaces feel bigger, and people naturally look at them. So when you put a beautiful frame around one, that investment of time and creativity gets noticed. A gorgeous mirror in an entryway, bathroom, or bedroom genuinely elevates the whole room in a way that’s hard to explain until you see it.
The other thing worth mentioning is that most of these projects work on mirrors you already own. You don’t need to buy a new mirror. You just need to look at what you have differently and decide which treatment fits your space and your style. Whether you want something rustic, coastal, modern, glam, or bohemian, there is a mirror frame idea on this list that is going to make you want to go find an ugly mirror at a thrift store just so you can try it.
1. Rope Wrapped Coastal Mirror Frame
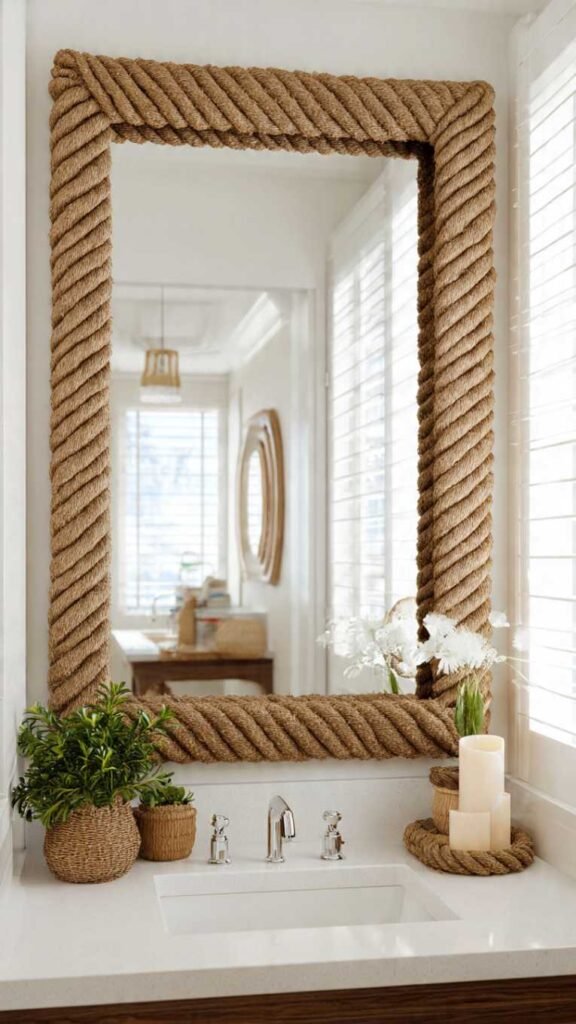
Wrapping a mirror frame in rope is one of those projects that looks like it took a lot of skill and effort but is honestly just hot glue and patience. You start at one edge and wrap natural jute or manila rope around the entire frame, row by row, gluing as you go. The finished result is this beautiful textured coastal frame that looks like something from a beach house boutique. It works especially well in bathrooms, entryways, and bedrooms and it makes even the ugliest plastic frame underneath completely unrecognizable. The texture it adds to a wall is really something.
What It Is: A mirror frame completely wrapped in natural jute or manila rope using hot glue, creating a textured coastal or bohemian look over any existing frame shape.
Supplies and Budget: Natural jute or manila rope ($8–12), hot glue gun and glue sticks ($5–8 if you don’t own one), scissors, existing mirror with frame. Total: $13–$20
Quick How-To: Start at one corner of the frame and apply hot glue in small sections. Press rope firmly into glue, wrapping continuously around the frame. Keep rows tight against each other. At corners, fold rope neatly and glue flat. Continue until entire frame is covered.
DIY Tip: Work in small glue sections of about three inches at a time rather than applying glue to a large area – hot glue dries fast and if you apply too much at once the glue sets before you can press the rope in and you end up with a bumpy uneven surface.
2. Mosaic Tile Mirror Frame
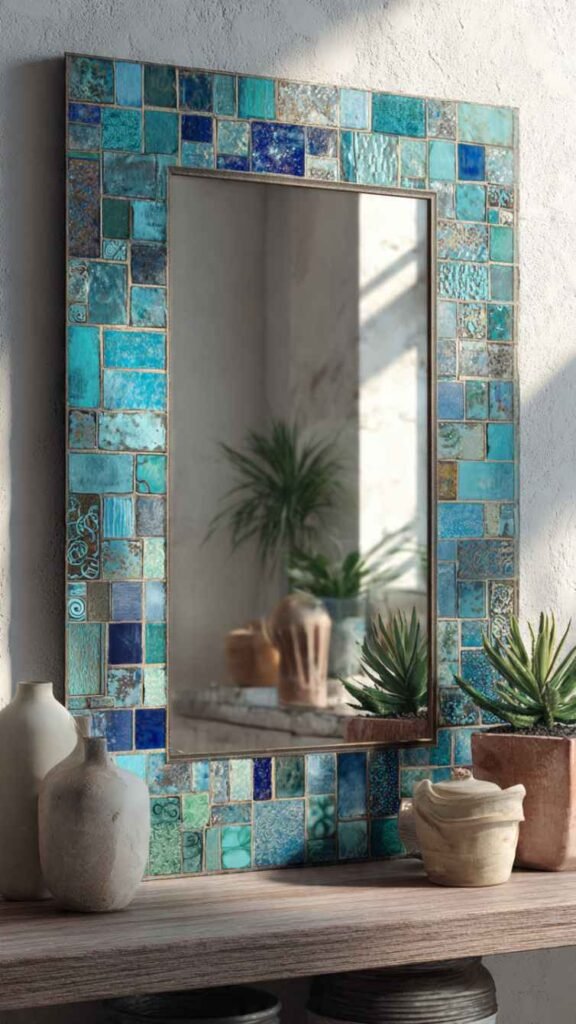
A mosaic tile frame is one of the most colorful and artistic things you can do with a plain mirror and the results are genuinely stunning. You can use broken ceramic tiles, glass tiles, mirror pieces, sea glass, or even old china plates broken into pieces to create a pattern or random mosaic around the frame. The light catches all the different tile surfaces and creates this really alive, sparkling effect. It’s a little more involved than some of the other projects here but it’s also one of the most impressive when it’s finished. These frames become actual art pieces.
What It Is: A decorative mirror frame covered in mosaic pieces – broken tiles, glass tiles, mirror shards, or sea glass – set in tile adhesive and grouted for a colorful, artistic finish.
Supplies and Budget: Mosaic tiles or materials ($10–20), tile adhesive ($6–8), unsanded grout ($5–7), grout sealer ($4–6), tile nippers optional ($8). Total: $25–$41 plus existing mirror
Quick How-To: Apply tile adhesive to small frame sections. Press tile pieces firmly, leaving small gaps for grout. Work section by section until frame is covered. Let dry 24 hours. Apply grout over all tiles, pressing into gaps. Wipe off excess with damp sponge. Seal when dry.
DIY Tip: Use unsanded grout for gaps smaller than an eighth of an inch – sanded grout is for larger gaps and using the wrong type causes cracking over time and the whole thing starts falling apart, which is heartbreaking after all that work.
3. Driftwood and Branch Frame
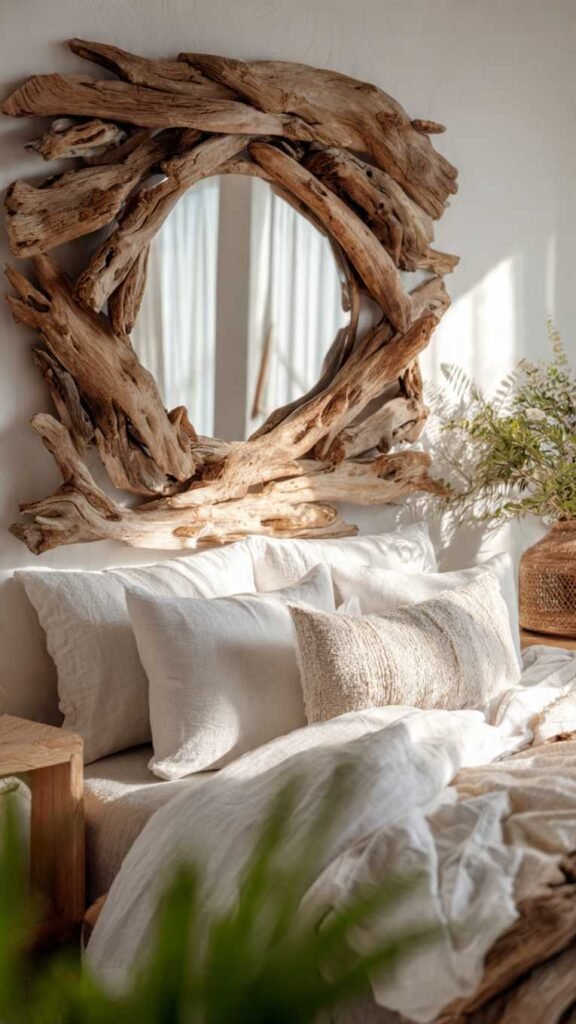
Building a frame out of driftwood or natural branches collected from outside is one of those projects that has this beautiful organic, collected quality that you simply cannot replicate with bought materials. Every piece of driftwood is different so every frame comes out completely unique. You arrange branches and driftwood pieces around the mirror’s perimeter and glue or wire them together to create a frame that looks like it grew there. It works beautifully in bohemian, coastal, and natural home styles and it’s the kind of thing people stop and ask about every single time they visit.
What It Is: A mirror frame built from collected driftwood pieces or natural branches arranged and glued around the mirror’s edge, creating an organic, nature-inspired frame with no two ever looking alike.
Supplies and Budget: Driftwood or branches (free from outdoors or $10–15 from craft store), heavy duty waterproof glue or hot glue ($5–8), wire for binding optional ($3–4), mirror. Total: $8–$27
Quick How-To: Lay mirror flat. Arrange driftwood pieces around the perimeter in a pleasing layout before gluing anything. Start with larger anchor pieces and fill in with smaller ones. Apply generous glue to each piece and press firmly. Let dry flat for at least four hours before hanging.
DIY Tip: Seal your driftwood with a clear matte sealant spray before assembling the frame – this locks in any loose sand or salt, prevents the wood from continuing to dry and crack, and gives the whole frame a more finished and intentional look.
4. Sunburst Mirror Frame With Wood Skewers or Dowels
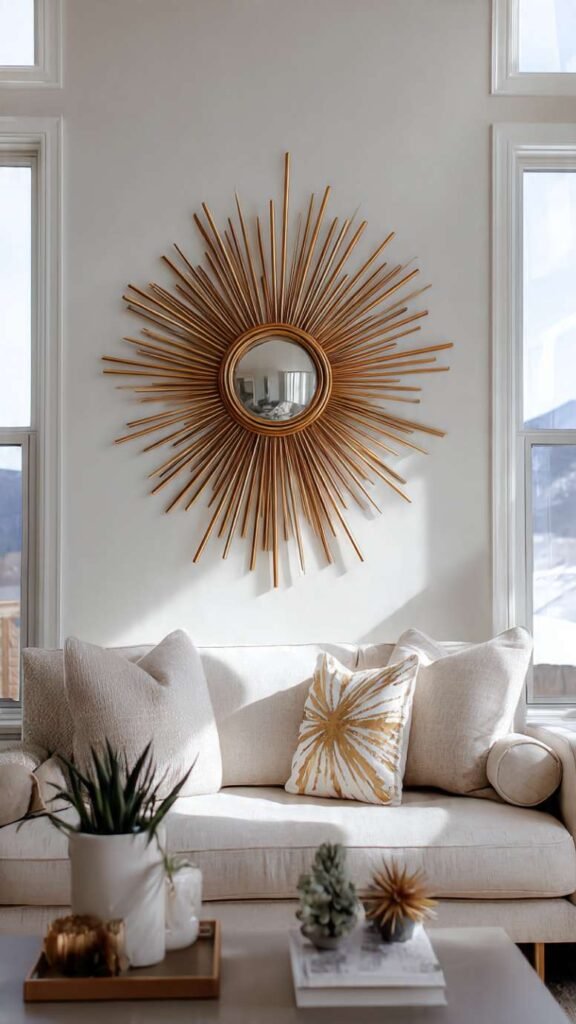
The sunburst mirror is having an ongoing moment in home decor and making your own is so much more satisfying than buying one because you control the size, the finish, and the length of the rays. The classic version uses wooden dowels or even bamboo skewers glued in a radiating pattern around the mirror’s edge, then painted gold, brass, or natural wood tone. The result is dramatic and graphic and works in living rooms, entryways, and bedrooms equally well. The scale is completely up to you and a larger sunburst makes a genuinely bold statement wall piece.
What It Is: A decorative sunburst mirror made by gluing wooden dowels or bamboo skewers in a radiating star pattern around the mirror’s edge and finishing with metallic or natural paint.
Supplies and Budget: Wooden dowels or bamboo skewers in varied lengths ($6–10), hot glue gun ($5–8), gold or brass spray paint ($6–8), round mirror ($8–15 thrifted or existing). Total: $25–$41
Quick How-To: Arrange dowels in radiating pattern on flat surface before gluing to plan layout. Alternate long and short dowels for variation. Glue each dowel to the back edge of the mirror frame working in a star pattern. Let dry. Spray paint entire piece in one or two coats.
DIY Tip: Spray paint everything before assembly rather than after if you want super clean results – paint each dowel separately and paint the mirror frame separately, then assemble. Painting after assembly means getting paint on the mirror glass no matter how careful you are.
5. Painted Faux Plaster or Venetian Finish Frame
This one blows people’s minds every time because you’re taking a regular frame and making it look like it’s made from aged plaster, stone, or Venetian plaster through paint techniques alone. No special materials required beyond paint, a sea sponge, and a little patience. The layered painting technique builds up depth and texture that looks genuinely like a completely different material. It works especially well for creating a European antique or modern organic aesthetic, and when it’s done right even people who know you made it can’t quite believe it’s just paint.
What It Is: A mirror frame transformed using layered paint techniques with sponges and dry brushing to mimic the look of aged plaster, stone, or Venetian plaster finishes.
Supplies and Budget: Chalk paint or matte paint in 2–3 tones ($10–15), sea sponge ($3–5), clear wax or matte sealer ($6–8), existing mirror frame. Total: $19–$28
Quick How-To: Paint base coat in lightest tone and let dry. Dip sea sponge in slightly darker tone, dab off excess, and stipple over frame unevenly. Add darkest tone in recessed areas and edges. Dry brush lightest tone back over raised areas. Seal with clear wax or matte sealer.
DIY Tip: Step back from the frame every few minutes while working on the faux finish – what looks too subtle up close almost always looks exactly right from a normal viewing distance, and what looks right up close is usually way too heavy and overdone from across the room.
6. Seashell and Sea Glass Mirror Frame
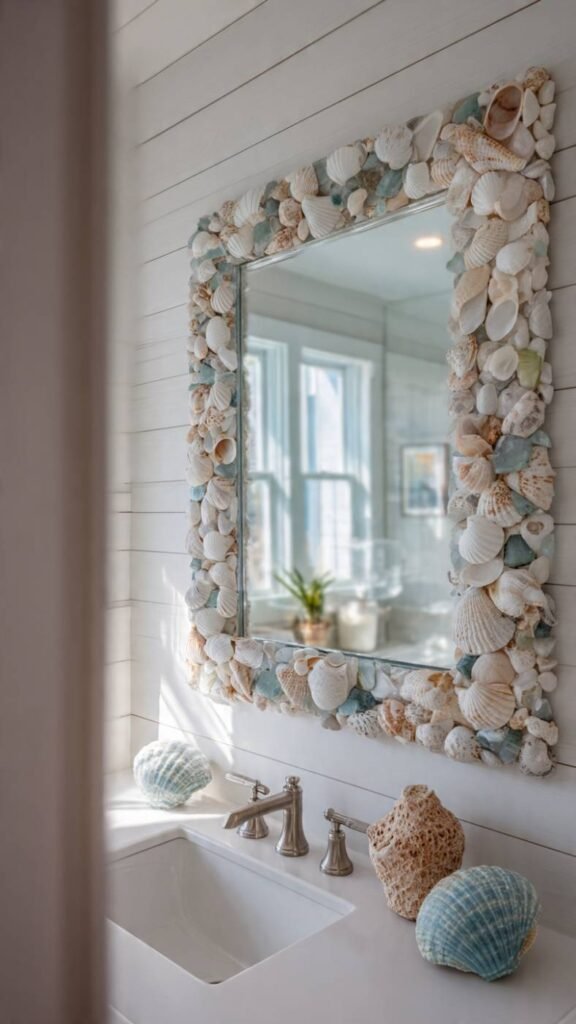
If you collect shells from every beach trip the way a lot of us do and then just have bags of them sitting in a drawer doing nothing, this is the project you have been waiting for. Arranging shells, sea glass, and coral pieces around a mirror frame and setting them in adhesive creates this genuinely beautiful coastal art piece that also preserves your memories from different trips. You can organize shells by size and type for something more formal, or arrange them randomly for a natural collected look. Either way the finished mirror looks like something from a coastal boutique hotel.
What It Is: A decorative mirror frame decorated with collected seashells, sea glass, and coral pieces set in strong adhesive, creating a coastal memory piece or beach-inspired decorative mirror.
Supplies and Budget: Collected shells and sea glass (free from beach trips or $8–15 craft store), strong craft adhesive or E6000 glue ($5–7), optional grout for gaps ($5), existing mirror. Total: $10–$27
Quick How-To: Lay out your shell arrangement on the frame before gluing to plan placement. Start with larger shells as anchor pieces. Apply E6000 glue to each shell and press firmly, holding for 30 seconds. Fill gaps with smaller shells and sea glass. Let cure fully for 24 hours before hanging.
DIY Tip: E6000 glue is the right choice for this project rather than hot glue – shells are heavy and hot glue loses its grip over time especially in humid bathroom environments where these mirrors often live, and you’ll start losing shells within months.
7. Reclaimed Wood Plank Frame
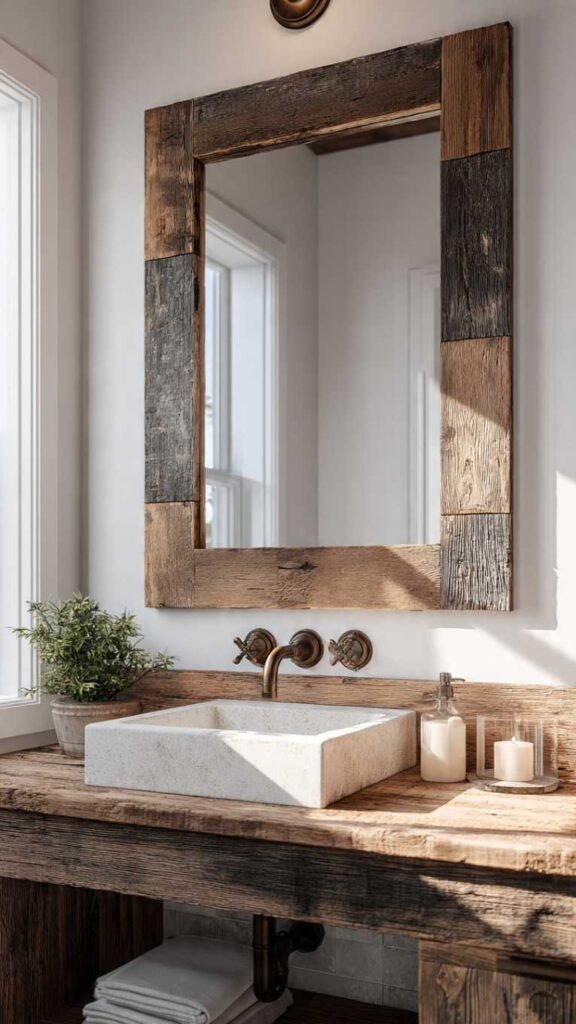
Building a frame from reclaimed wood planks or pallet wood gives a mirror that warm, rustic, handmade quality that genuinely cannot be faked with store-bought materials. The natural wood grain, the slight imperfections, the varied tones from different wood pieces – all of that character is what makes these frames so beautiful. You cut wood pieces to frame the mirror, nail or glue them together at the corners, and attach the mirror to the back. Stain the wood, leave it natural, or paint it for a more modern take. These frames work in farmhouse, industrial, modern rustic, and Scandinavian style homes.
What It Is: A mirror frame built from reclaimed wood planks or pallet wood pieces, cut and assembled around the mirror for a warm, rustic handmade look with natural character.
Supplies and Budget: Reclaimed wood or pallet wood (free to $10–15), saw or have cut at hardware store, wood glue and nails ($5–8), wood stain or paint optional ($8–12), mirror. Total: $13–$35
Quick How-To: Measure mirror dimensions. Cut four wood pieces for top, bottom, and two sides with mitered or straight corners. Sand edges smooth. Assemble frame with wood glue and reinforce with small nails at corners. Attach mirror to frame back with mirror clips or strong adhesive. Stain or seal.
DIY Tip: Cut your wood pieces a half inch longer than you think you need on each side – you can always trim down but you can’t add length back, and having a little extra gives you room to adjust the fit perfectly around your specific mirror.
8. Washi Tape Geometric Frame
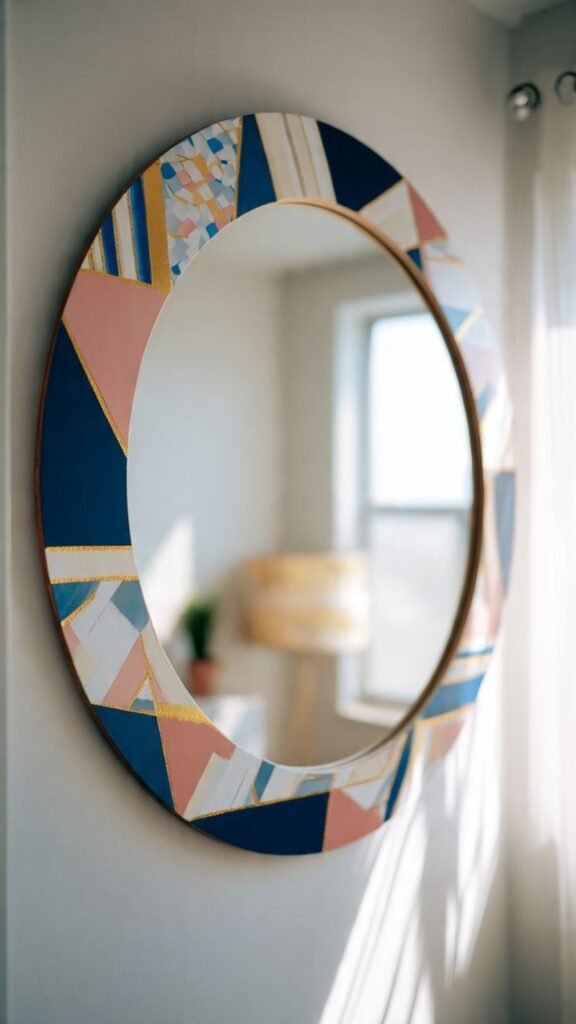
This is the most commitment-free option on this entire list because washi tape peels off cleanly which means you can change it whenever you want – seasonally, whenever you get bored, whenever your style changes. You use washi tape in coordinating patterns and colors to create a geometric border directly on the wall around a frameless mirror, or to add a decorative pattern to an existing plain frame. The result looks intentional and designed and the tape options available now are genuinely beautiful. This is perfect for renters, for kids rooms, and for anyone who likes to change their decor frequently.
What It Is: A decorative mirror frame or border created using washi tape applied directly to an existing frame or to the wall around a frameless mirror in geometric patterns.
Supplies and Budget: Washi tape in 2–4 coordinating patterns ($8–15 for a set), ruler, scissors, frameless mirror or plain framed mirror. Total: $8–$15
Quick How-To: Plan your geometric pattern on paper first. Apply washi tape strips in your chosen pattern around the frame or directly on the wall. Use a ruler for perfectly straight lines. Overlap tape at corners and trim with scissors for clean edges. Press firmly to adhere fully.
DIY Tip: Use a credit card or bone folder tool to press the tape completely flat after applying – washi tape has a tendency to lift at edges especially on textured walls, and pressing firmly right after application means it stays put much longer.
9. Dollar Store Flower and Pearl Glam Frame
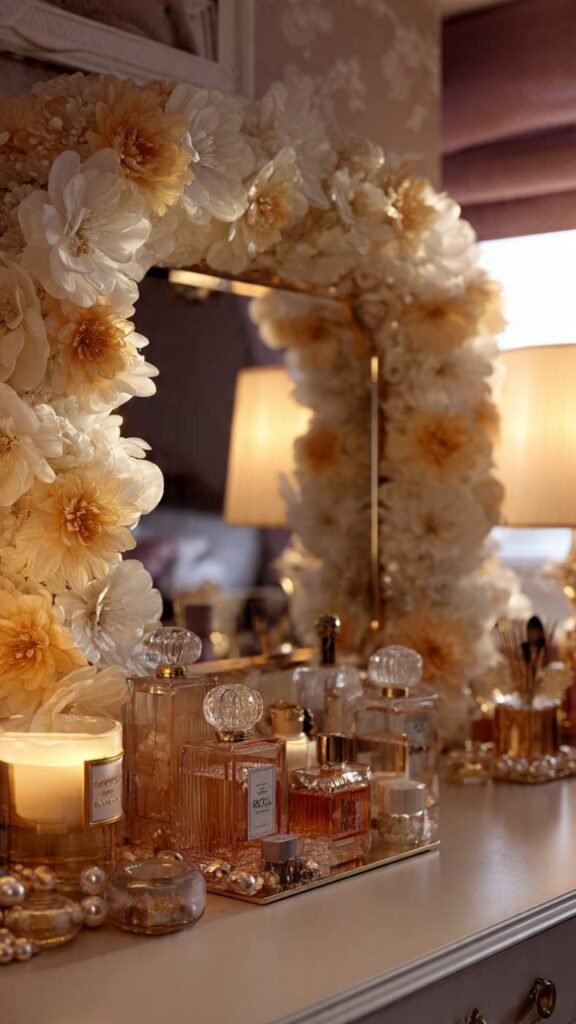
This is your glam maximalist mirror frame and it costs almost nothing to make which feels like getting away with something. You cover a frame completely with faux flowers, pearl garland, crystal beads, or a combination of all three using hot glue. The dollar store and craft store dollar sections are genuinely goldmines for these materials – faux flower picks, pearl strands, rhinestone trim, and decorative picks are all usually a dollar or two each. The finished mirror looks incredibly over the top in the best way and works beautifully in a glam bedroom, vanity area, or bathroom.
What It Is: A decorative mirror frame completely covered in faux flowers, pearl strands, crystal beads, and decorative trims using hot glue for a maximalist glam aesthetic.
Supplies and Budget: Dollar store faux flowers and pearl garland ($8–15 total), rhinestone or crystal trim ($5–8), hot glue gun and sticks ($5–8), existing mirror frame. Total: $18–$31
Quick How-To: Remove stems from faux flowers leaving just the flower heads. Work in small sections around the frame applying hot glue and pressing flower heads firmly. Fill gaps with pearl strands and small crystal picks. Layer different elements for fullness. Keep adding until no frame base is visible.
DIY Tip: Use a mix of different flower sizes rather than all the same size – large flowers as anchor points with medium and small flowers filling in between creates a much more lush and professional result than rows of identical flower heads.
10. Painted Arch Mirror With Color Block Wall Treatment
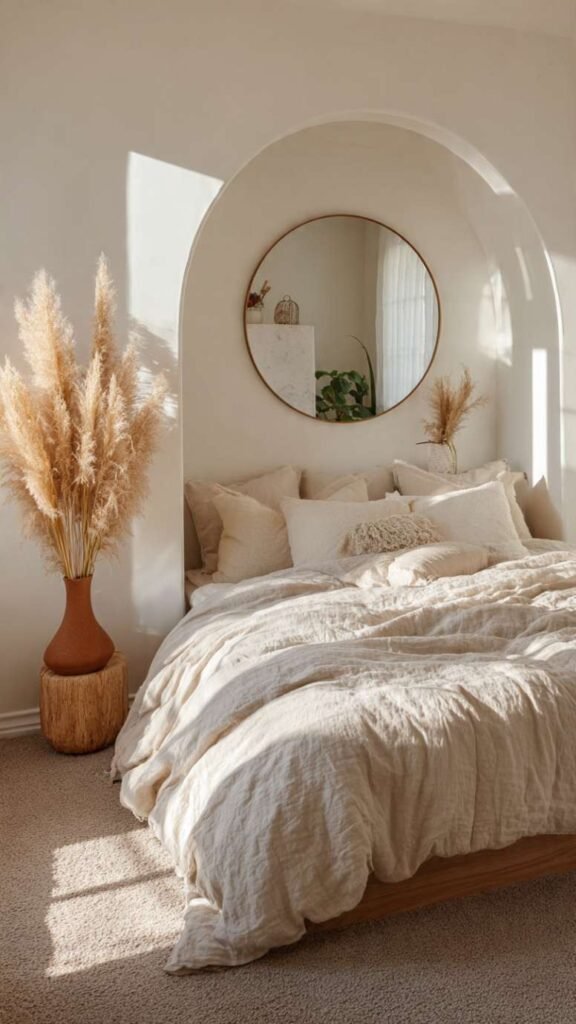
This last idea is technically as much about the wall as the mirror itself, and that’s what makes it so genius. You hang a simple frameless or plain framed mirror and then paint a large arch or scallop shape directly on the wall behind and around it using the same paint technique. The painted arch becomes the mirror’s frame and the result looks like a custom built-in architectural detail. This is huge in interior design right now and it photographs beautifully which means it works incredibly well as a content backdrop too. The whole project costs almost nothing if you already have paint.
What It Is: A mirror styling technique where a large painted arch, scallop, or geometric shape is painted directly on the wall behind the mirror, using the wall paint itself as a decorative frame effect.
Supplies and Budget: Wall paint in contrasting or complementary color ($15–25 for a small can), painter’s tape ($4–6), large compass or string and pencil for arch template ($2–3), existing mirror. Total: $21–$34
Quick How-To: Mark your arch shape on the wall using a large compass or string-and-pencil method. Apply painter’s tape carefully along the arch line. Paint inside the arch shape in your chosen color with two coats. Peel tape slowly while paint is still slightly wet for clean edges. Hang mirror centered in arch.
DIY Tip: Peel the painter’s tape off at a 45-degree angle back over itself while the paint is still slightly tacky rather than fully dry – pulling tape off dry paint often lifts the paint beneath and ruins the crisp edge you worked so hard to create.