Ottomans are one of those furniture pieces that I never really appreciated until I had a living room without one and suddenly realized how much I missed having somewhere to put my feet up, set down a tray of drinks, or give a guest somewhere to perch when the sofa is full. The problem is that a decent ottoman in a store costs way more than it should for what it essentially is – a padded box or cushion with legs. I kept looking at price tags thinking the same thing over and over: I could make this myself.

And it turns out, making your own ottoman is one of the most satisfying furniture DIYs you can tackle because the results look so professional and the process is genuinely more straightforward than it appears. Most ottomans are built on a very simple structure – a wooden box or frame, some foam padding, fabric, and sometimes legs. That is really all there is to it. The variations in shape, size, fabric, and detail are what create all the different looks, but the core construction is almost always the same basic idea.
What makes DIY ottomans especially worth it is the customization factor. You pick the exact fabric that works with your sofa and your room. You choose the size that actually fits your space rather than settling for whatever standard dimensions the store decided on. You add storage inside if you need it or keep it simple and solid if you don’t. You match the leg style to your existing furniture. None of that is possible when you’re buying from a store where your options are limited to whatever is currently in stock.
The other thing I love is that a lot of these builds use things you might already have – an old coffee table, a wooden crate, a tire, a cable spool. Transforming something you already own into a piece of furniture you actually love is genuinely one of the best feelings, and your guests will never stop asking where you got it.
1. Simple Upholstered Box Ottoman
This is the classic DIY ottoman build that every beginner should start with because it teaches you the basic upholstery skills that apply to almost every other project on this list. You build a simple plywood box, top it with thick foam, wrap everything in batting for softness, then pull your chosen fabric over the whole thing and staple it to the bottom. Add four legs and you have a proper upholstered ottoman that looks completely store-bought. The size is entirely up to you and the fabric choice is what really sets the whole personality of the piece.
What It Is: A classic upholstered ottoman built from a plywood box base topped with foam and batting, wrapped in fabric and finished with four screw-in legs.
Supplies and Budget: Plywood ($15–25), 3-inch upholstery foam ($20–35), polyester batting ($8–12), upholstery fabric 1.5 yards ($15–40), staple gun ($10–15), screw-in legs set of four ($12–20). Total: $80–$147
Quick How-To: Cut plywood into five pieces for box – top, bottom, and four sides. Assemble with wood glue and screws. Cut foam to top size and glue down. Wrap batting over foam and sides. Pull fabric over entire piece starting from center of each side. Staple fabric to bottom. Screw in legs at corners.
DIY Tip: Pull your fabric from the center of each side outward to the corners rather than starting at a corner – this keeps the fabric grain straight and prevents the pattern from going crooked, which is really obvious on a finished ottoman sitting in the middle of your room.
2. Storage Ottoman With Hinged Lid
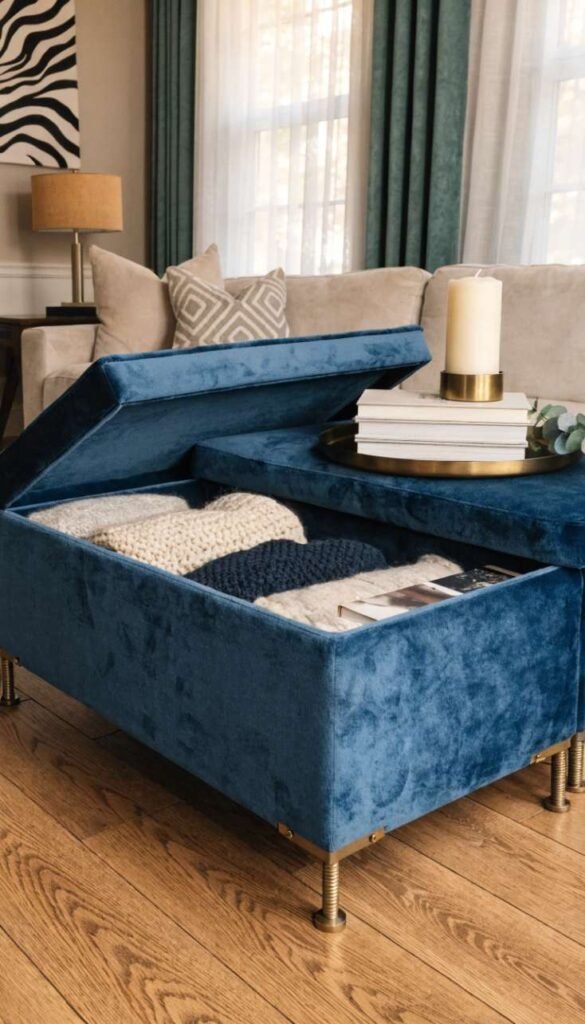
Everything about a storage ottoman makes sense – it’s seating, it’s a footrest, it’s a coffee table surface, and it secretly holds all the blankets, remote controls, kids toys, and random living room stuff that otherwise has nowhere to go. Building one with a hinged lid is only slightly more involved than a basic box ottoman and the payoff in daily usefulness is enormous. The key is getting the hinge placement right so the lid opens smoothly and stays open while you’re digging around inside. This is the one project on this list that genuinely changes how you live in your space.
What It Is: An upholstered ottoman with a hinged lid that opens to reveal interior storage, built from a plywood box with foam and fabric on the lid and sides.
Supplies and Budget: Plywood ($20–30), upholstery foam ($20–35), batting ($8–12), fabric 2 yards ($15–45), piano hinge ($8–12), staple gun ($10–15), screw-in legs ($12–20). Total: $93–$169
Quick How-To: Build plywood box with a separate lid piece – the lid sits on top rather than being attached at this stage. Upholster the box sides and lid separately. Attach piano hinge connecting lid back edge to box back edge. Add a leather pull tab at front of lid for easy opening. Attach legs at base corners.
DIY Tip: Add a small chain or ribbon on each interior side connecting the lid to the box interior – this acts as a lid stay that prevents the lid from flipping all the way back and straining the hinge or falling off when someone opens it too enthusiastically.
3. Wooden Cable Spool Ottoman
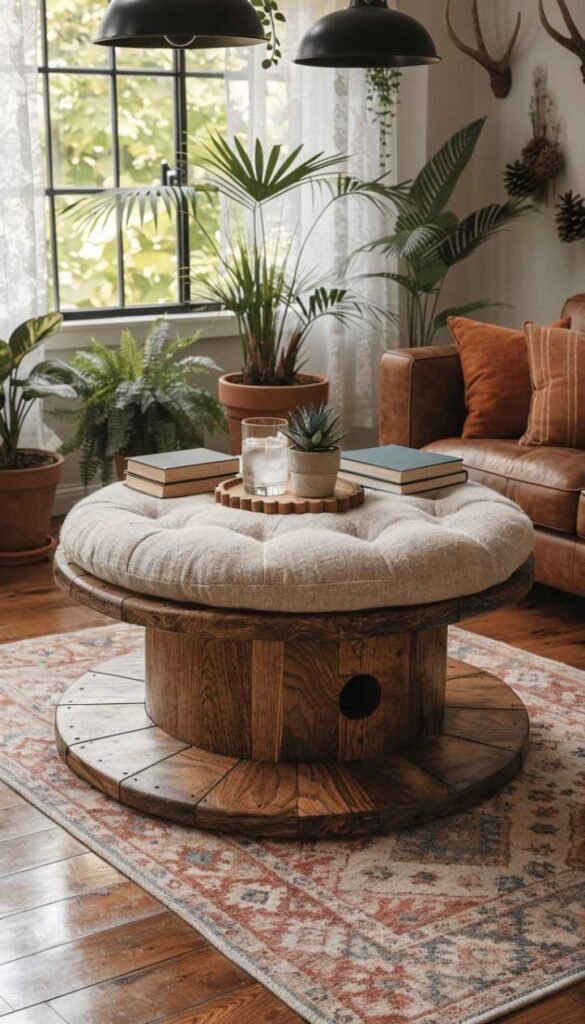
Cable spools – the giant ones that electrical and telephone companies use for wire – are one of the best free or nearly free furniture bases you will ever find. The shape is already perfect for a round ottoman or side table. You sand it smooth, paint or stain the wood, add a round foam cushion to the top surface, and you have a substantial, incredibly sturdy piece of furniture that has real character and weight to it. These are usually available for free from utility companies, construction sites, or electrical supply companies who would otherwise have to dispose of them.
What It Is: A large wooden cable spool repurposed as a round ottoman or coffee table by sanding, finishing, and adding a foam cushion to the top surface.
Supplies and Budget: Cable spool (free to $20 from utility companies), sandpaper and wood filler ($8–12), paint or stain ($10–15), round foam cut to size ($15–25), fabric for cushion top ($10–20), staple gun ($10–15). Total: $53–$87
Quick How-To: Sand entire spool removing splinters and rough spots. Fill any large gaps with wood filler. Paint or stain and seal. Cut round foam to match top circle diameter. Cover foam in batting then fabric. Staple fabric to the underside of the top spool disc. Set cushion on top – no permanent attachment needed as weight holds it.
DIY Tip: Check the spool carefully before bringing it inside – cable spools often have chemical treatments or oils from the cables they held, so wipe down all surfaces with a damp cloth and let it air out in a garage for a few days before finishing and bringing indoors.
4. Crochet Pouf Ottoman
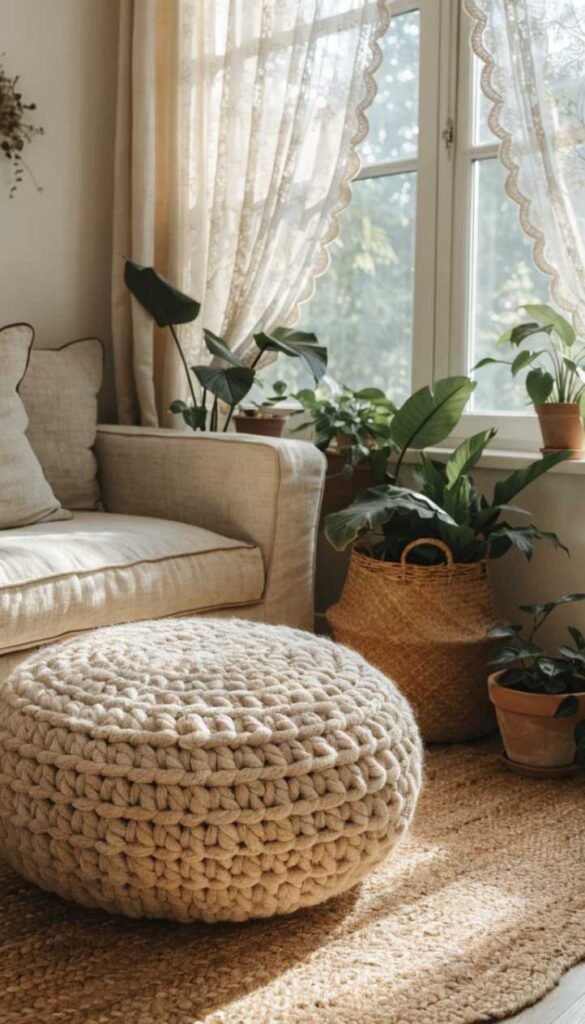
A crocheted pouf is the kind of project that looks so impressive displayed in a room that people assume you bought it somewhere expensive and are genuinely surprised when you tell them you made it yourself. It’s worked in a simple basic crochet stitch using chunky yarn or t-shirt yarn, shaped into a round cylinder, and stuffed firmly with polyfill, old fabric scraps, or a foam insert. The texture is incredible and it adds that warm handmade quality to a room that manufactured furniture simply never has. Even beginner crocheters can finish one of these in a couple of evenings.
What It Is: A crocheted round pouf ottoman made with chunky yarn or t-shirt yarn in a simple stitch pattern, stuffed firmly with polyfill or foam for use as a footrest or extra seating.
Supplies and Budget: Chunky yarn or t-shirt yarn ($15–30), large crochet hook size N or P ($5–8), polyfill stuffing or foam insert ($10–20), yarn needle for finishing ($2–3). Total: $32–$61
Quick How-To: Crochet a large circle for the top using increasing rounds. Work straight sides down in single crochet for desired height. Crochet a matching circle for the bottom. Stuff very firmly before closing – understuffed poufs collapse and look sad. Join top, sides, and bottom. Weave in all ends securely.
DIY Tip: Stuff the pouf much more firmly than feels natural while you are filling it – crochet stretches significantly under body weight and a pouf that feels perfectly stuffed before use will feel floppy and unsatisfying within the first week of actually sitting on it.
5. Repurposed Tire Ottoman
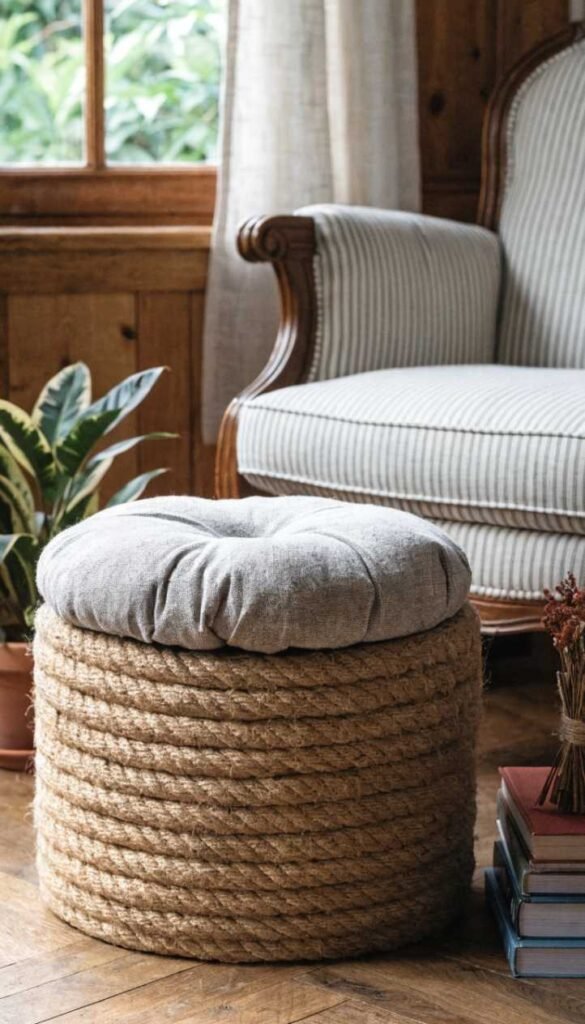
A stacked tire ottoman is one of those genuinely genius repurposing ideas that is both environmentally satisfying and results in a piece of furniture with incredible character. You stack two or three tires, wrap them in rope or paint them, and top them with a round upholstered cushion. The solid rubber base is practically indestructible and the weight means it stays exactly where you put it without sliding around. Rope wrapped tires look coastal and bohemian, painted tires look more modern and intentional. The cushion top makes it comfortable and the whole thing costs almost nothing if you source free tires.
What It Is: A round ottoman made from one or two stacked tires wrapped in rope or painted, topped with a round upholstered foam cushion for a durable, repurposed furniture piece.
Supplies and Budget: Old tires (free from tire shops), jute or manila rope ($12–18) or spray paint ($6–10), round plywood disc ($8–12), foam and fabric for cushion top ($20–35), hot glue or staple gun ($10–15). Total: $50–$90
Quick How-To: Clean tires thoroughly. Wrap with rope starting from bottom using hot glue to secure each row, or spray paint. Cut plywood circle to tire diameter. Attach plywood to top tire with strong adhesive. Upholster plywood with foam and fabric, stapling to underside. Set cushioned top on tire base.
DIY Tip: Ask at any tire shop for their old discarded tires – they actually pay to dispose of old tires so they are genuinely happy to let you take them for free, and you can usually find tires in good condition that just wore out naturally with no damage.
6. No-Sew Fabric Wrapped Ottoman
This is the absolute most beginner-friendly option on this list because there is no sewing, no stapling, and no construction involved whatsoever. You take an existing ottoman – even a really ugly or worn out one – or buy the cheapest basic version you can find, and you wrap it in new fabric using nothing but hot glue and folding technique. The result looks completely intentional and put together and you can change the fabric whenever you get bored with it for almost no money. This is also a great technique for updating a thrift store ottoman you paid almost nothing for.
What It Is: An existing ottoman refreshed by wrapping it in new fabric secured entirely with hot glue and neat folding, requiring no sewing or stapling skills whatsoever.
Supplies and Budget: Existing ottoman or thrifted one ($0–25), new fabric 1.5 to 2 yards ($12–30), hot glue gun and plenty of glue sticks ($8–12), scissors. Total: $20–$67
Quick How-To: Lay fabric face down. Center ottoman upside down on fabric. Pull one side up and hot glue to bottom. Pull opposite side taut and glue. Fold corners like wrapping a present – fold one side in, then the other, and glue flat. Flip right side up. Check for any gaps and add glue where needed.
DIY Tip: Use a fabric with a little bit of stretch or drape to it for this technique – stiff quilting cotton is very hard to fold neatly around corners while velvet, canvas, and cotton-linen blends are much more forgiving and give you cleaner results at the corners.
7. Wooden Pallet Ottoman
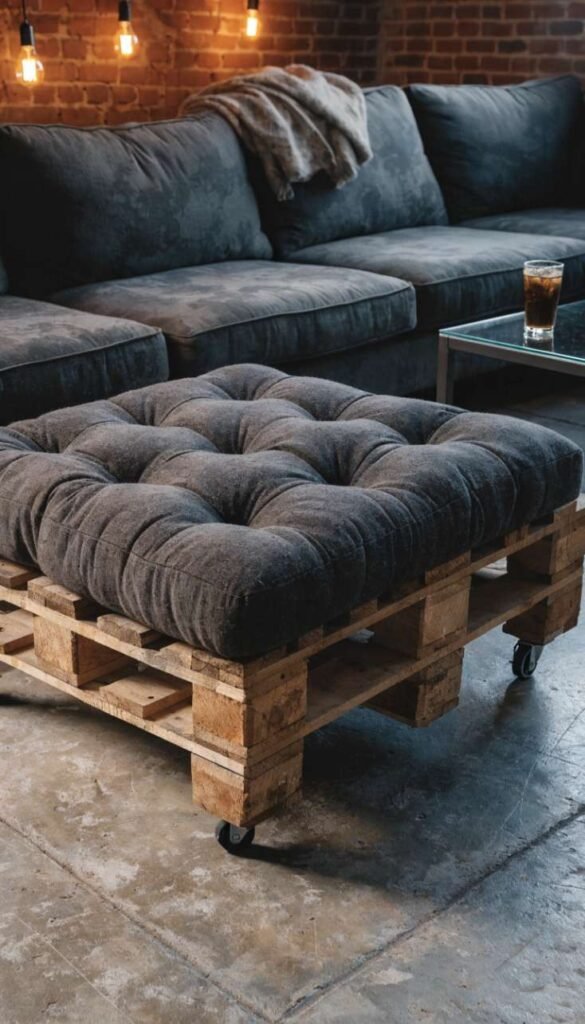
Pallet wood ottomans have this wonderful rustic, handmade quality that looks right at home in farmhouse, industrial, and bohemian spaces. You take one or two pallets stacked together, sand them very well, paint or stain them, and add either legs or casters for mobility. Top it with a foam cushion covered in your chosen fabric for the upholstered version, or leave the top surface as raw wood for a harder coffee table style. The pallet slats create natural visual texture that looks interesting and intentional, and the whole build costs almost nothing if you source your pallets for free.
What It Is: A low ottoman or coffee table built from one or two stacked wooden pallets, sanded and finished, with optional foam cushion on top and casters or legs on the bottom.
Supplies and Budget: Wooden pallets (free to $10), sandpaper ($5–8), paint or stain ($10–15), foam and fabric for cushion ($20–35), casters or legs ($10–20). Total: $45–$88
Quick How-To: Find HT marked pallets. Sand thoroughly on all surfaces and edges – this step is critical with pallet wood. Fill large gaps with wood filler if desired. Stain or paint and seal. Stack two pallets if more height is needed. Attach casters to bottom for a moveable coffee ottoman. Add cushion top.
DIY Tip: Spend more time sanding pallet wood than you think is necessary – pallet wood is rough and full of splinters that are invisible until they end up in someone’s leg when they sit on it, so sand through multiple grits ending with 220 for a genuinely smooth result.
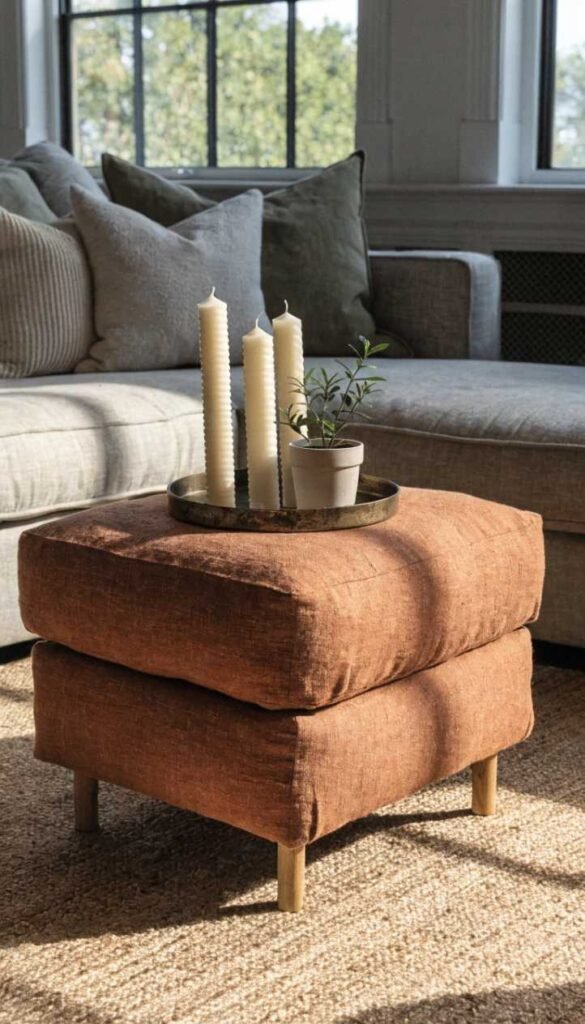
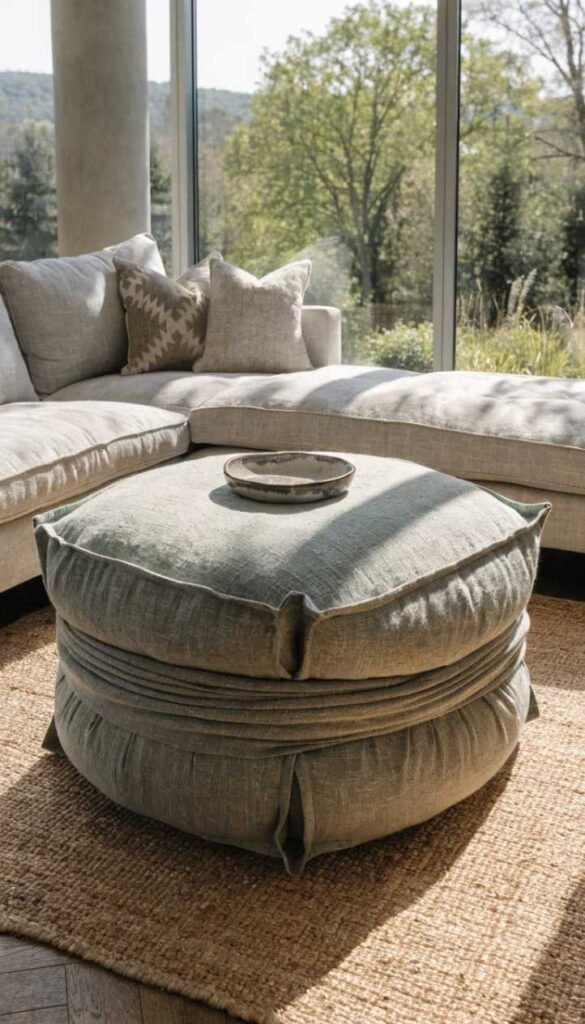
8. Foam Floor Pouf Ottoman

A giant floor pouf made entirely from foam is one of the most surprisingly comfortable and easy projects on this list. You cut foam into pieces and glue them together to form a cylindrical or rectangular shape, then sew or hot glue a fabric cover around it. The result is lightweight, incredibly comfortable, and easy to move around the room wherever it’s needed. Floor poufs work especially well in kids rooms, reading corners, and casual living spaces where you want something relaxed and informal. Outdoor fabric makes it durable enough for regular heavy use.
What It Is: A large floor-level foam pouf ottoman made by shaping and gluing foam pieces into a cylinder or rectangle and covering with a sewn or hot-glued fabric outer cover.
Supplies and Budget: High-density foam ($25–40), foam adhesive spray ($8–12), outdoor or canvas fabric 2 yards ($15–30), sewing machine or hot glue gun ($10–15), zipper optional ($3–5). Total: $61–$102
Quick How-To: Cut foam into a large circle for top and bottom and a long rectangle for the sides. Use foam spray adhesive to join pieces into cylinder shape. Let cure. Cut fabric into top circle and side rectangle with seam allowance. Sew or hot glue side seam into tube. Attach top and bottom circles. Add zipper for removable cover option.
DIY Tip: Use high-density upholstery foam rather than regular craft foam for the main body – regular craft foam compresses completely flat under body weight and never recovers its shape, while high-density foam springs back every time and stays comfortable for years.
9. Upholstered Tufted Ottoman
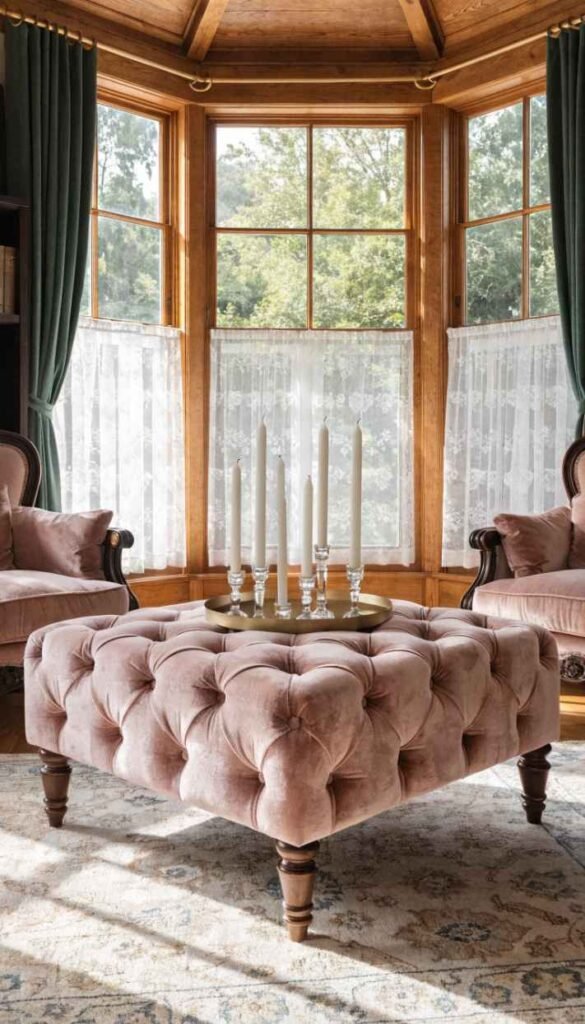
Tufted upholstery looks so elegant and complicated that most people assume it is completely beyond DIY territory, but the basic button tufting technique is actually very achievable once someone walks you through the process. You build your box, add thick foam, mark a tufting grid on the foam surface, and use a long upholstery needle to pull buttons through both the fabric and foam from top to bottom, pulling them tight to create those signature dimples. The tufted surface has this gorgeous diamond pattern of fabric peaks and button centers that looks genuinely luxurious and tailored.
What It Is: A classically elegant upholstered ottoman with button tufting on the top surface, built on a plywood box base with thick foam and fabric pulled into tufted diamond patterns using a long upholstery needle and covered buttons.
Supplies and Budget: Plywood ($15–25), 4-inch high density foam ($25–40), batting ($8–12), upholstery fabric 2 yards ($20–50), covered button kit ($6–10), long upholstery needle ($5–8), screw-in legs ($12–20). Total: $91–$165
Quick How-To: Build box and attach foam. Mark tufting grid on foam in diamond pattern. Cover buttons with fabric using button kit. Thread upholstery needle with strong thread. Push needle through fabric, batting, foam, and plywood at each tufting point. Pull button tight from below and knot. Continue all tufting points before finishing fabric edges.
DIY Tip: Mark your tufting grid very carefully with a ruler and chalk on the foam before starting – uneven tufting spacing is immediately and painfully obvious in the finished piece because the eye goes straight to the pattern and any inconsistency in the diamond grid ruins the whole elegant effect.
10. Repurposed Coffee Table Ottoman
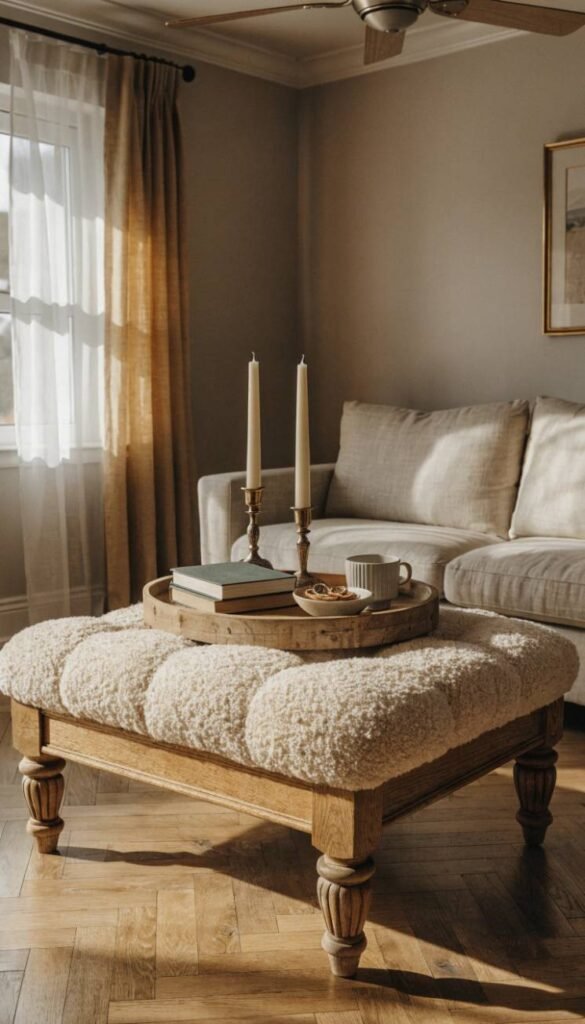
Turning an old wooden coffee table into an upholstered ottoman is one of the best furniture flips you can do because you already have the structure – the legs, the base, the proportions are all sorted. You just need to add foam on top of the table surface, wrap it in batting and fabric, and suddenly a piece of furniture you were about to donate becomes the ottoman you actually wanted. Thrift store coffee tables with solid frames are perfect for this. The legs are already attached and the surface is the right height for an ottoman, so you are really just adding upholstery on top of something that already works.
What It Is: An old wooden coffee table converted into an upholstered ottoman by adding foam padding to the top surface and wrapping the entire top in batting and fabric, keeping the original table legs and frame.
Supplies and Budget: Thrifted coffee table ($10–30), upholstery foam ($20–35), batting ($8–12), fabric 1.5 to 2 yards ($15–40), staple gun ($10–15), optional paint for legs ($8–12). Total: $71–$144
Quick How-To: Clean table and paint legs if desired – do this first before upholstering. Cut foam to table top dimensions and glue down. Wrap batting over foam and around table top edges. Pull fabric over batting starting from center of each side. Staple fabric to the underside of the table top. Fold corners neatly and staple flat.
DIY Tip: Paint or refinish the table legs before you upholster the top because getting paint on fresh fabric is almost impossible to fix and tape never fully protects the fabric edges right where the legs meet the upholstered top surface.