Okay, so here’s the thing about TV stands – most of the ones you find in stores are either super generic, way too expensive for what they actually are, or just not the right size for your space. I’ve been there, standing in a furniture store staring at a $600 particle board console thinking “I could literally build something better than this for a hundred dollars.” And the truth is, you really can.

DIY TV stands have become one of my favorite weekend projects because they’re not as intimidating as people think. You don’t need to be a carpenter or have a garage full of tools. A lot of these ideas use simple materials – cinder blocks, old crates, basic lumber from the hardware store, or even furniture you already own that just needs a little updating. The hardest part is honestly just deciding which style you want to go with.
What I love most about making your own TV stand is that you actually get exactly what you need. Your TV is a specific size, your room has specific dimensions, your style is your own – so why settle for something that’s almost right? When you build it yourself, the height is perfect, the storage works for your actual stuff, and it looks like it belongs in your home instead of looking like it came from everyone else’s home too.
Whether your style is modern and minimal, warm and rustic, industrial, or somewhere in between, there’s a DIY TV stand on this list that’s going to work for you. Some of these take a full weekend, some take a couple of hours, and a few you can pull together with zero power tools. Let’s get into it.
1. Cinder Block and Wood Plank Console
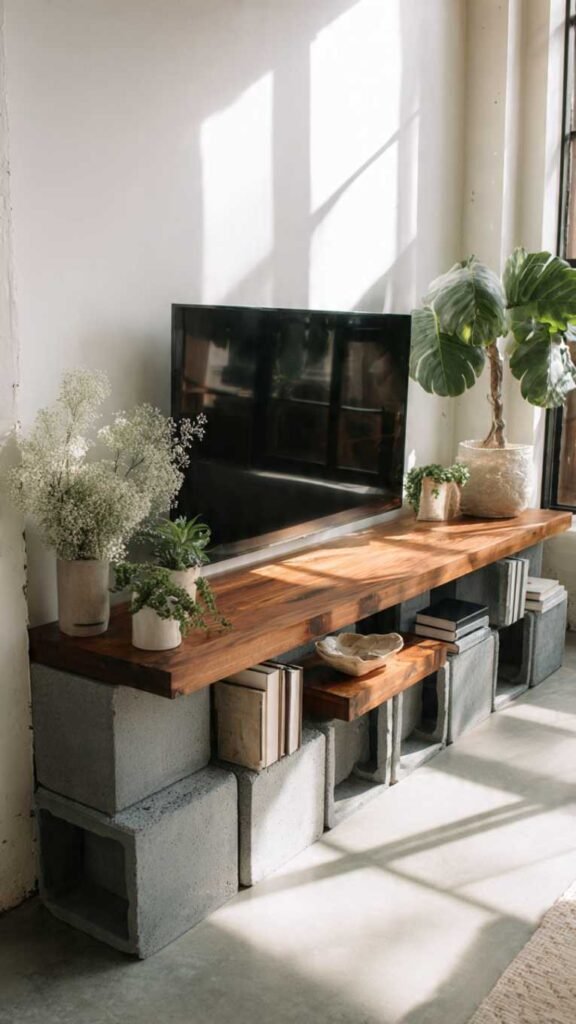
This one is probably the easiest DIY TV stand you will ever make, and it looks genuinely cool when it’s done. You stack cinder blocks on each end, lay wood planks across them as shelves, and that’s basically it. The industrial meets natural vibe works really well in modern, bohemian, and even farmhouse spaces. You can paint the cinder blocks, leave them raw, or whitewash them depending on your look. The wood planks can be stained whatever color matches your room. It’s heavy, sturdy, and surprisingly stylish for something that took you 30 minutes to put together.
What It Is: A TV console made by stacking cinder blocks as supports with wooden boards as shelves – totally freestanding, no tools needed.
Supplies and Budget: Cinder blocks ($1–2 each), 2×10 or 2×12 lumber boards ($15–30 each), wood stain or paint ($10–15), sandpaper. Total: $40–$80
Quick How-To: Sand and stain your wood boards, let them dry fully. Stack two to three cinder blocks on each end at your desired height. Lay the boards across the tops. Add a second shelf level if you want storage in the middle.
DIY Tip: Fill the cinder block holes with rope, greenery, or small plants to make them look more intentional and less construction-site-y.
2. Floating Wall-Mounted Shelves Console
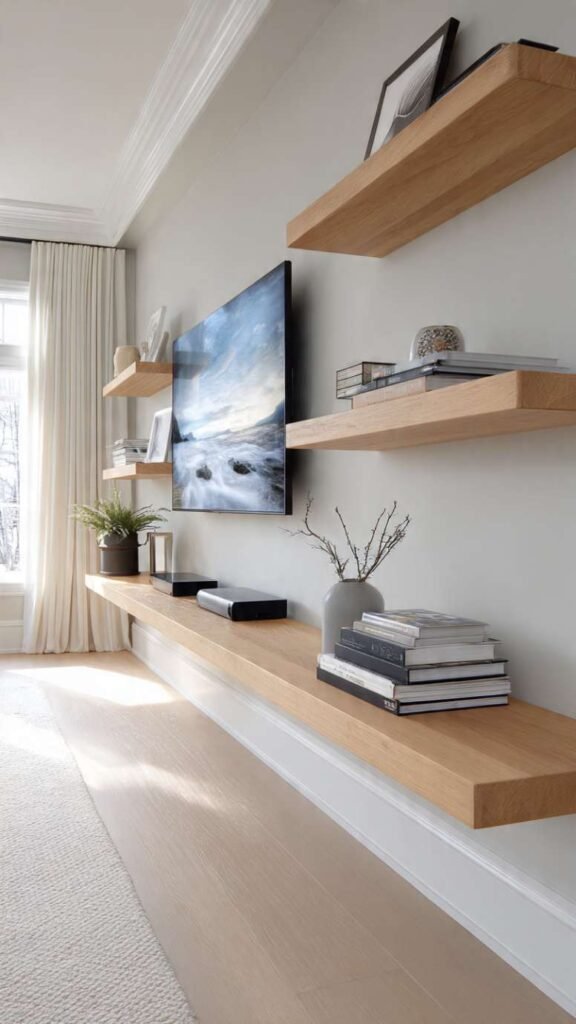
A floating TV setup looks so clean and modern, and it’s way more achievable than people think. Instead of a traditional stand sitting on the floor, you mount a long thick shelf directly to the wall at the right height, then add one or two shelves below it for your cable box, gaming consoles, or whatever else you need. The floor stays completely clear, which makes even a small living room feel bigger and more open. You can choose a natural wood shelf for warmth or paint it to match your walls for a really seamless built-in look.
What It Is: Wall-mounted wood shelving used as a floating TV console, with no legs touching the floor.
Supplies and Budget: Floating shelf brackets ($20–40), thick wood board or pre-made floating shelf ($30–60), stain or paint ($10), wall anchors and screws. Total: $60–$110
Quick How-To: Find wall studs, mark your shelf height (usually 24–30 inches from the floor), mount brackets securely into studs, slide shelf on. Repeat for lower storage shelves. Hide cords behind the wall or with a cord cover kit.
DIY Tip: Always mount into studs, not just drywall – a TV is heavy and you don’t want this coming down. A stud finder is worth the $15.
3. Upcycled Dresser TV Console
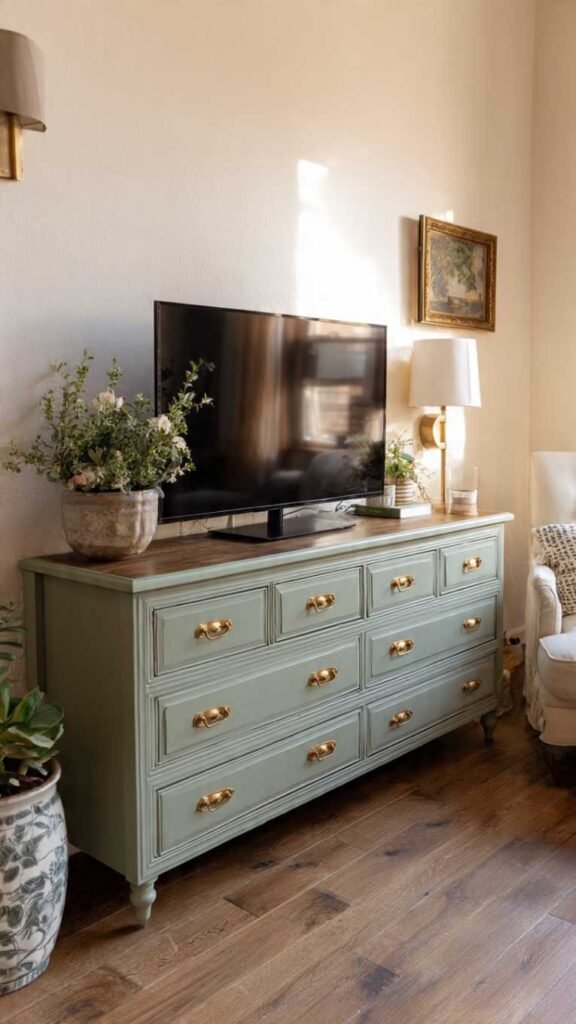
This is one of those ideas that once you see it, you can’t unsee it – an old dresser with the top drawers removed or left intact makes the most perfect TV stand. The storage is amazing because you already have all those drawers for hiding remotes, game controllers, chargers, and everything else that normally ends up scattered around the TV. You can find a solid wood dresser at a thrift store or Facebook Marketplace for almost nothing, paint it whatever color you want, swap out the hardware, and suddenly you have a custom media console that looks like it cost a fortune.
What It Is: A thrifted or old dresser repurposed as a TV console, with fresh paint and updated hardware.
Supplies and Budget: Thrifted dresser ($20–80), chalk paint or furniture paint ($15–25), new drawer pulls ($15–30), sandpaper and primer ($10). Total: $60–$145
Quick How-To: Sand dresser lightly, apply primer if needed, paint with two coats, let dry fully. Swap hardware with new pulls. Make sure it’s stable and the right height for your TV before placing it.
DIY Tip: If the dresser is a little too tall, you can remove the legs or feet to lower it. If it’s too short, add hairpin legs for a mid-century modern feel.
4. Hairpin Leg Plywood Console

This build gives you that clean mid-century modern look without a complicated build. You basically make a simple plywood box – or even just a thick slab – add hairpin legs to the bottom, and stain or paint it. The hairpin legs do all the style work honestly, they instantly make anything look intentional and designed. You can add a back panel, a shelf inside, or keep it totally open. The whole thing comes together with pretty basic woodworking skills, and the result looks like something you’d pay $400 for in a boutique home store.
What It Is: A simple plywood or solid wood box console with metal hairpin legs attached to the bottom.
Supplies and Budget: Plywood sheet ($30–50), hairpin legs set of 4 ($25–45), wood stain or paint ($10–15), wood screws and sandpaper ($10). Total: $75–$120
Quick How-To: Cut plywood to your desired width and depth. Sand all edges smooth. Build a simple open box or slab. Attach hairpin legs with screws at each corner. Stain or paint and seal.
DIY Tip: Pre-drill your screw holes before attaching the hairpin legs to the plywood – it prevents the wood from splitting and makes the legs sit perfectly flush.
5. Pipe and Wood Industrial Console
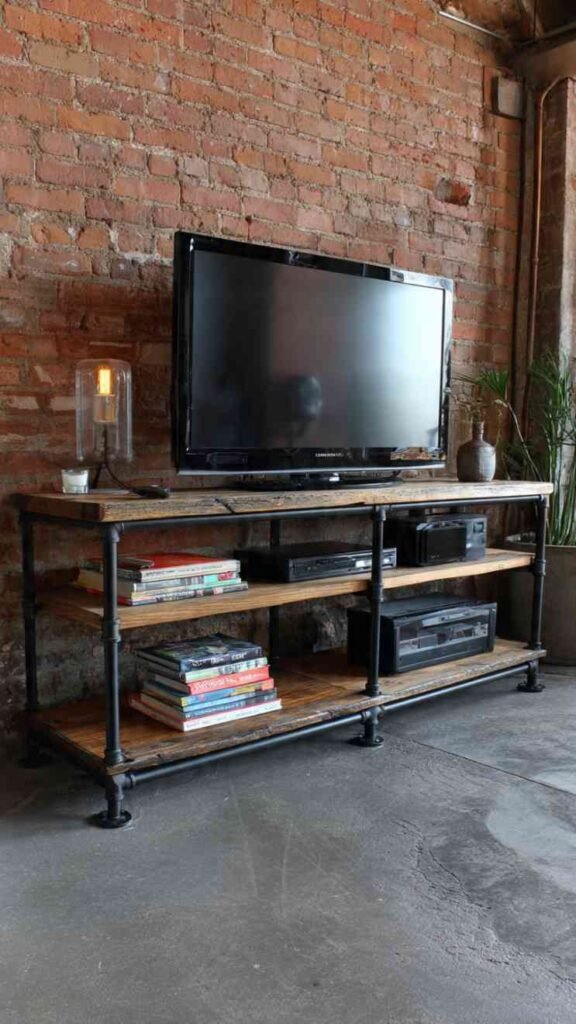
If you like that industrial look with exposed metal and raw wood, this one is going to be your favorite. You use actual plumbing pipes from the hardware store as the frame and legs, then attach wood planks as the shelves. It sounds weird but it looks amazing – very coffee shop, very intentional, very “I definitely designed this myself.” The pipes come in black or you can get them in silver, and they screw together with standard fittings so no welding required. The whole thing is surprisingly solid and sturdy when it’s all connected.
What It Is: A TV console built with black iron plumbing pipe as the frame and structural legs, with wood boards as shelves.
Supplies and Budget: Black iron pipes and fittings ($40–70), wood planks ($20–40), wood stain ($10–15), pipe flanges and screws ($15). Total: $85–$145
Quick How-To: Plan your shelf layout and buy pipes cut to length at the hardware store. Screw floor flanges to your wood boards, connect pipes between shelves. Sand and stain wood before assembly.
DIY Tip: The hardware store will cut pipes to your exact measurements for free or a small fee – don’t try to cut them yourself at home.
6. Wooden Crate Stacked Console

Wooden crates – the kind you find at craft stores, hardware stores, or even wine shops – stack together to make the cutest little TV console. You can leave them as open cubbies or add simple backs and doors if you want a cleaner look. Arrange them in different configurations depending on your space: stack them vertically, lay them on their side, mix it up. Stain them all one color for a cohesive look, or do a slightly varied finish for that eclectic, collected feel. They’re lightweight, cheap, and you can completely rearrange the whole thing whenever you feel like a change.
What It Is: Wooden crates arranged and secured together to form a modular TV console with built-in cubby storage.
Supplies and Budget: Wooden crates ($8–20 each, need 4–6), wood stain or paint ($10–15), L-brackets to secure together ($8), sandpaper. Total: $55–$140
Quick How-To: Sand crates smooth, stain or paint all of them the same color. Arrange in your desired configuration. Use L-brackets on the inside corners to attach them together so they don’t shift.
DIY Tip: Lay the crates on their side so the open part faces out – this gives you actual accessible storage instead of just a flat top surface.
7. Concrete Block and Glass Console
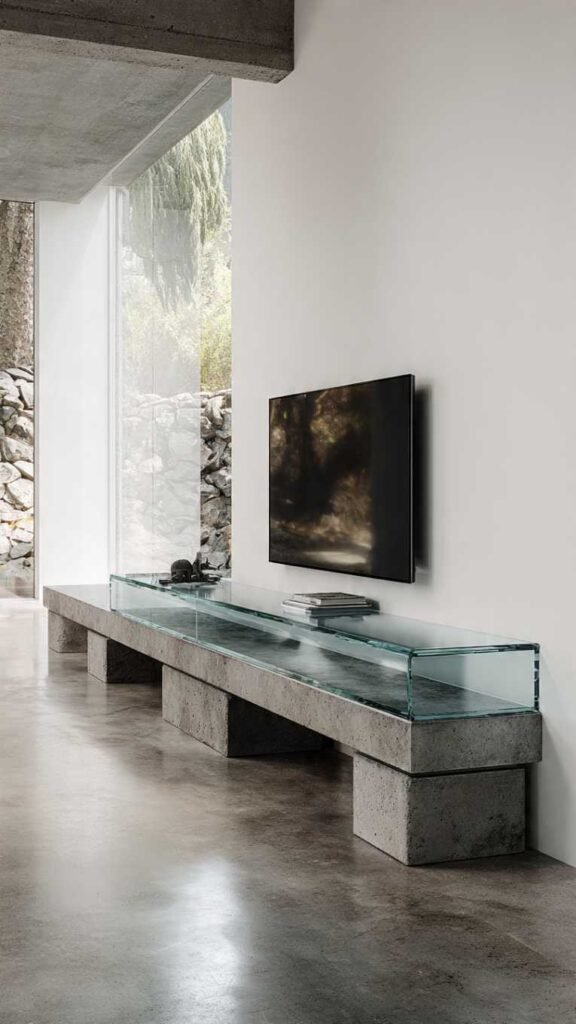
This one feels really modern and architectural – you use solid concrete blocks or riser blocks as the base and lay a thick piece of tempered glass across the top as the surface. It has this very minimalist, gallery-like quality that works really well in modern and contemporary spaces. The glass top makes the whole thing feel lighter even though the base is heavy and substantial. You can find concrete blocks at any home improvement store, and glass cut to size is more affordable than you’d think at a local glass shop.
What It Is: A minimalist TV console using concrete blocks as the base with a custom-cut piece of tempered glass as the top surface.
Supplies and Budget: Concrete riser blocks ($15–30), tempered glass cut to size ($50–100), felt pads for under glass ($5). Total: $70–$135
Quick How-To: Arrange concrete blocks in two stacks at your desired width and height. Place felt pads on top of blocks so glass doesn’t scratch or slip. Lay tempered glass across the top. Style underneath.
DIY Tip: Get your glass cut at least an inch wider and deeper than the concrete base so it overhangs slightly on all sides – it looks much more intentional that way.
8. Ikea Kallax Hack Console
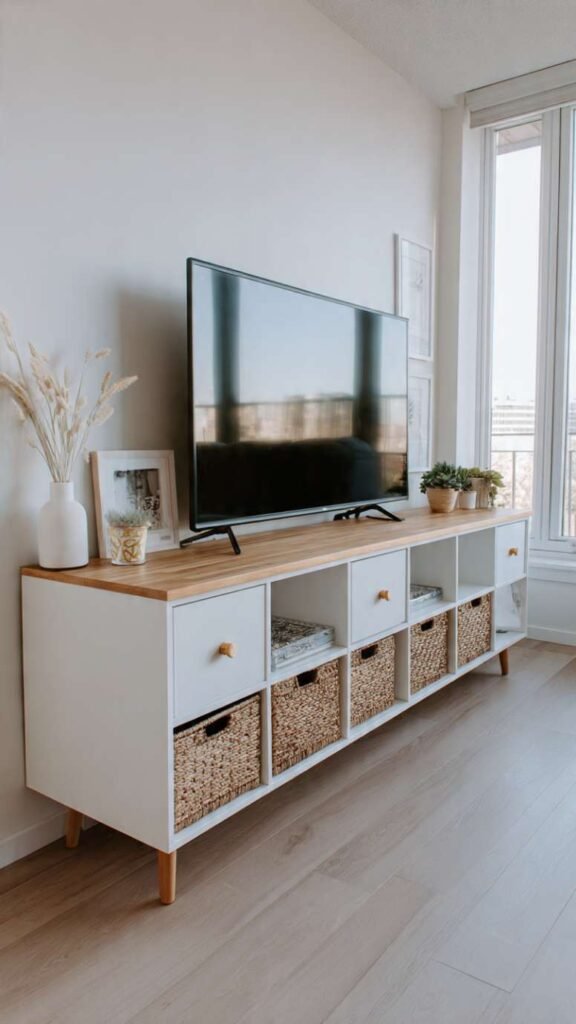
Okay, yes, technically you’re buying flat-pack furniture and then customizing it – but hear me out, because a hacked Kallax becomes something completely different from what you started with. You take the standard Kallax unit, lay it on its side, add custom legs, change the hardware, add a wood top, maybe wrap the outside in contact paper or wallpaper, and suddenly it looks nothing like the original. The storage is genuinely excellent, the cube system is super flexible, and the total cost is still pretty low.
What It Is: An Ikea Kallax shelf unit modified with new legs, a wood top, and custom hardware to look like a designer media console.
Supplies and Budget: Ikea Kallax unit ($60–100), new legs ($20–40), wood top piece ($20–35), paint or contact paper ($15–20), new hardware ($15). Total: $130–$215
Quick How-To: Assemble Kallax. Add a wood top by cutting to size and securing with wood glue and screws from underneath. Attach legs at corners. Paint the whole unit or apply contact paper for a wood or marble look.
DIY Tip: Adding legs is the single biggest upgrade – it completely changes the piece from “Ikea shelf” to “actual furniture.” Tapered wood legs or hairpin legs both work great.
9. Reclaimed Wood Barn Door Console
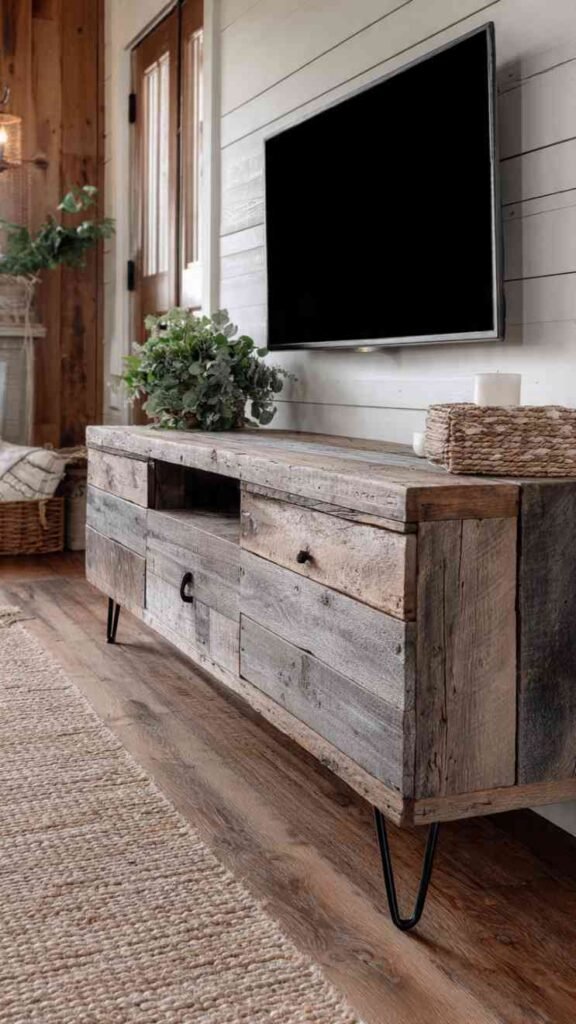
This one takes a little more work but the result is genuinely stunning. You build a simple frame console and use old barn wood or reclaimed wood planks for the front panel and top surface. The weathered, aged character of old wood gives it that texture and history you just can’t get from new lumber. If you can’t find actual barn wood, there are great techniques to age new wood using vinegar and steel wool that give you a really convincing weathered look. Pair it with black metal hardware and legs for that perfect rustic-industrial combination.
What It Is: A TV console built with a simple structural frame and clad in reclaimed or artificially aged barn wood for a rustic, textured look.
Supplies and Budget: 2×4 lumber for frame ($20–30), reclaimed or aged wood planks ($30–60), black metal hairpin or pipe legs ($30–45), black hardware ($10–15). Total: $90–$150
Quick How-To: Build a basic rectangular frame from 2x4s. Attach reclaimed wood planks to the front and top. Sand edges so they’re safe to touch. Attach black legs. Seal the wood with a matte finish to protect it.
DIY Tip: To age new wood cheaply, soak steel wool in white vinegar for 24 hours, then brush the liquid onto the wood. It reacts with the tannins and creates a beautiful gray-brown aged finish.
10. Simple Painted MDF Box Console
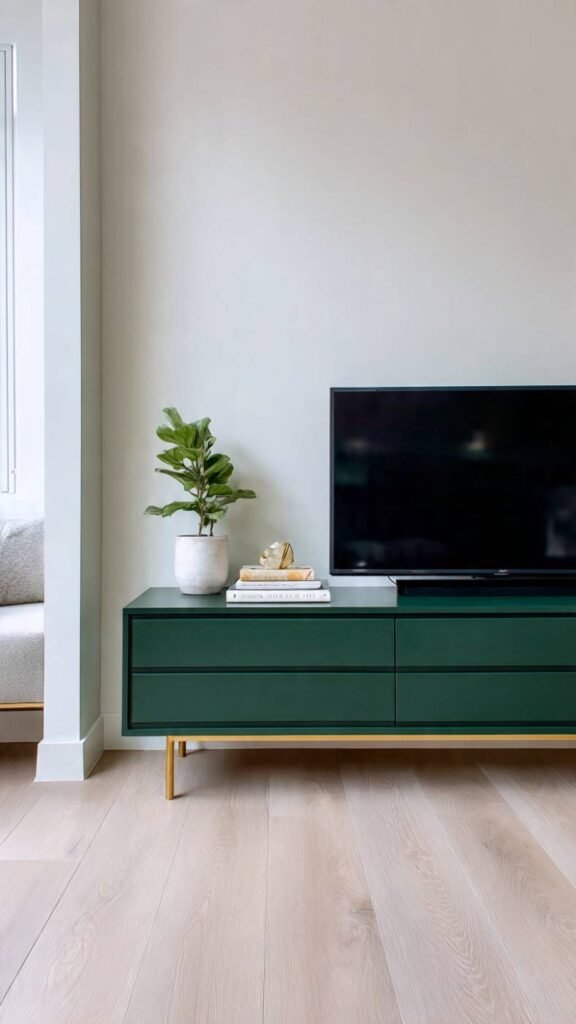
This last one is proof that you don’t need fancy materials to get a great result – you just need a good paint job and clean lines. You cut MDF into panels, assemble them into a simple long box shape with an internal shelf, fill all the seams with wood filler so everything looks seamless, sand it smooth, and then paint it in a beautiful color. When it’s done right, painted MDF looks completely custom and expensive. Go bold with a deep green or navy, or keep it subtle with a warm white or clay tone. It looks like built-in furniture for a fraction of the cost.
What It Is: A custom-shaped TV console built from MDF panels, with seams filled and sanded to a perfectly smooth finish before painting.
Supplies and Budget: MDF sheet ($25–40), wood filler ($8–10), primer ($10), furniture paint ($15–25), sandpaper in multiple grits ($8). Total: $66–$93
Quick How-To: Cut MDF to your measurements. Assemble with wood glue and screws. Fill all seams and screw holes with wood filler. Sand smooth when dry. Prime, then paint two to three coats. Add legs or leave low-profile.
DIY Tip: The secret to MDF looking expensive is the prep work – fill every single seam, sand with progressively finer grits, and don’t skip the primer. The paint step is actually the easy part.