I got into making my own rings completely by accident the way I get into most of my craft obsessions – I saw someone wearing the most beautiful stacked ring set and when I asked where she got them she told me she made them herself and I genuinely did not believe her at first. They looked so finished and intentional and real that I assumed she was being modest about some small jewelry brand she’d found. But she showed me the process right there and I went home that same day and ordered supplies.
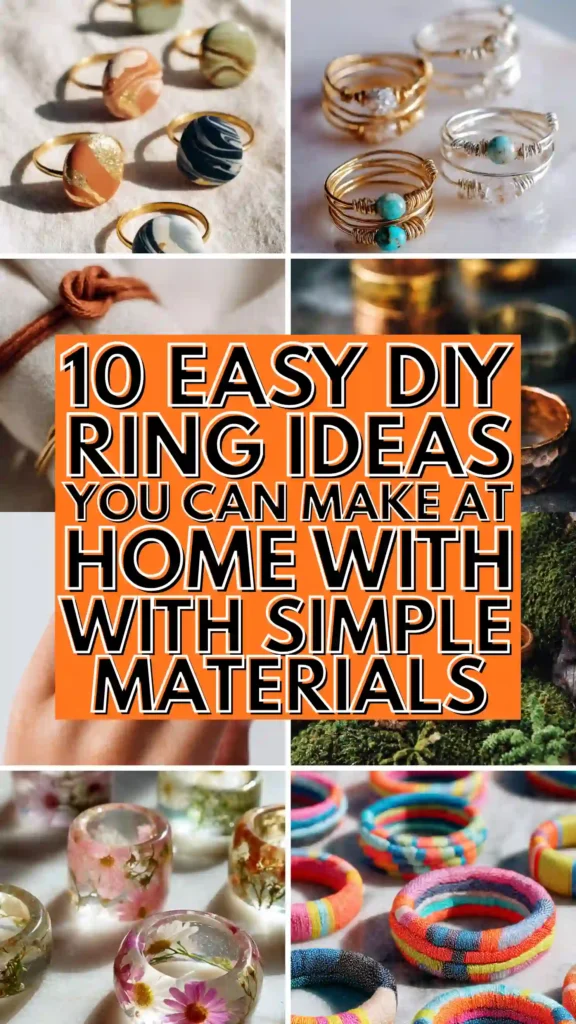
What surprised me most about jewelry making, and ring making specifically, is how approachable it actually is when you break it down. There is this assumption that jewelry requires special training, expensive tools, and some kind of artistic background. And while advanced metalsmithing absolutely does require all of those things, the beginner and intermediate ring projects that produce genuinely beautiful results need almost none of that. Wire, polymer clay, resin, beads, simple metal blanks – these are the materials that most people are working with and the results are stunning.
Rings are also the perfect jewelry project because the scale is small, which means the material cost is low and the time investment per piece is short. You can make five different rings in an afternoon, figure out which techniques you love, and end up with a whole collection of pieces that work together. The satisfaction of wearing something on your hand that you made yourself is genuinely different from wearing something purchased – there is this quiet pride every time you look down and remember that you made that.
Whether you want something delicate and minimal, bold and sculptural, colorful and playful, or earthy and natural, there is a ring making technique on this list that fits your style and your current skill level. Start with one that feels manageable and I promise you will not stop at just one.
1. Wire Wrapped Ring
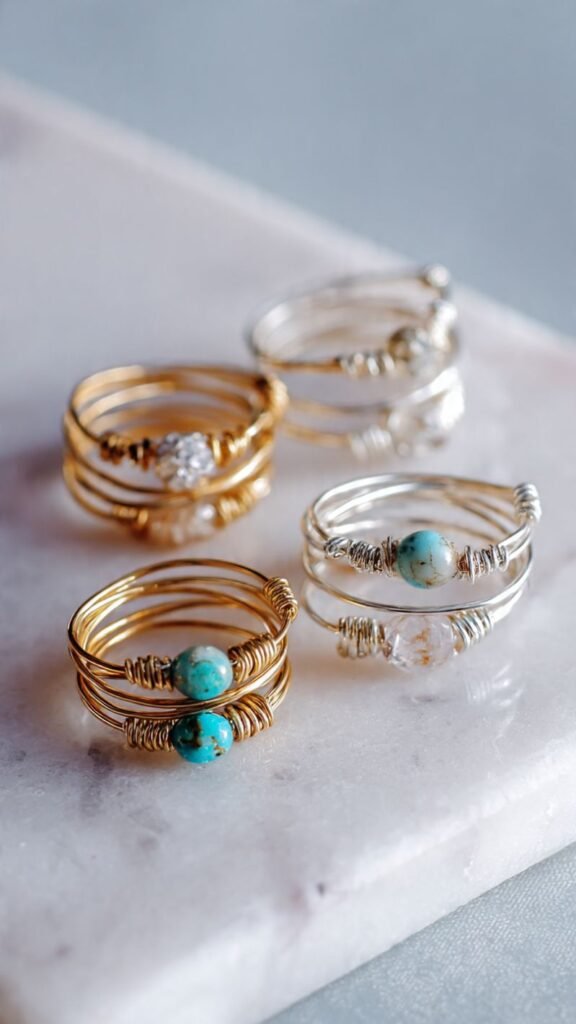
Wire wrapped rings are where most jewelry makers start and for very good reason – the technique is simple, the materials cost almost nothing, and the results look genuinely beautiful even when you are a complete beginner. You bend and wrap thin gauge wire around a ring mandrel or a marker to form the band, then continue wrapping to create the decorative element on top which can be as simple or as elaborate as you want. Add a bead, a small crystal, a found stone, or just let the wire wrapping itself be the design. No soldering, no special tools, just wire and pliers.
What It Is: A handmade ring created by wrapping and shaping thin gauge wire around a mandrel for the band and continuing the wire wrapping to create a decorative bezel or sculptural element on top.
Supplies and Budget: Craft wire in 20 and 26 gauge ($6–10), round nose pliers and flat nose pliers ($8–15 for a set), ring mandrel or thick marker ($5–8), small bead or crystal ($2–5). Total: $21–$38
Quick How-To: Cut about 18 inches of 20 gauge wire. Wrap around mandrel at your ring size three times for the band. Bring wire ends up to center top and begin wrapping decorative element. Add bead by threading onto thinner 26 gauge wire and wrapping around band wires to secure. Tuck all wire ends with flat nose pliers.
DIY Tip: Always tuck your wire ends completely flat against the ring using flat nose pliers and then run your finger along the surface to feel for any sharp points – a wire end that feels fine to you while making the ring will absolutely scratch and catch on everything once you start wearing it.
2. Polymer Clay Statement Ring
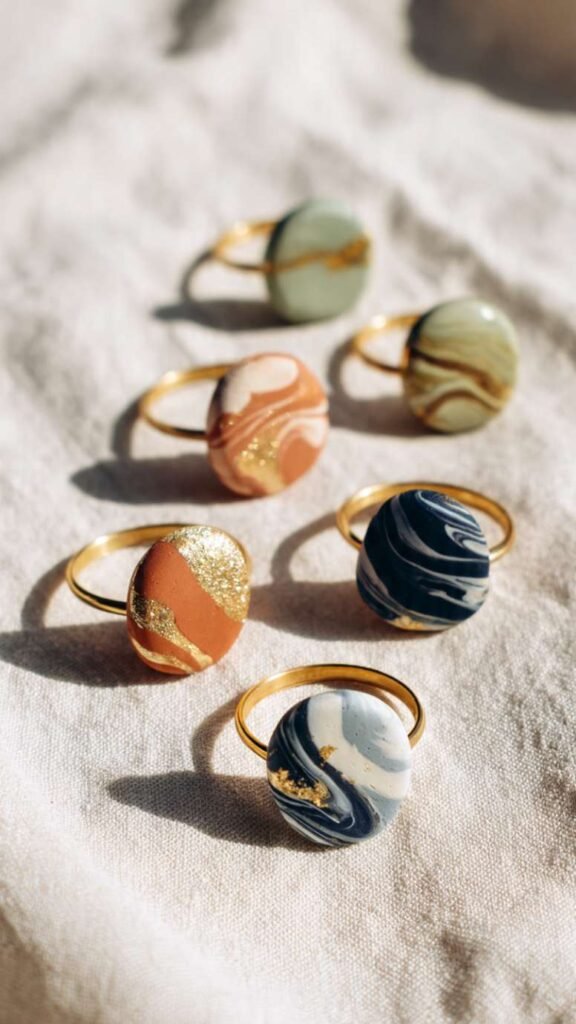
Polymer clay rings are having a major moment right now and when you see them in person you understand why – the colors, the textures, and the sculptural shapes you can achieve with clay are genuinely stunning and unlike anything you find in regular jewelry stores. You shape the clay into a bold top element – think abstract organic shapes, thick discs, twisted forms, layered color combinations – then bake it hard, sand it smooth, and attach it to a simple metal ring blank. The result is a statement ring that looks like it came from an independent designer and costs you almost nothing to make.
What It Is: A bold statement ring made by sculpting a decorative top element from polymer clay in any shape or color combination, baking it hard, and attaching it to a metal ring blank base.
Supplies and Budget: Polymer clay in multiple colors ($8–14), metal ring blanks with flat pad ($6–10 for a pack), strong jewelry adhesive E6000 ($5–7), sandpaper in fine grits ($3–5). Total: $22–$36
Quick How-To: Condition clay by kneading until soft. Shape decorative top element – keep it slightly larger than ring blank pad. Press lightly onto pad to check fit then remove. Bake clay piece per instructions without ring blank. Sand smooth through grits when cool. Glue to ring blank with E6000. Let cure 24 hours before wearing.
DIY Tip: Sand your baked clay piece through progressively finer grits of sandpaper ending with 400 or 600 grit wet sanding – this removes the slightly chalky surface that polymer clay has straight from the oven and gives you a smooth polished finish that looks completely professional.
3. Resin Ring With Dried Flowers
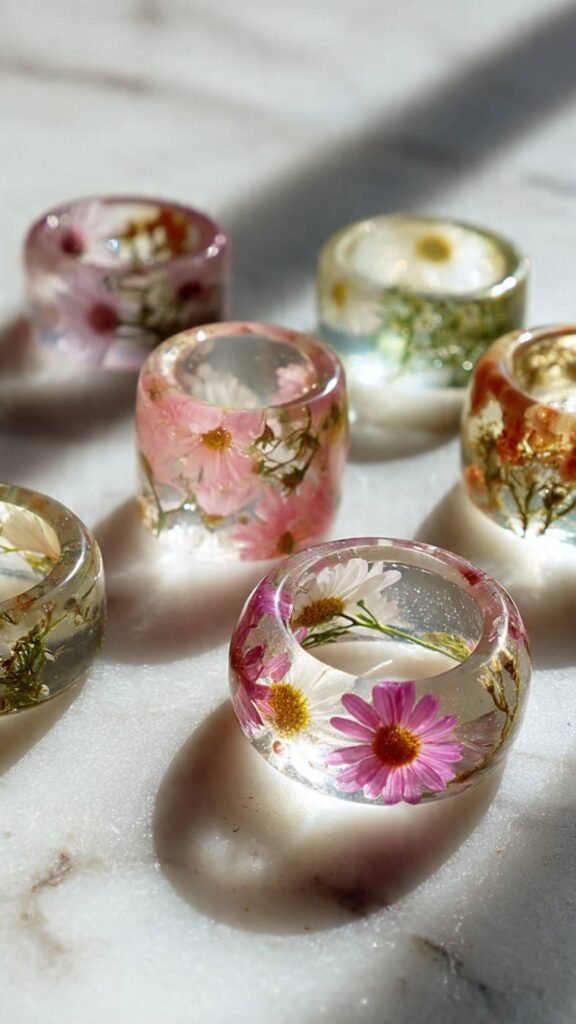
Resin jewelry captured everyone’s attention when the trend started and it has not slowed down because the results are genuinely magical – tiny preserved flowers and botanicals suspended inside a perfectly clear glossy dome that sits on your finger like a little wearable terrarium. Making resin rings requires a bit more patience than some other techniques because resin needs time to cure properly, but the process itself is simple and the end result is something you truly cannot buy anywhere that looks exactly like what you made. Every single one is completely unique.
What It Is: A ring made by pouring clear UV or two-part resin into a ring mold with tiny dried flowers and botanical elements suspended inside, creating a wearable botanical preservation piece.
Supplies and Budget: Clear casting resin or UV resin ($12–20), ring silicone molds ($8–12), tiny dried flowers and leaves ($5–8), UV lamp if using UV resin ($15–20), sandpaper and polish ($5–8). Total: $45–$68
Quick How-To: Pour thin base layer of resin into mold. Let cure partially. Arrange dried flowers on surface. Pour second layer to cover flowers. Cure fully per resin instructions. Demold carefully. Sand through grits starting at 400 to remove mold lines. Polish to high clarity with resin polish or car headlight polish.
DIY Tip: Seal your dried flowers with a thin coat of resin or Mod Podge before embedding them in the main pour – unsealed dried botanicals release tiny air bubbles into the resin as it cures and you end up with cloudiness and bubbles right around your flowers instead of crystal clear results.
4. Beaded Stretch Ring
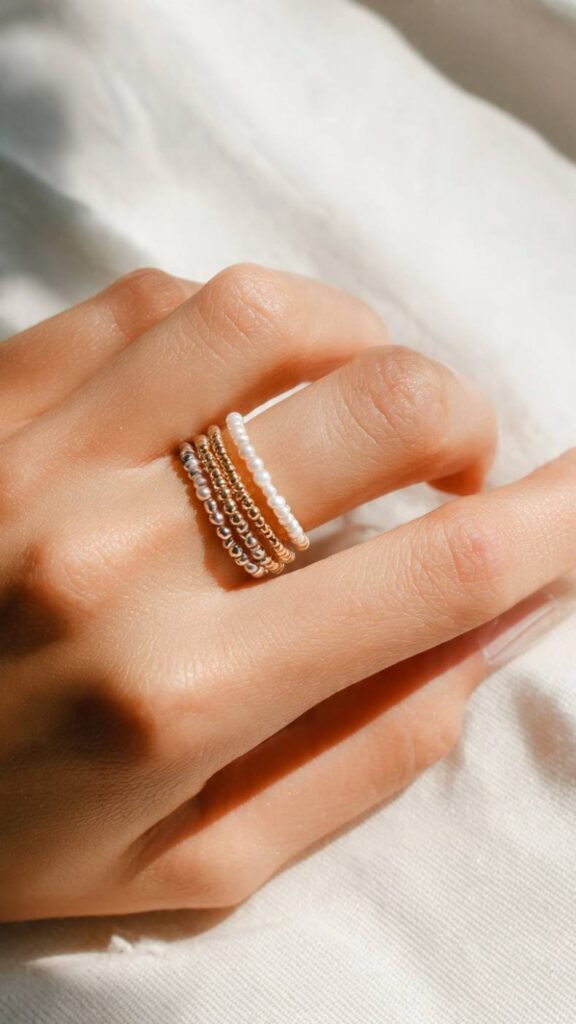
Beaded stretch rings are the most beginner-friendly project on this entire list and I mean that in the best way – there is genuinely no skill required, the materials are inexpensive, and you can make a whole set of coordinating rings in about twenty minutes that look beautiful stacked together. You thread small seed beads or crystal beads onto elastic cord, tie it into a loop sized to your finger, and that is really it. The trick is in choosing bead combinations that work together and sizing the ring correctly so it is snug enough not to spin but comfortable enough to wear all day.
What It Is: A simple stretchy beaded ring made by threading seed beads or small crystal beads onto elastic cord and tying into a finger-sized loop, worn individually or stacked in coordinating sets.
Supplies and Budget: Seed beads or crystal beads ($5–10 for a large pack), clear elastic cord 0.5mm ($4–6), scissors, beading needle optional ($2–3). Total: $11–$19 makes many rings
Quick How-To: Cut elastic about 8 inches long. Thread beads in desired pattern until you have enough to go around your finger snugly. Tie a surgeon’s knot – two overhand knots in opposite directions. Pull very tight. Add a small drop of super glue to knot. Trim ends close. Slide knot inside a bead to hide it.
DIY Tip: Size your beaded ring slightly smaller than you think you need because elastic stretches with wear and a ring that fits perfectly when new will feel loose and spin around on your finger within a few weeks of regular wearing.
5. Hammered Metal Band Ring
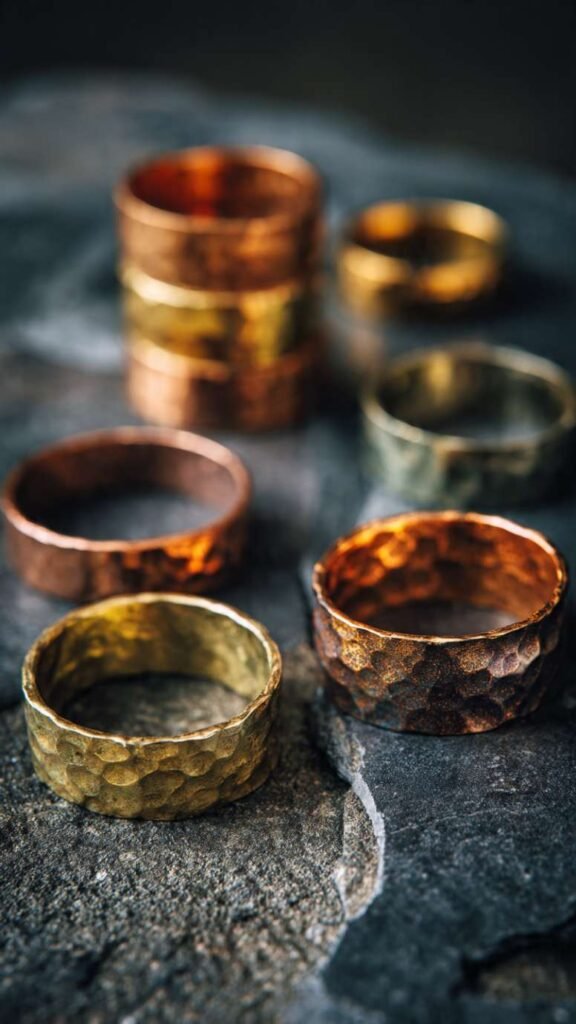
A hammered metal band has this beautiful artisan quality that looks like it came from a jewelry studio and once you understand the basic process it is genuinely achievable at home without a professional setup. You work with a strip of copper, brass, or silver colored craft metal, shape it around a mandrel, close the join, and then texture the surface with a hammer and bench block to create those gorgeous irregular hammered marks that catch light so beautifully. The finished ring looks handcrafted in the most appealing way and the hammered texture means slight imperfections are completely part of the aesthetic.
What It Is: A simple metal band ring made by shaping a strip of copper, brass, or craft metal around a mandrel and texturing the surface with a hammer on a steel bench block to create a beautiful hammered finish.
Supplies and Budget: Copper or brass craft metal strip ($8–12), ring mandrel ($8–15), chasing hammer or ball peen hammer ($10–18), steel bench block ($10–15), metal file ($5–8), jewelry jump ring pliers ($8). Total: $49–$76
Quick How-To: Cut metal strip to length – your ring size in inches plus a small overlap. File ends smooth. Shape around mandrel by pressing and tapping to form a circle. Bring ends together to close join. Hammer entire band surface on bench block using ball peen end for hammered texture. File and sand any rough spots.
DIY Tip: Anneal your copper or brass before shaping by heating it with a small torch or even a kitchen torch until it glows slightly then quenching in water – this softens the metal and makes it dramatically easier to shape around the mandrel without cracking or work hardening.
6. Knot Ring From Wire or Cord
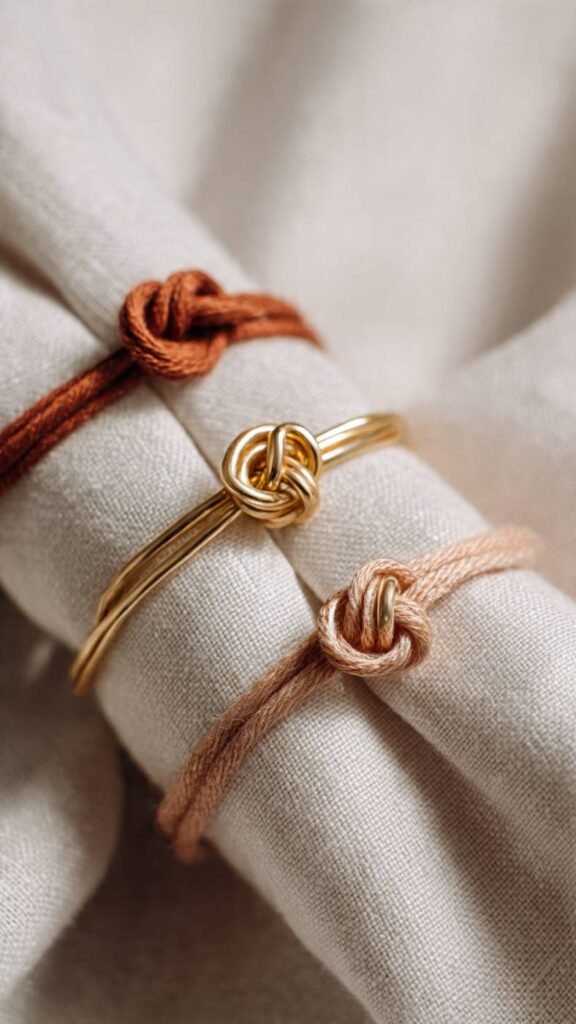
A simple knot tied in wire or cord and worn as a ring is one of those ideas that is so elegant in its simplicity that you almost can’t believe it works as well as it does. You take a length of wire or waxed cord, tie a single or double overhand knot, position the knot at the top center of your finger, and bring the ends around to join at the bottom. The knot becomes the decorative focal point and the band is just the two ends wrapped around the finger. In gold wire it looks minimalist and expensive, in colored cord it looks bohemian and casual.
What It Is: A minimalist ring made by tying a simple knot in wire or waxed cord and forming the remaining lengths into a band around the finger, with the knot as the decorative center element.
Supplies and Budget: Gold or silver craft wire 20 gauge ($6–10) or waxed linen cord ($4–6), round nose pliers for wire version ($5–8), scissors. Total: $10–$18 makes multiple rings
Quick How-To: Cut about 10 inches of wire or cord. Find center point and tie a single overhand knot at center leaving it slightly loose. Position knot on top of finger. Bring both ends around finger to size and either twist wire ends together underneath or tie cord ends in a small flat knot. Trim excess and tuck ends.
DIY Tip: Tie your knot before you size the ring to your finger rather than after – it is much harder to manipulate a knot into the right position when the ring is already around your finger than when you have the full length of wire or cord free to work with.
7. Stacked Midi Ring Set
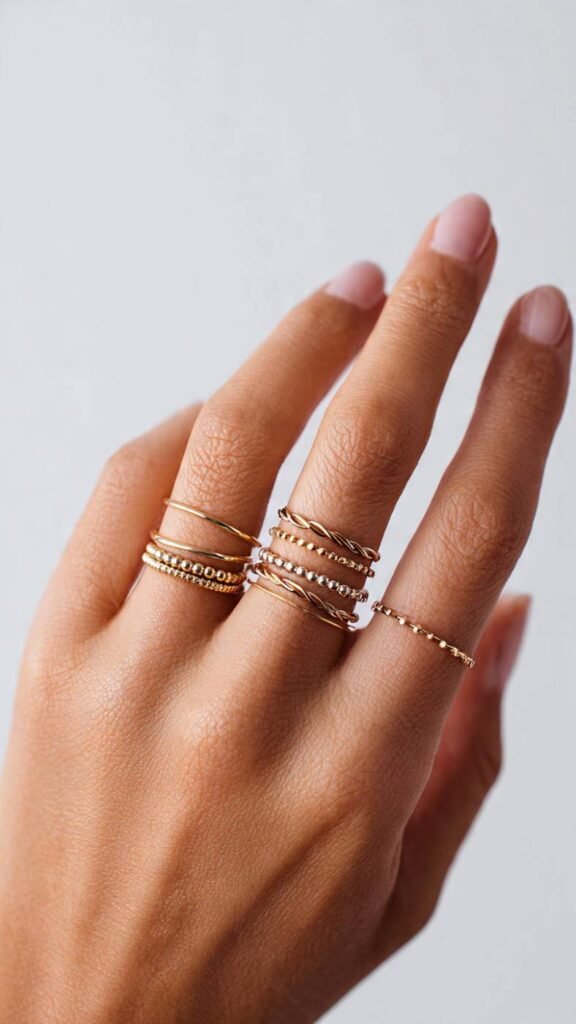
Midi rings sit on the middle section of the finger between the knuckle and the first joint and a set of them stacked together on multiple fingers creates one of the most editorial and fashion-forward jewelry looks you can wear. Making your own set means you can dial in exactly the sizes you need for that above-the-knuckle fit which varies from person to person and is hard to find in stores. Simple thin bands in wire or metal, tiny beaded rings, and delicate twisted wire rings all work beautifully as midi rings and a mixed set of five or six different styles looks incredibly curated.
What It Is: A coordinating set of small-sized rings designed to be worn above the knuckle on the middle phalanges of multiple fingers, made in varied simple styles that work together as a stacked set.
Supplies and Budget: Thin gauge wire 22 or 24 gauge in gold and silver ($8–12), small seed beads ($4–6), elastic cord ($4–6), ring mandrel for sizing ($8–15). Total: $24–$39 makes full set of 6–8 rings
Quick How-To: Measure circumference above knuckle at desired position – this is smaller than your regular ring size. Make varied simple styles: plain wire bands, twisted wire, single bead accents, wrapped wire. Size all rings to the same above-knuckle measurement. Mix metals and styles for the most interesting stacked look.
DIY Tip: Make your midi rings at least a half size smaller than feels comfortable when sliding over the knuckle – they need to be snug enough to stay in position above the knuckle without sliding down, and you can always stretch a wire ring slightly larger but you cannot make it smaller.
8. Stone Setting Ring With Prong Setting Kit
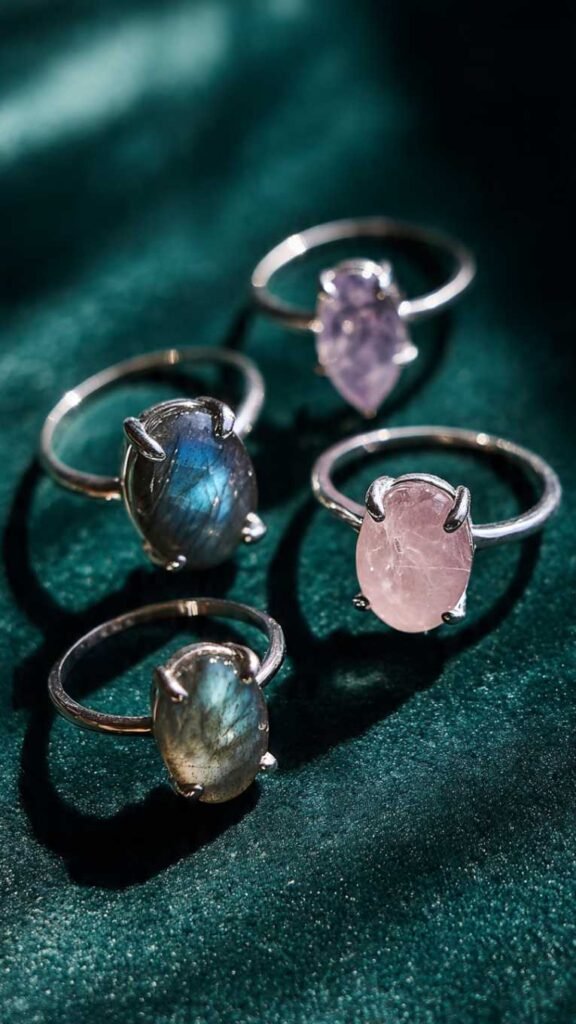
Setting an actual stone in a ring sounds like professional jeweler territory but prong setting kits that come pre-made with the prongs already in place make this genuinely achievable for a home crafter. You choose your stone – a cabochon works best for beginners – select a prong setting that fits it, set the stone into the prongs, and use prong closing pliers or even a wooden dowel to gently push the prongs over the stone to secure it. Attach the setting to a ring blank and you have a ring with a real set stone that looks completely professional.
What It Is: A ring featuring a real or semi-precious stone set into a prong setting kit, attached to a ring blank – using pre-made prong settings to achieve a professional stone-set look without advanced jeweling tools.
Supplies and Budget: Prong setting blanks in various sizes ($8–15 for a pack), cabochon stones or semi-precious stones ($5–15), ring blanks with pad ($6–10), prong pusher tool or wooden dowel ($3–8), jewelry adhesive ($5). Total: $27–$53
Quick How-To: Choose a prong setting that matches your stone diameter. Set stone into prongs and check fit – it should sit level. Use prong pusher tool to gently push each prong over stone edge in opposite pairs – push one, then the one directly opposite, then the others. Check stone is secure. Glue setting to ring blank pad.
DIY Tip: Push prongs down in opposite pairs rather than going around the stone in a circle – doing them in opposite pairs keeps even pressure on the stone and prevents it from shifting sideways as you work, which can crack certain stones if they get pushed unevenly.
9. Fabric and Thread Wrapped Ring
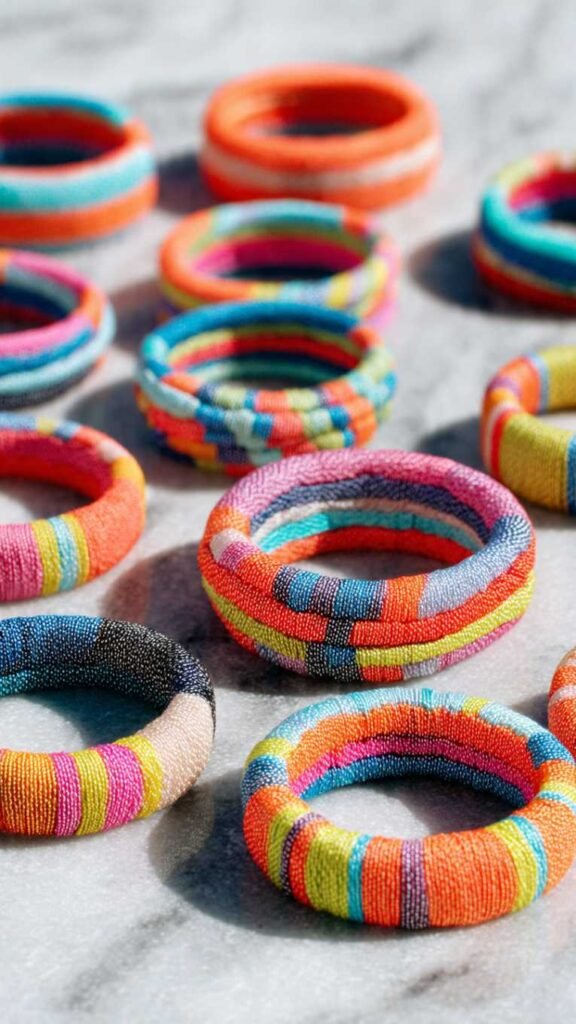
Fabric and thread wrapped rings are so simple they almost feel too easy but the results are genuinely beautiful especially when you choose your colors and patterns thoughtfully. You take a plain metal ring blank or even a simple wire band and wrap it completely in embroidery floss, thin ribbon, or fabric strips in a tight even pattern. The wrapped fabric or thread completely transforms the metal base and you can create stripes, color blocks, or gradient effects by switching colors as you wrap. These are lightweight, comfortable, and add a pop of color and texture to any jewelry stack.
What It Is: A simple ring made by wrapping a plain metal ring blank or wire band completely in embroidery floss, thin ribbon, or fabric strips to create a colorful fabric-covered band ring.
Supplies and Budget: Plain metal ring blanks or wire ($5–8), embroidery floss in multiple colors ($4–8 for a pack), fabric glue or clear nail polish to secure ends ($3–5), scissors. Total: $12–$21 makes many rings
Quick How-To: Secure thread end to ring blank with a dot of fabric glue and let dry. Begin wrapping thread tightly around band with no gaps between wraps. Keep tension even and consistent. Change colors by cutting thread, gluing end down, and starting new color immediately adjacent. Seal final end with fabric glue or clear nail polish.
DIY Tip: Apply a very thin coat of clear nail polish over the finished wrapped ring – this seals the thread so it does not unravel with wear, prevents the colors from bleeding if the ring gets wet, and gives the whole wrapped surface a slightly polished finish that looks more intentional.
10. Nature Inspired Twig and Branch Ring
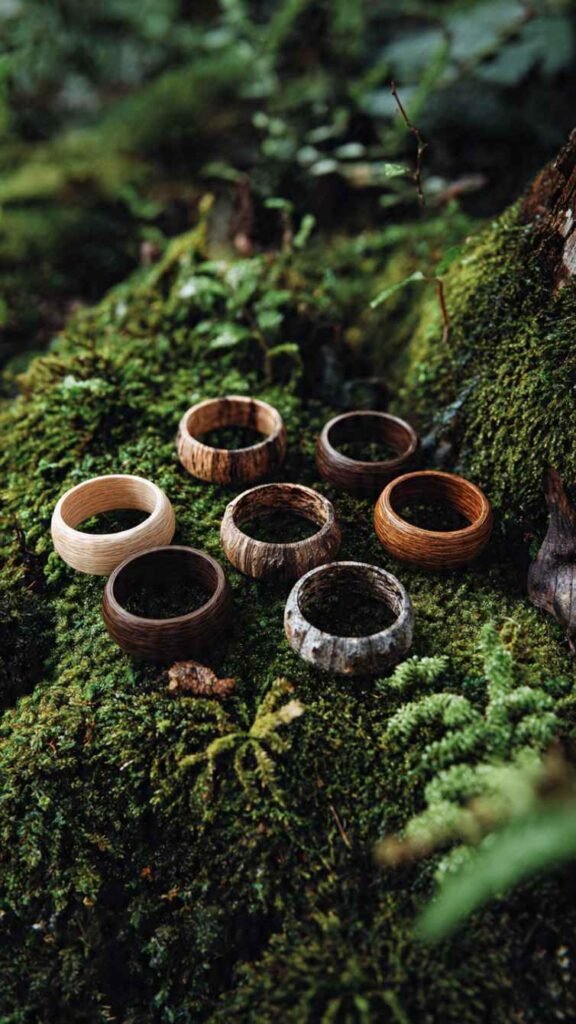
Making a ring from an actual twig or small branch is one of those projects that feels almost meditative and the result has this beautiful organic quality that you simply cannot manufacture. You find a small straight twig of the right diameter, cut it to finger length, drill a small channel through the center, sand it incredibly smooth, and seal it with wood finish or resin for durability. The natural wood grain, the slight variations in color, the organic imperfection of the material – all of it becomes the beauty of the ring. No two will ever look exactly alike which is kind of the whole point.
What It Is: A ring made from a small section of natural twig or branch, drilled through the center, sanded smooth, and sealed with wood finish or clear resin for a completely organic natural wood ring.
Supplies and Budget: Small straight twigs or branches (free from outdoors), small drill and bit ($0 if owned or $15–25), sandpaper in multiple grits ($3–5), wood finish or clear resin ($8–15), wood carving tool optional ($8–12). Total: $14–$57
Quick How-To: Find a twig slightly larger in diameter than your finger. Cut to about half inch length. Mark center and drill through with drill bit sized to your finger. Sand interior channel smooth first. Shape exterior by sanding and optional carving. Sand through grits to 400 minimum. Seal with thin coats of wood finish or clear resin. Sand between coats.
DIY Tip: Soak your twig sections in water for a few hours before drilling – wet wood drills much more cleanly than dry wood, produces less cracking and splitting, and the channel comes out smoother which means less interior sanding to get it comfortable enough to actually wear on your finger.