Can I be honest with you? I avoided watercolor for years because I thought it was one of those things that only actually talented artists could do. Every time I tried it as a kid it turned into a muddy brown mess and I just decided it wasn’t for me. Then a friend showed me she was making the most gorgeous handmade cards with watercolor and I watched her do it and thought – wait, that’s it? That’s all you’re doing? Because it looked so simple and the results were genuinely beautiful.
The thing about watercolor that nobody tells you is that the imperfections are the whole point. The way colors bleed into each other, the soft uneven edges, the little blooms that happen when wet paint meets wet paper – all of that is what makes watercolor look like watercolor. You’re not trying to control it perfectly. You’re kind of working with it and letting it do its thing, and that’s actually really freeing once you stop fighting it.
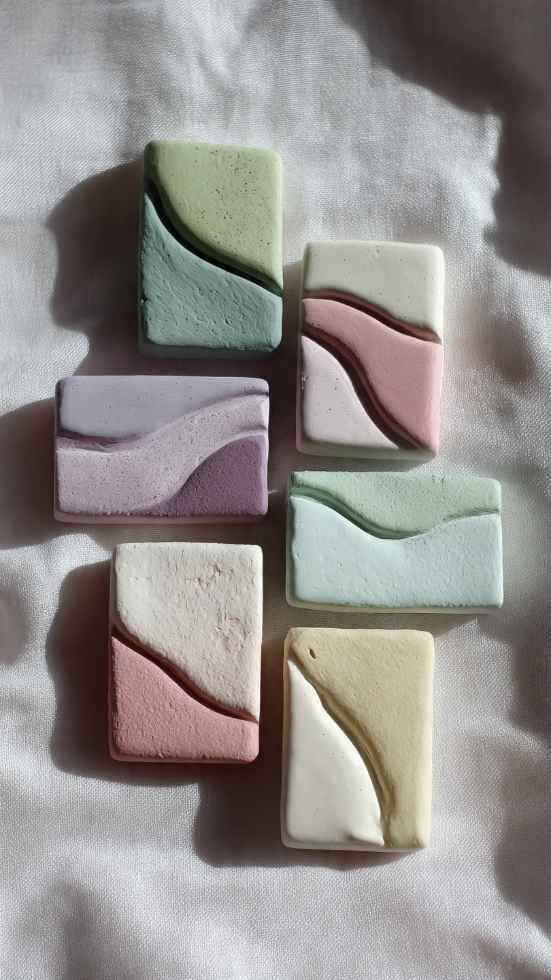
Making cards specifically is such a good entry point into watercolor because the scale is small. You’re not committing to a huge painting. A standard card is about 4 by 6 inches and you can finish one in twenty minutes. If it doesn’t turn out the way you wanted, you just try another one. The paper is cheap, the paints are cheap, and you end up with something genuinely useful – a card you can actually send to someone instead of buying one for six dollars at a drugstore.
These ten ideas go from truly beginner-level (we’re talking wet paper and dropping in color, that’s all) all the way up to slightly more detailed techniques. You don’t need expensive supplies, you don’t need lessons, and you really don’t need to be artistic. You just need to be willing to play around and see what happens.
1. Simple Watercolor Wash Background Cards
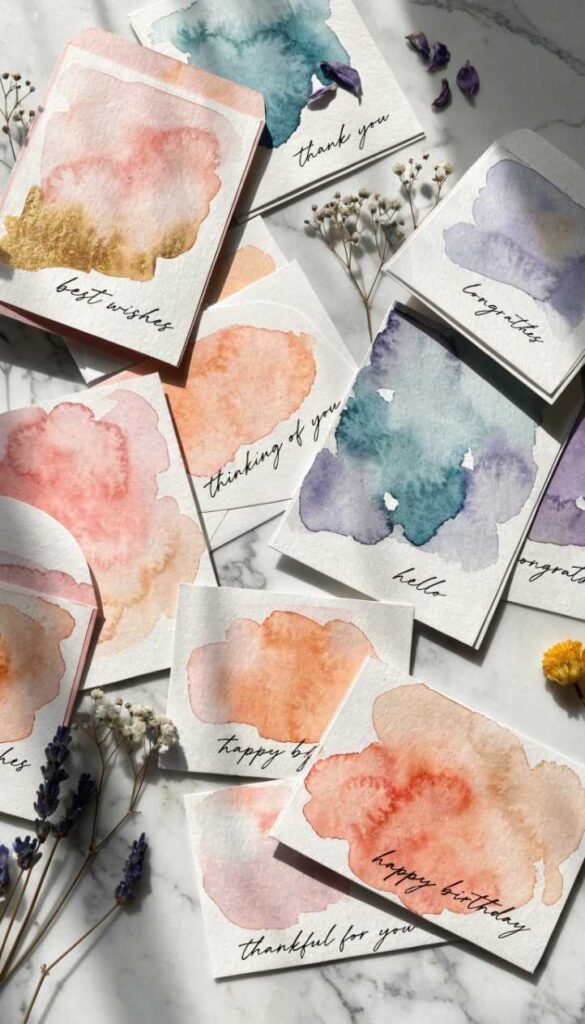
This is the most beginner-friendly watercolor technique there is and honestly the results look so professional that people will think you actually know what you’re doing. You wet the card paper first, then drop in two or three colors and let them spread and blend on their own. You barely touch it – the water does all the work. Once it dries you have this gorgeous soft gradient background that you can add a simple message to with a pen or stamp. These work as birthday cards, thank you cards, just because cards – literally any occasion.
What It Is: Cards made with a simple wet-on-wet watercolor wash background in blended colors, finished with a handwritten or stamped message on top.
Supplies and Budget: Watercolor paper or cards ($8–12), watercolor paints ($8–15), two brushes, water cup, black fine liner pen ($3–5). Total: $19–$32
Quick How-To: Wet the card surface with a clean wet brush. Drop in two colors on opposite ends and watch them blend toward the middle. Tilt card slightly to encourage movement. Let dry completely flat. Write or stamp your message.
DIY Tip: Use cold press watercolor paper rather than regular cardstock – it absorbs water properly so the paint behaves and dries without warping as badly. Hot press is too smooth and regular cardstock buckles badly.
2. Watercolor Floral Wreath Cards
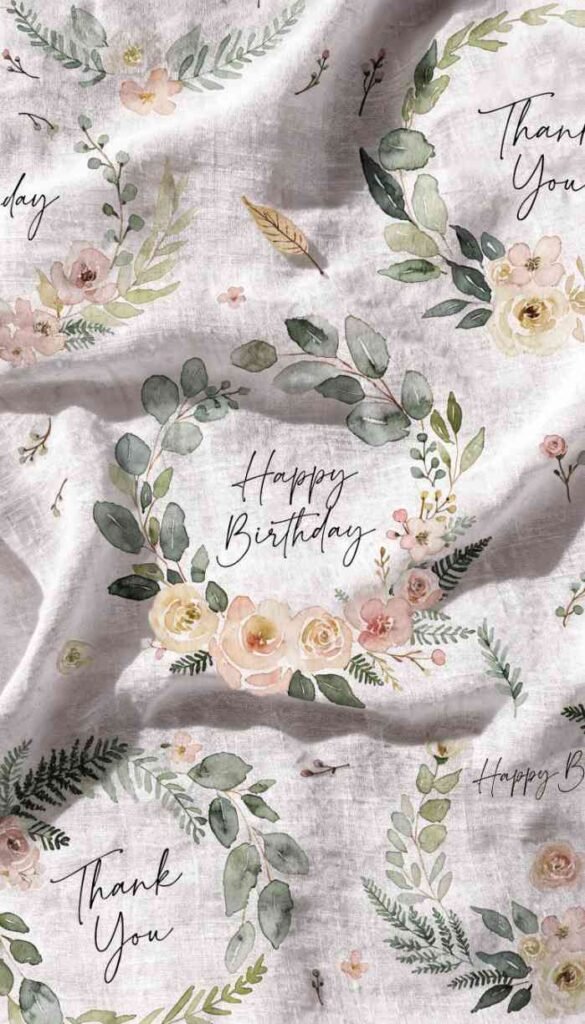
A watercolor floral wreath around a simple message in the middle is one of those card designs that looks impressive and complicated but is actually made up of the simplest individual parts. You paint small loose leaf shapes, tiny dot flowers, and simple petal clusters arranged in a rough circle. Nothing needs to be perfect – the looser and more relaxed the brushwork, the better it actually looks. The key is using a small round brush and not overthinking each little shape. This style of botanical illustration is very forgiving and very fashionable right now.
What It Is: Greeting cards featuring a loose painted watercolor wreath of leaves and simple flowers arranged in a circle around a central message or blank space.
Supplies and Budget: Watercolor paper cards ($8–12), watercolor paints in greens and florals ($8–15), small round brush size 2 or 3 ($5–8), fine liner pen ($3–5). Total: $24–$40
Quick How-To: Lightly pencil a circle as a guide. Paint small leaf shapes around the circle using a round brush – press down for wide part, lift for tip. Add dot flowers and simple petal shapes. Let dry. Erase pencil line. Add message in center.
DIY Tip: Paint all your green leaves first and let them dry before adding flowers on top or beside them – layering wet colors next to each other makes them bleed together and you lose the definition between elements.
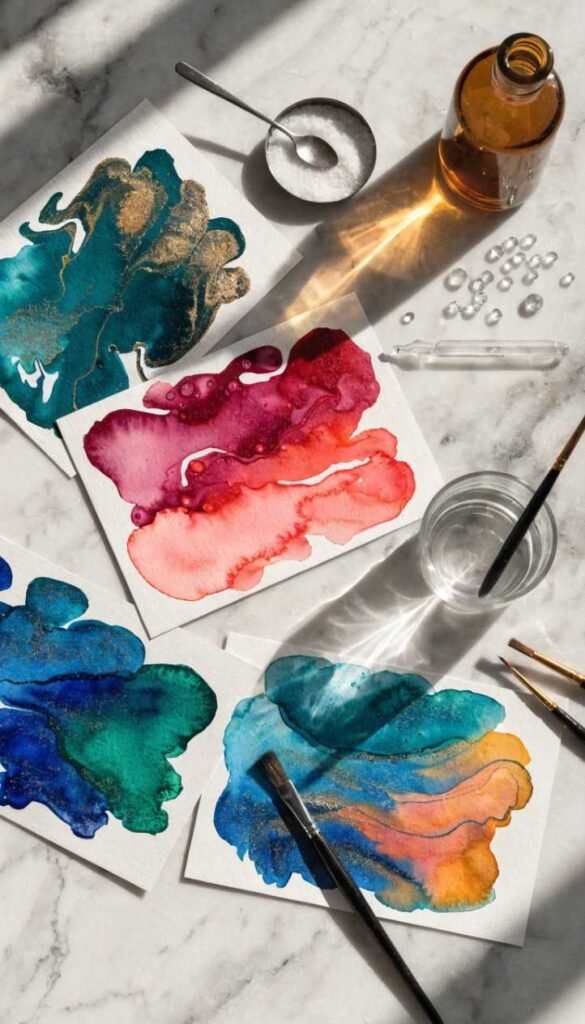
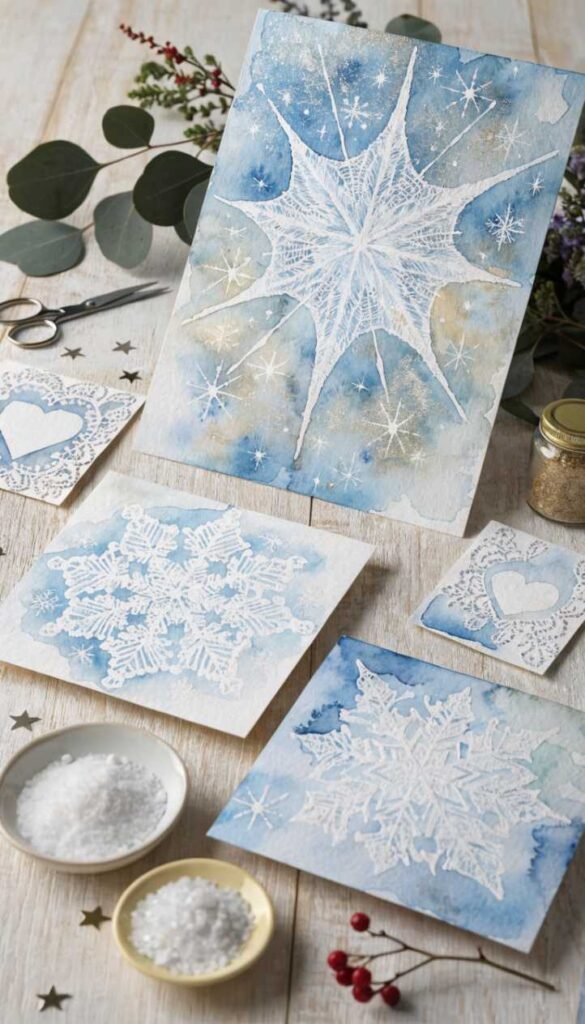
3. Salt Texture Effect Cards
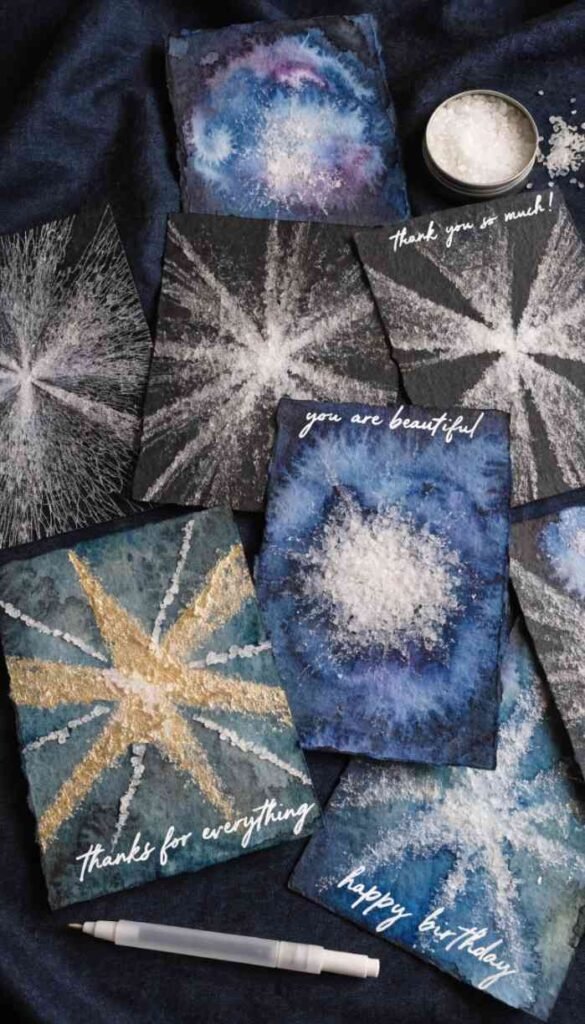
This one involves a little kitchen science and it feels like a magic trick every single time. You paint a watercolor wash onto wet paper, and then while it’s still wet you sprinkle table salt over the surface. The salt absorbs moisture in little bursts as it dissolves and leaves behind the most beautiful starburst and snowflake patterns. Every card comes out completely unique and the texture looks like something between a galaxy and a snowstorm. These make incredible winter holiday cards or birthday cards – honestly they just look like you bought them from an expensive stationery shop.
What It Is: Watercolor cards with unique organic starburst texture patterns created by sprinkling table salt onto wet watercolor paint and letting it absorb the moisture as it dries.
Supplies and Budget: Watercolor paper cards ($8–12), watercolor paints ($8–15), table salt (already in your kitchen), brushes, white gel pen ($3–4). Total: $19–$31
Quick How-To: Paint a generous wet wash of color on your card. While still very wet, sprinkle table or sea salt across the surface. Leave completely undisturbed until fully dry – do not touch it. Brush off dried salt crystals gently. Add message with white gel pen.
DIY Tip: The wetter the paint when you add the salt, the bigger and more dramatic the pattern. If the paint has already started to dry before you add salt, the effect won’t work as well so have your salt ready before you even start painting.
4. Watercolor Ombre Stripe Cards
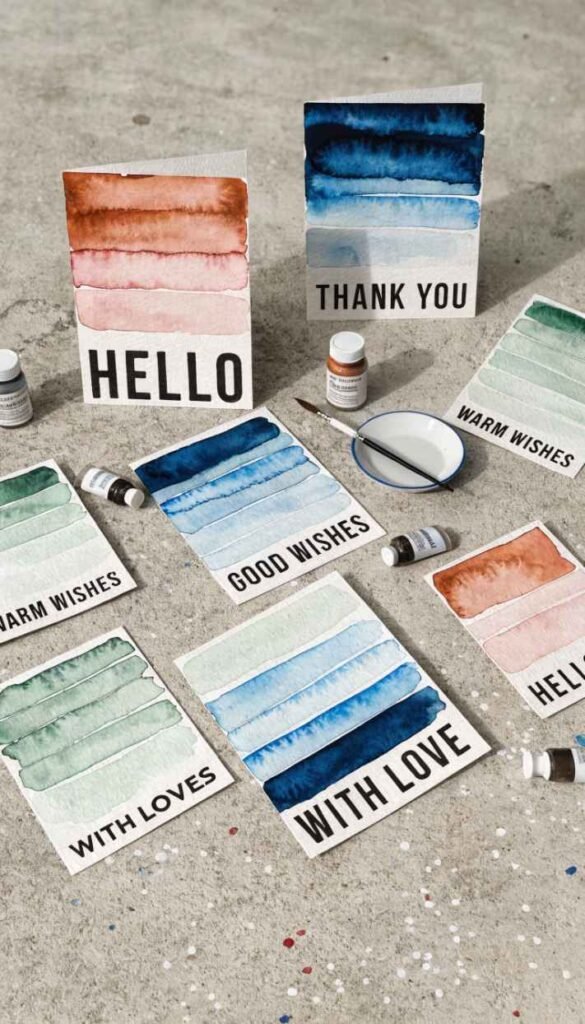
These are clean, modern, and really satisfying to make because you can see the card coming together stripe by stripe. You paint horizontal bands of color across the card, working quickly so each stripe is still slightly wet when the next one goes on – this creates that soft blended edge between colors. You can do one color going from dark to light, or transition through multiple colors like a sunset. Add a simple stamped or hand lettered message and you have something that looks very graphic design-y and polished. Great for people who like a more modern aesthetic over something floral.
What It Is: Cards painted with horizontal watercolor stripes that blend softly at the edges, creating an ombre or gradient effect in one or multiple colors.
Supplies and Budget: Watercolor paper cards ($8–12), watercolor paints ($8–15), flat or medium round brush, masking tape optional ($3), fine liner or stamp ($3–5). Total: $22–$35
Quick How-To: Mix a light and dark version of your color. Paint top stripe with darkest tone. Rinse brush slightly, paint next stripe immediately below while first is still wet. Continue adding water to lighten each stripe as you move down. Let dry flat.
DIY Tip: Tape the edges of your card with painter’s tape before painting for perfectly clean borders – peel it off while the paint is still slightly damp, not fully dry, so the paper doesn’t tear.
5. Loose Watercolor Landscape Cards
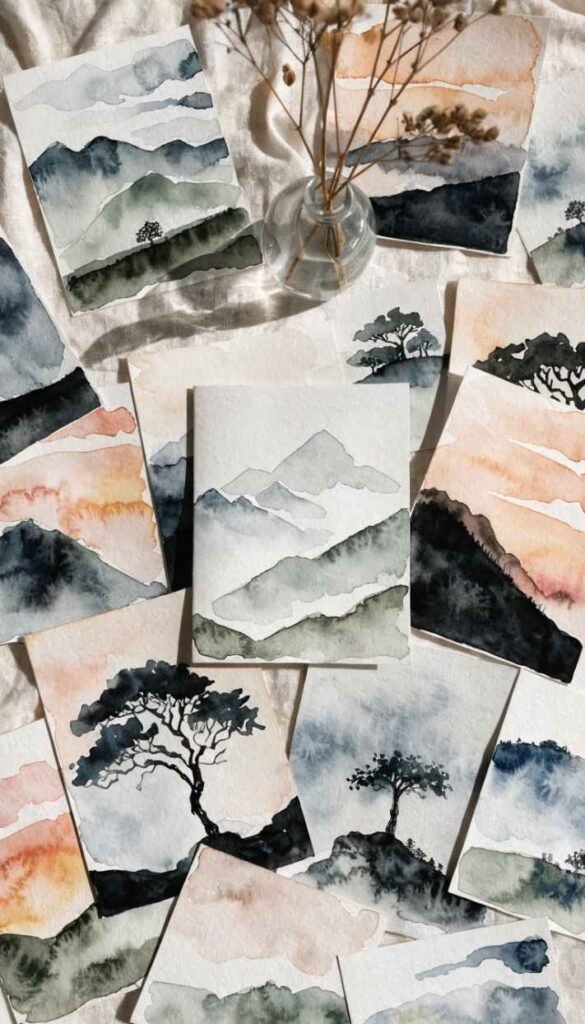
A tiny landscape on a card sounds intimidating but a loose minimalist landscape is genuinely one of the easiest things to paint in watercolor. You’re basically painting colored shapes. A pale wash for the sky, a darker strip for distant hills, maybe a simple tree silhouette or two. The trick is keeping it loose and impressionistic – you’re not trying to paint a realistic scene, you’re capturing a feeling. Misty mountains, a simple sunset, rolling hills, a lone tree. These cards feel very peaceful and personal and they’re the kind that people frame instead of throwing away.
What It Is: Simple minimalist watercolor landscape cards featuring loose painted scenes – mountains, sunsets, fields, and tree silhouettes in soft layered washes.
Supplies and Budget: Watercolor paper cards ($8–12), watercolor paints ($8–15), medium and small round brushes, fine liner pen ($3–5). Total: $19–$32
Quick How-To: Start with lightest color for sky as a wet wash. Let it dry slightly, then add a slightly darker middle ground strip below. Add darkest elements like tree silhouettes last with a small brush. Keep shapes simple and painterly.
DIY Tip: Work in layers and let each layer dry before adding the next one – in landscapes you always paint back to front, lightest to darkest, distant to close. Rushing this and painting wet on wet makes everything muddy.
6. Watercolor and White Ink Floral Cards
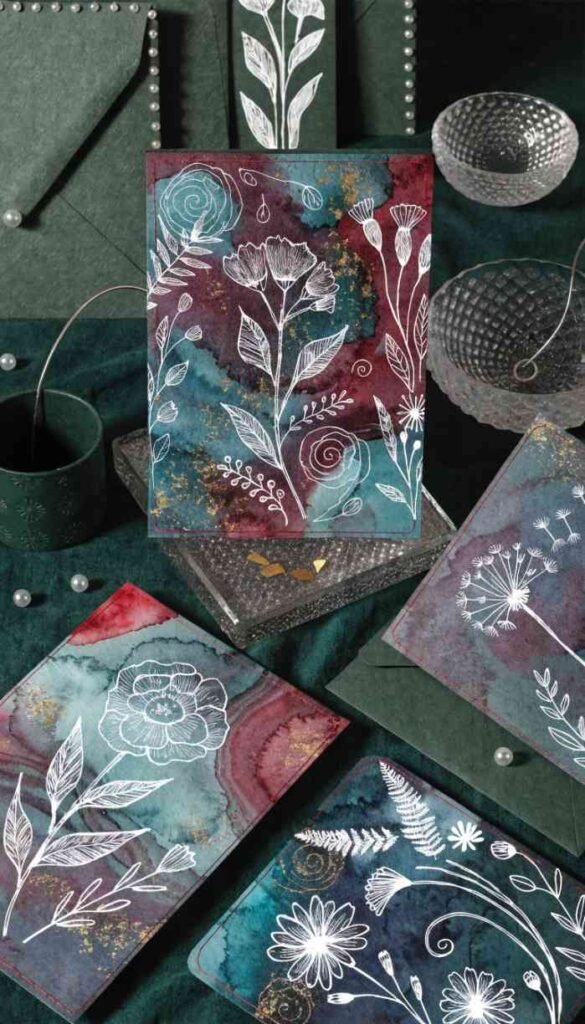
This combination of watercolor backgrounds with white ink or gel pen details drawn on top is genuinely beautiful and it’s way easier than it looks. You start with a loose, colorful watercolor wash as your background – it can be messy and imperfect because you’re going to cover parts of it anyway. Then once it dries you use a white gel pen or white ink to draw simple flower and leaf outlines on top. The white over color creates this gorgeous contrast and the hand-drawn lines add a completely different texture to the watercolor background beneath.
What It Is: Cards combining a loose watercolor wash background with white gel pen or ink illustrations drawn on top after the paint dries.
Supplies and Budget: Watercolor paper cards ($8–12), watercolor paints ($8–15), white gel pen ($4–6), optional fine liner in black ($3). Total: $23–$36
Quick How-To: Paint a colorful wash background and let it dry completely – this is important, the background must be bone dry or the white pen will smear. Draw simple flower outlines, leaves, and botanical details on top with white gel pen. Add message in corner.
DIY Tip: Shake your white gel pen well and test it on scrap paper before drawing on your card – white gel pens can get clogged and skip, and you don’t want that happening mid-flower on a card you just spent twenty minutes painting.
7. Alcohol Ink Effect Watercolor Cards
Alcohol ink and watercolor aren’t exactly the same thing but you can get a very similar gorgeous fluid art look using just watercolor with a few tricks – mainly using a straw to blow wet paint across the surface or tilting and tipping the card while paint is wet. The colors spread in these wild organic patterns that look like poured ink or marbled paper. You have almost no control over where things go and that’s the entire appeal. Every card comes out looking like an abstract painting and they’re some of the most visually striking cards in this whole list.
What It Is: Cards with abstract fluid art patterns created by tilting, blowing through a straw, or dropping water into wet watercolor paint to create organic flowing designs.
Supplies and Budget: Watercolor paper cards ($8–12), watercolor paints in bold colors ($8–15), straw, pipette or dropper optional ($3), fine liner pen ($3–5). Total: $22–$35
Quick How-To: Drop generous puddles of two or three bold colors onto wet paper. Immediately tilt the card to let colors run and blend. Use a straw to blow paint in different directions. Add drops of clean water for blooms. Let dry flat. Add minimal message.
DIY Tip: Work with the card inside a tray or on a surface that can get messy – this technique drips and runs off the edges. Also use more paint than you think you need because thin washes don’t move and flow as dramatically as generous puddles.
8. Watercolor Resist with Wax or Masking Fluid Cards
This technique feels like such a cheat code once you discover it. You draw or write on your card first with a white wax crayon or masking fluid – the paint won’t stick to those areas. Then you paint right over everything with watercolor and watch your hidden drawing appear as the paint covers the surface. The revealed lines stay crisp white against the painted background. You can write a secret message, draw a pattern, make snowflakes, hearts, stars – anything. It’s the kind of technique that makes people say “how did you do that” when they see the finished card.
What It Is: Cards made using wax crayon or masking fluid to draw designs that resist watercolor paint, revealing white patterns against a painted background.
Supplies and Budget: Watercolor paper cards ($8–12), white wax crayon ($2–3) or masking fluid ($6–8), watercolor paints ($8–15), brushes. Total: $18–$38
Quick How-To: Draw your design firmly with white wax crayon or paint masking fluid and let it dry. Paint over the entire card with watercolor wash. Watch as your design shows through. For masking fluid, peel it off after drying to reveal crisp white lines beneath.
DIY Tip: Press firmly with the wax crayon – a light hand means inconsistent resist and some areas will still absorb paint. You want a solid waxy coat over every part of your design for clean results.
9. Simple Watercolor Animal Portrait Cards
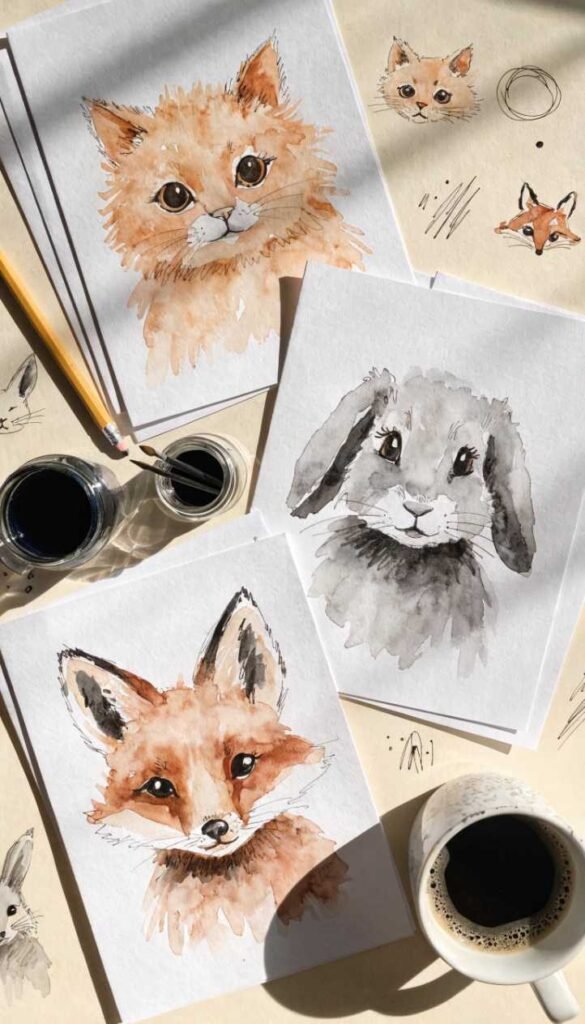
Loose watercolor animal faces are incredibly charming and much easier than you’d think because you’re painting them in a simple, rounded, almost cartoonish style rather than trying for realistic portraits. A round head, simple ears, dot eyes, a little nose – that’s basically your cat or dog or rabbit face. Add soft washes of the right colors and a simple background wash and it reads immediately as the animal you intended. These are incredibly sweet as birthday cards for pet lovers or as thank you cards. Kids go absolutely wild for them and adults secretly do too.
What It Is: Simple rounded watercolor animal face illustrations on cards – cats, dogs, rabbits, foxes, and bears are popular – painted in a loose, sweet, modern style.
Supplies and Budget: Watercolor paper cards ($8–12), watercolor paints ($8–15), small round brush size 2, fine liner pen ($3–5) for outlines. Total: $19–$32
Quick How-To: Lightly sketch a round head shape in pencil. Paint large color areas first – head, ears. Let dry, then add details like eye patches, nose, inner ear color. Once fully dry, add fine liner outlines and dot details. Erase pencil guides.
DIY Tip: Keep your animal’s face round and simple – the cuter these look, the less detail they actually have. Resist the urge to add too many lines or details because simplicity is what makes this style so appealing.
10. Galaxy and Night Sky Watercolor Cards
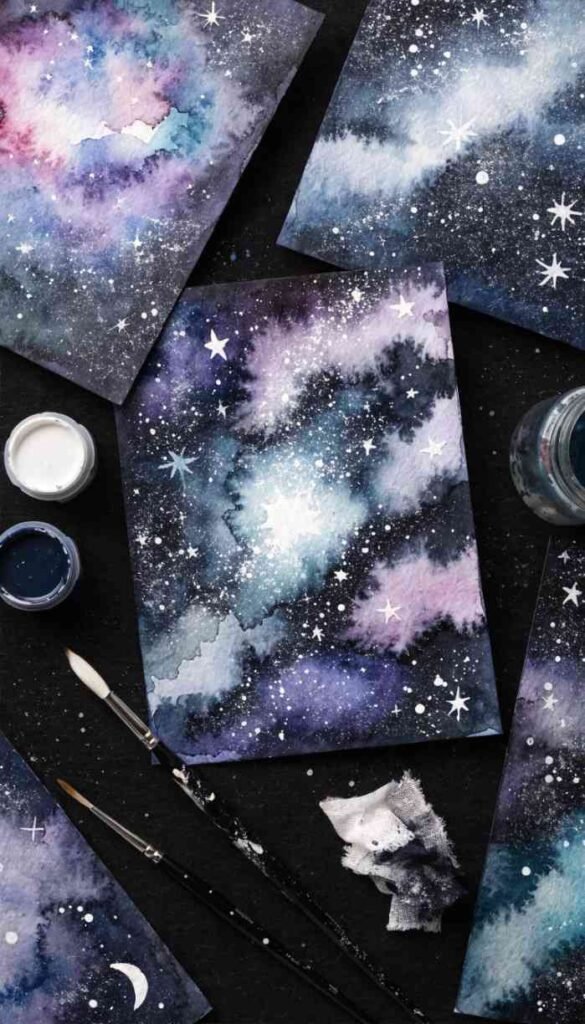
Dark backgrounds with starry night effects are striking, dramatic, and surprisingly easy to do with watercolor on dark paper or by building up dark paint layers. You paint a deep background in navy, purple, and black, then flick or splatter white paint or white ink across the surface for stars. Add soft glowing spots of lighter color for nebula effects. The contrast between the dark cosmos background and bright white stars is genuinely stunning and these cards feel special in a way that bright cheerful cards don’t – they have this beautiful mysterious quality that people really respond to.
What It Is: Deep-toned watercolor cards featuring galaxy and night sky effects – dark layered backgrounds with splattered white star details and soft nebula color blooms.
Supplies and Budget: Watercolor paper cards ($8–12), watercolor paints in darks and purples ($8–15), white gouache or white acrylic ($4–6), old toothbrush for splattering, white gel pen ($4). Total: $24–$37
Quick How-To: Paint the card in deep navy and purple washes, letting colors blend wet on wet. Add soft spots of lighter pink or teal for nebula effect. Let dry completely. Load an old toothbrush with white gouache and flick your thumb across it over the card to splatter stars. Add larger stars with white gel pen.
DIY Tip: Practice your toothbrush splatter technique on scrap paper before doing it on your actual card – the distance you hold the brush from the paper and how loaded with paint it is both affect the star size dramatically.