Sugar cookies are my comfort baking go-to for basically everything – birthday parties, holidays, random Tuesday afternoons when I need something sweet, or just because. There’s something so pure and perfect about a good sugar cookie that never goes out of style, no matter how trendy other desserts get. These 10 sugar cookie recipe ideas cover every texture and flavor variation you could possibly want, from soft and pillowy to perfectly crisp, plain to fancy, so you’ll always have the right sugar cookie for any occasion.
The Classic Soft Sugar Cookies are what I grew up making with my mom – simple, buttery, and absolutely perfect. The Cut-Out Sugar Cookies are essential for holiday baking when you need shapes and decorating fun. The Chewy Bakery-Style Sugar Cookies are those thick, soft cookies with crackly tops that taste like they came from an expensive bakery. The Frosted Sugar Cookies take things up a notch with that sweet, creamy topping everyone loves. The Almond Sugar Cookies have this subtle nutty flavor that’s so elegant, while the Brown Sugar Cookies bring caramel-like depth that’s absolutely addictive. The Cream Cheese Sugar Cookies are unbelievably soft and tangy, and the bright Lemon Sugar Cookies are perfect for spring and summer. The fun Funfetti Sugar Cookies make every day feel like a celebration with those colorful sprinkles baked right in, and the Vanilla Bean Sugar Cookies are pure, simple elegance with real vanilla bean specks throughout.
What makes sugar cookies so special is their versatility – they’re blank canvases for decorating, perfect on their own, amazing with coffee or milk, and loved by literally everyone. They’re easy enough for beginner bakers but special enough to impress, and honestly, a good sugar cookie recipe is something every baker needs in their collection!
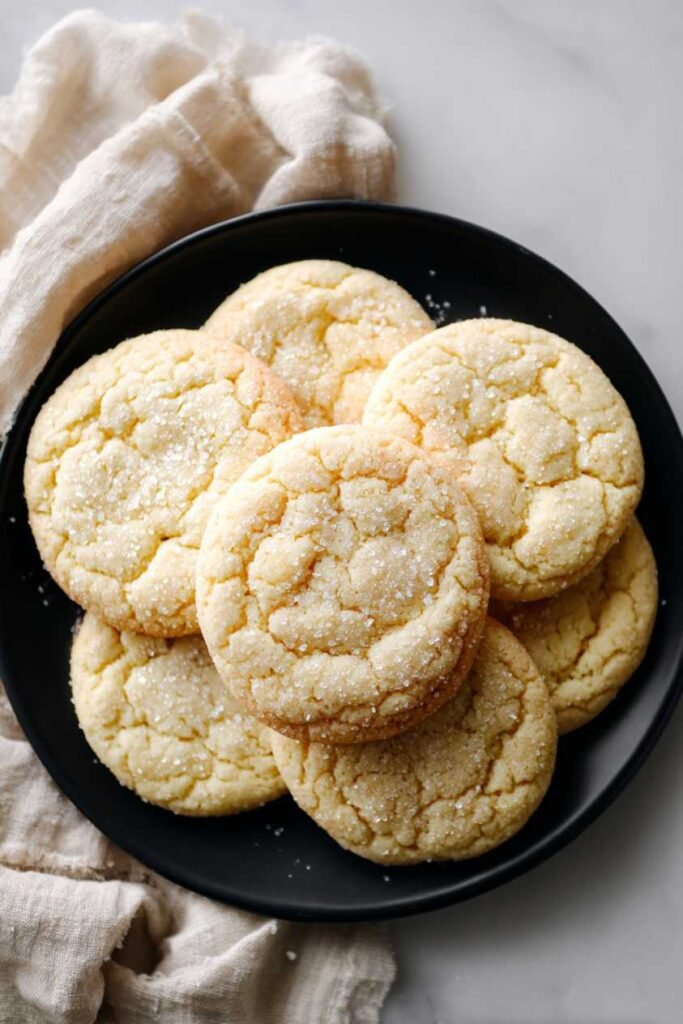
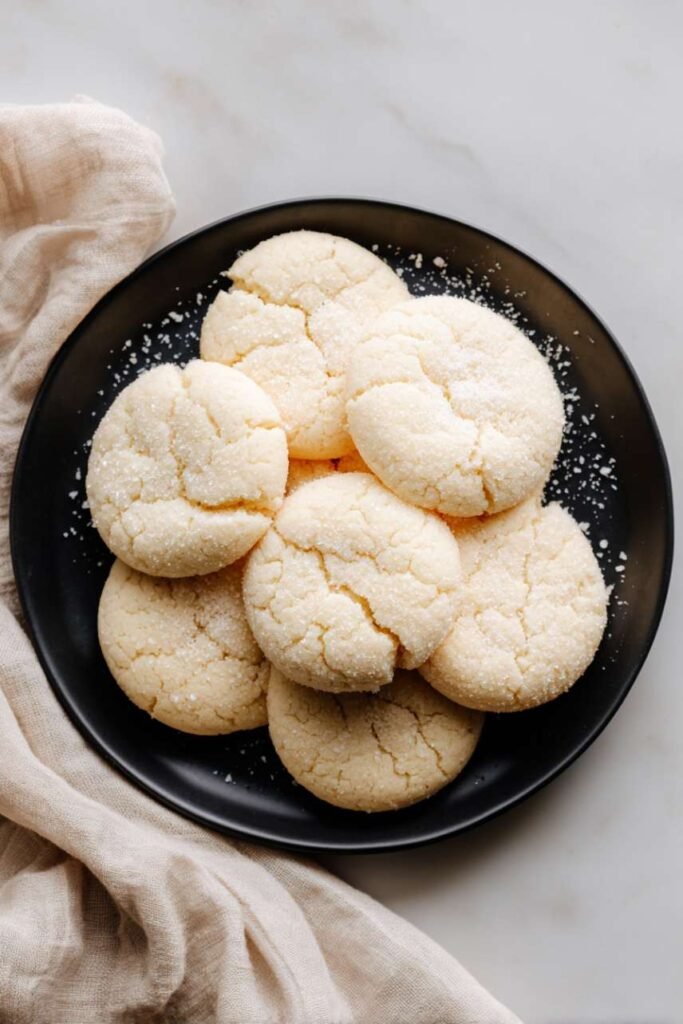
1. Classic Soft Sugar Cookies
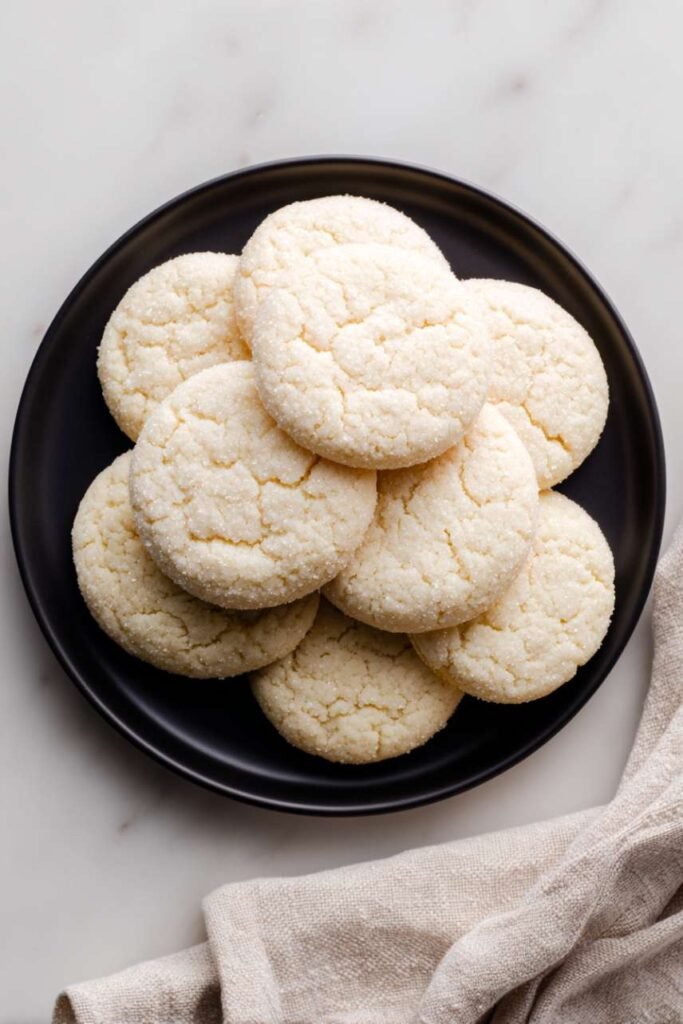
Classic soft sugar cookies are the ultimate comfort cookie with their tender, melt-in-your-mouth texture and sweet vanilla flavor. The combination of butter, sugar, and just the right amount of flour creates these perfectly soft cookies that stay tender for days. I grew up making these cookies with my grandmother and they still remind me of home every time I bake them. The key is not overbaking – you want to remove them from the oven when they still look slightly underdone. This has become my most-made cookie recipe because they’re foolproof, versatile, and universally loved by everyone. Every bite delivers that perfect soft, sweet cookie experience that brings back childhood memories.
Ingredients
- 2¾ cups all-purpose flour
- 1 teaspoon baking soda
- ½ teaspoon baking powder
- ½ teaspoon salt
- 1 cup (2 sticks) unsalted butter, softened
- 1½ cups granulated sugar
- 1 large egg
- 1 teaspoon vanilla extract
- ½ teaspoon almond extract (optional)
- Additional sugar for rolling
Steps
Step 1: Preheat your oven to 350°F and line baking sheets with parchment paper. In a medium bowl, whisk together the flour, baking soda, baking powder, and salt. Set aside. The combination of baking soda and baking powder creates the perfect soft texture. In a large bowl using an electric mixer, cream together the softened butter and sugar for three to four minutes until light and fluffy. The mixture should be pale and airy – this creaming process is crucial for tender cookies.
Step 2: Add the egg, vanilla extract, and almond extract if using to the butter mixture. Beat until well combined and smooth. The mixture should be creamy and homogeneous. Gradually add the dry ingredients to the wet ingredients, mixing on low speed until just combined. Don’t overmix – mix just until you no longer see streaks of flour. Overmixing develops gluten and makes cookies tough instead of tender.
Step 3: Cover the dough with plastic wrap and refrigerate for at least thirty minutes or up to two hours. Chilling is important – it prevents the cookies from spreading too much and helps them maintain their soft, thick texture. If you skip this step, your cookies will be flatter and potentially crispy instead of soft. The chilled dough is also easier to handle and shape.
Step 4: Once chilled, scoop the dough using a cookie scoop or tablespoon into balls about 1½ tablespoons each. Roll each ball between your palms to make it smooth and round. Roll each dough ball in granulated sugar to coat completely. The sugar coating creates a subtle crunch on the outside while the inside stays soft. Place the sugar-coated balls on the prepared baking sheets about two inches apart.
Step 5: Bake for eight to ten minutes until the edges are just barely set but the centers still look soft and slightly underbaked. This is crucial – they should look puffy and pale, not golden brown. Let the cookies cool on the baking sheet for five minutes before transferring to a wire rack. They’ll firm up as they cool but maintain that soft, tender texture. These classic soft sugar cookies are perfectly tender with a sweet, buttery flavor. The soft texture stays for days when stored in an airtight container. They’re simple, comforting, and absolutely delicious.
Prep Time: 15 minutes (plus 30 minutes chilling)
Baking Time: 10 minutes per batch
Servings: 36 cookies
2. Cut-Out Sugar Cookies
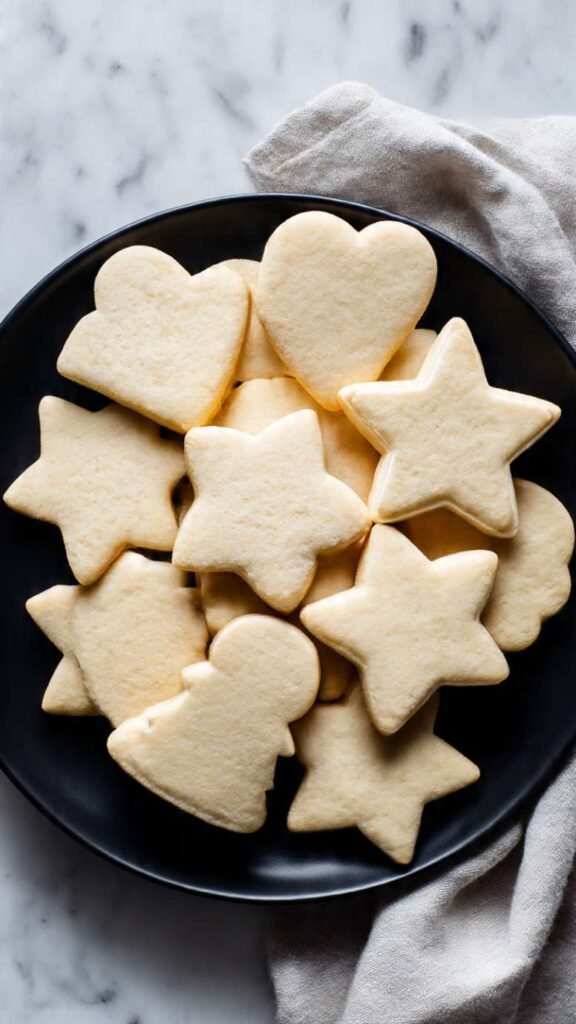
Cut-out sugar cookies are perfect for decorating with their firm texture that holds intricate shapes beautifully. The dough is specifically formulated to not spread during baking so your shapes stay perfect. I developed this recipe after years of frustration with cookies that lost their shape. The secret is extra flour and thorough chilling which creates cookies that maintain sharp edges. This has become my essential holiday recipe because these cookies are perfect for decorating and gifting. Every shape comes out crisp and perfect, ready for royal icing or buttercream.
Ingredients
- 3 cups all-purpose flour
- 1½ teaspoons baking powder
- ½ teaspoon salt
- 1 cup (2 sticks) unsalted butter, softened
- 1 cup granulated sugar
- 1 large egg
- 2 teaspoons vanilla extract
- ½ teaspoon almond extract
For royal icing (optional):
- 4 cups powdered sugar
- 3 tablespoons meringue powder
- 6-8 tablespoons water
- Food coloring as desired
Steps
Step 1: In a medium bowl, whisk together the flour, baking powder, and salt. The higher flour ratio is what helps these cookies hold their shape. In a large bowl, cream the softened butter and sugar for three to four minutes until light and fluffy. Add the egg, vanilla extract, and almond extract. Beat until well combined and smooth. The almond extract enhances the flavor and is traditional for cut-out cookies.
Step 2: Gradually add the dry ingredients to the wet ingredients, mixing on low speed until a dough forms. The dough will be thick and slightly crumbly at first, but keep mixing until it comes together. Don’t add liquid – it should come together as you mix. Divide the dough in half and shape each half into a flat disc. Wrap each disc tightly in plastic wrap and refrigerate for at least two hours or overnight. This chilling is absolutely essential for cut-out cookies.
Step 3: When ready to bake, preheat your oven to 350°F and line baking sheets with parchment paper. Remove one disc of dough from the refrigerator and let it sit at room temperature for five to ten minutes to soften slightly. On a lightly floured surface, roll the dough to ¼ inch thickness. Use as little flour as possible – too much makes cookies dry. Roll from the center outward for even thickness.
Step 4: Cut shapes using cookie cutters, cutting them as close together as possible to minimize scraps. Transfer cut shapes to the prepared baking sheets using a thin spatula, spacing them about one inch apart. These cookies don’t spread much. Re-roll scraps only once – multiple re-rollings make tough cookies. Bake for eight to ten minutes until the edges are just barely starting to turn golden. Don’t overbake – they should be pale with just a hint of color.
Step 5: Let the cookies cool on the baking sheet for five minutes, then transfer to a wire rack to cool completely before decorating. These cookies must be completely cool or the icing will melt. For royal icing, whisk together powdered sugar, meringue powder, and water until smooth and the desired consistency. Divide into bowls and add food coloring. Decorate cooled cookies using piping bags or squeeze bottles. Let icing dry completely before stacking, about four to six hours. These cut-out sugar cookies hold their shape perfectly with crisp edges ideal for decorating. The firm texture makes them perfect for intricate designs and royal icing decoration. They’re beautiful, delicious, and perfect for any celebration.
Prep Time: 20 minutes (plus 2 hours chilling)
Baking Time: 10 minutes per batch
Servings: 36-48 cookies depending on cutter size
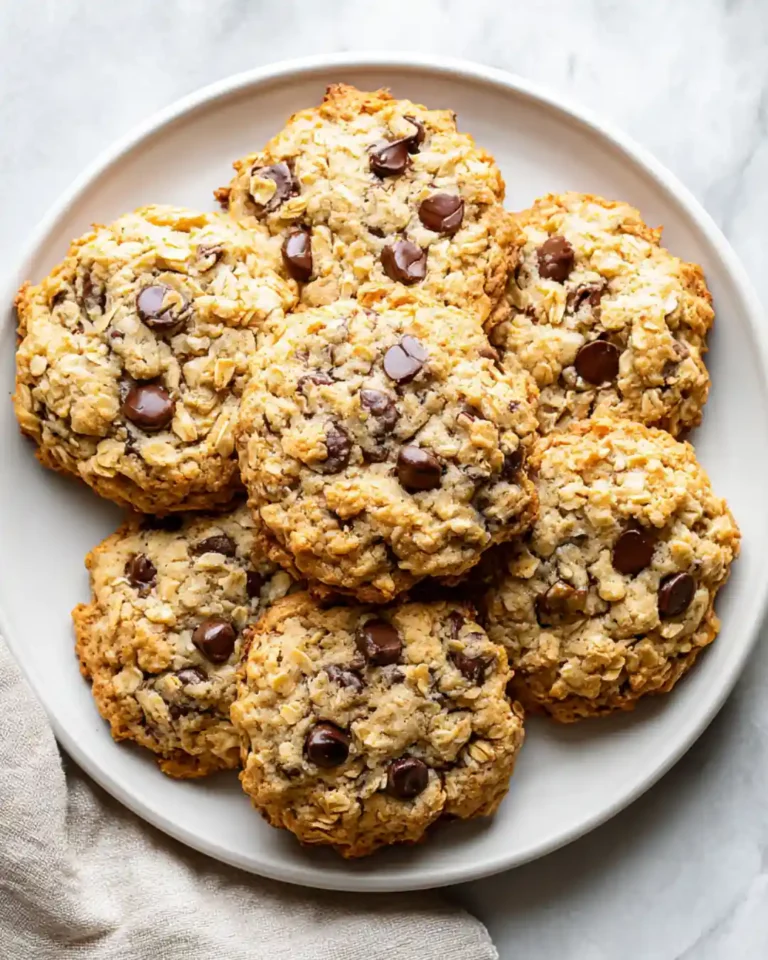
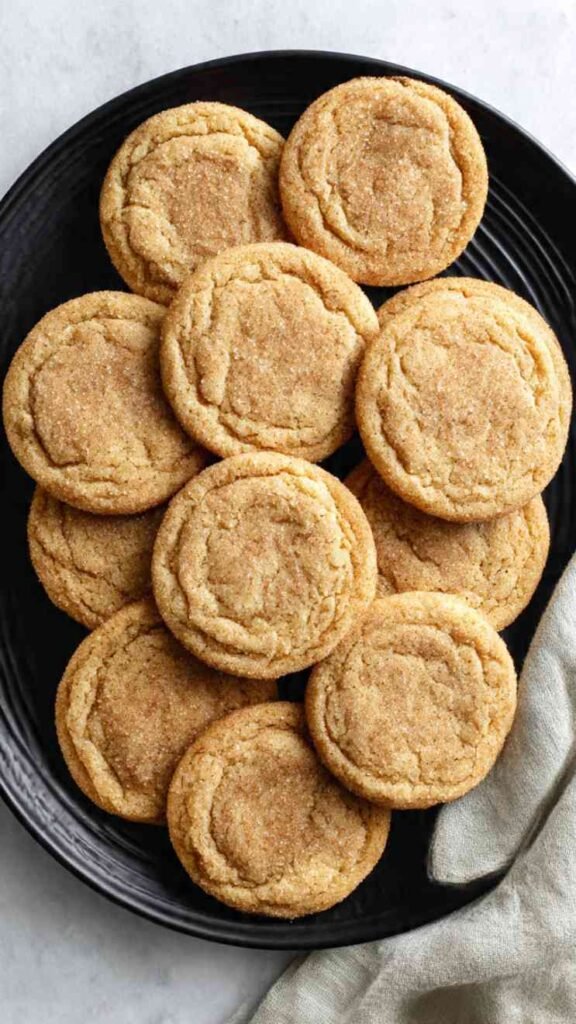
3. Chewy Bakery-Style Sugar Cookies
Chewy bakery-style sugar cookies are thick, soft, and have that signature crackled top from rolling in sugar. The combination of butter and shortening creates the perfect chewy texture that bakeries are famous for. I created this recipe to recreate those amazing oversized cookies from my favorite bakery. The secret is using both butter for flavor and shortening for texture, plus rolling in coarse sugar. This has become my most requested recipe because these cookies stay incredibly soft and chewy for days. The thick, substantial texture makes them feel special and indulgent.
Ingredients
- 2¾ cups all-purpose flour
- 1 teaspoon baking soda
- ½ teaspoon baking powder
- ½ teaspoon salt
- ½ cup (1 stick) unsalted butter, softened
- ½ cup vegetable shortening
- 1¼ cups granulated sugar
- ½ cup powdered sugar
- 1 large egg
- 1 large egg yolk
- 2 teaspoons vanilla extract
- ½ cup coarse decorating sugar for rolling
Steps
Step 1: Preheat your oven to 350°F and line baking sheets with parchment paper. In a medium bowl, whisk together the flour, baking soda, baking powder, and salt. Set aside. In a large bowl using an electric mixer, cream together the softened butter, shortening, granulated sugar, and powdered sugar for four to five minutes until very light and fluffy. The extended creaming time incorporates air for thick, chewy cookies.
Step 2: Add the whole egg, egg yolk, and vanilla extract to the butter mixture. Beat until well combined and smooth. The extra egg yolk is the secret to ultra-chewy cookies – it adds fat and richness without making them cakey. Add the dry ingredients and mix on low speed until just combined. The dough will be thick and slightly sticky. Cover and refrigerate for at least one hour or up to overnight. Chilling is essential for thick cookies that don’t spread.
Step 3: Once chilled, let the dough sit at room temperature for ten minutes. Place the coarse decorating sugar in a shallow bowl. Scoop the dough using a large cookie scoop (about ¼ cup) and roll into balls between your palms. The large size is what makes these bakery-style. Roll each ball generously in the coarse sugar, coating completely. The coarse sugar creates that signature sparkly, crackled appearance.
Step 4: Place the sugar-coated balls on prepared baking sheets about three inches apart. These cookies are large and need room. Don’t flatten them – you want them tall going into the oven for maximum thickness. Bake for eleven to thirteen minutes until the edges are set and lightly golden but the centers still look soft and puffy. They’ll look underbaked – this is correct.
Step 5: Let the cookies cool on the baking sheet for ten minutes. They’ll deflate slightly and set as they cool but maintain incredible chewiness. Transfer to a wire rack to cool completely. These chewy bakery-style sugar cookies are thick, soft, and have that perfect crackled top. The combination of butter and shortening creates amazing texture while the coarse sugar adds sparkle and crunch. They’re bakery-quality cookies you can make at home.
Prep Time: 15 minutes (plus 1 hour chilling)
Baking Time: 13 minutes per batch
Servings: 18 large cookies
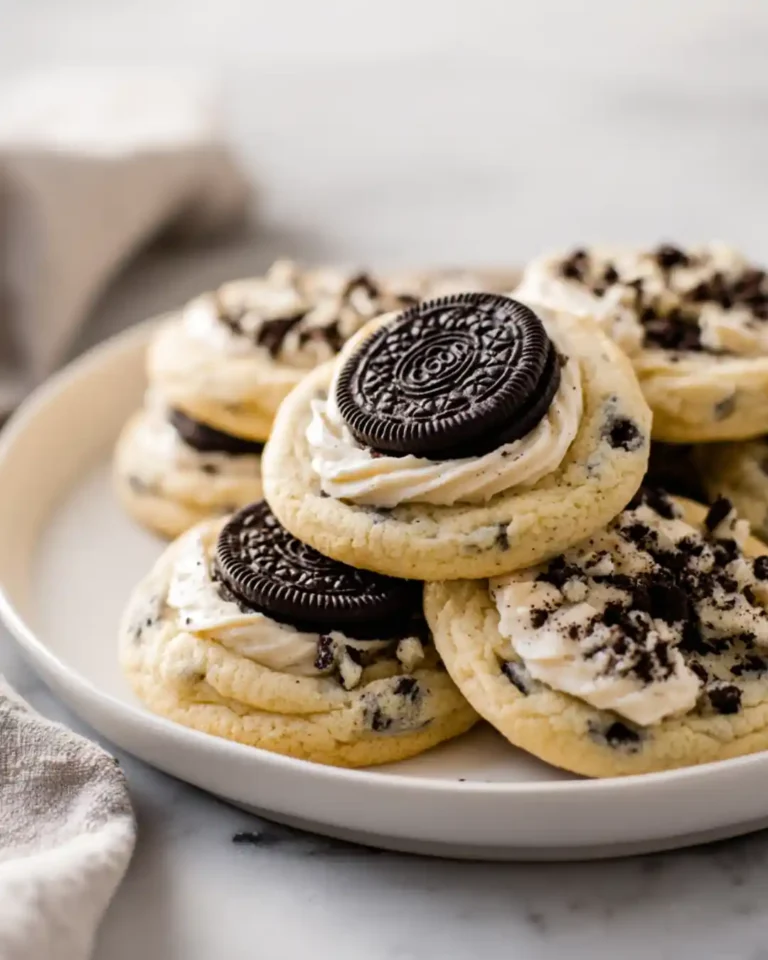
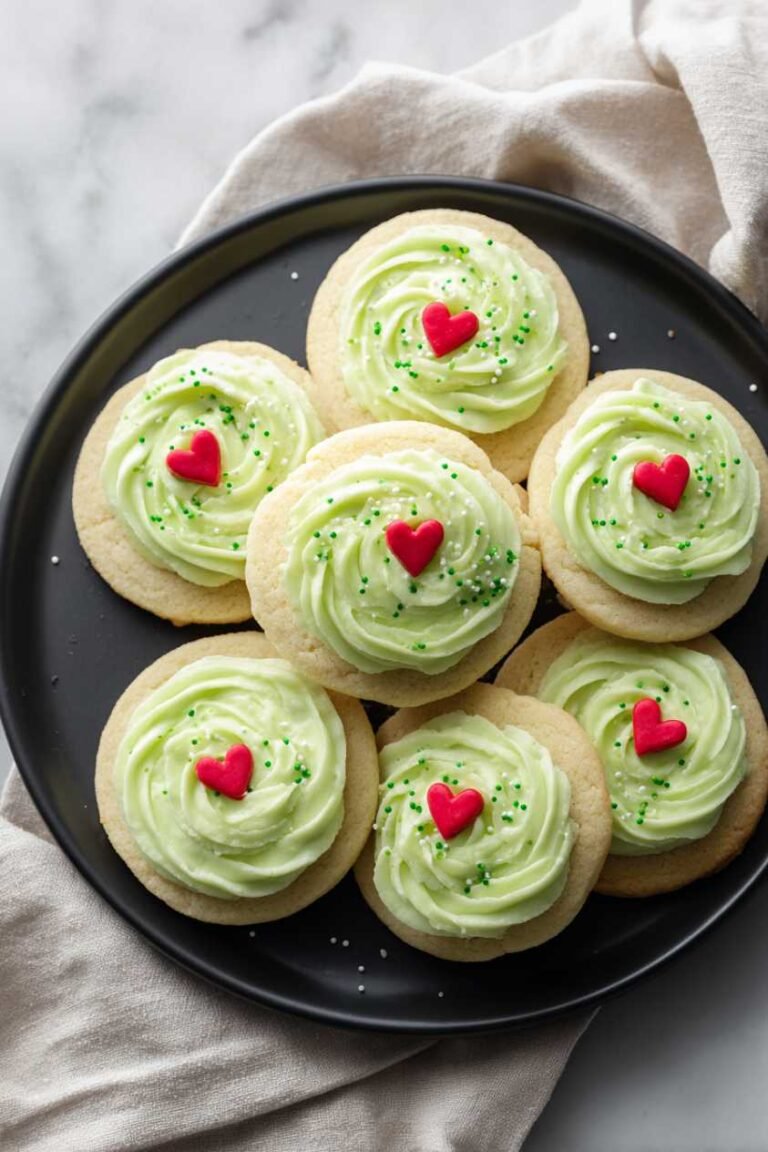
4. Frosted Sugar Cookies
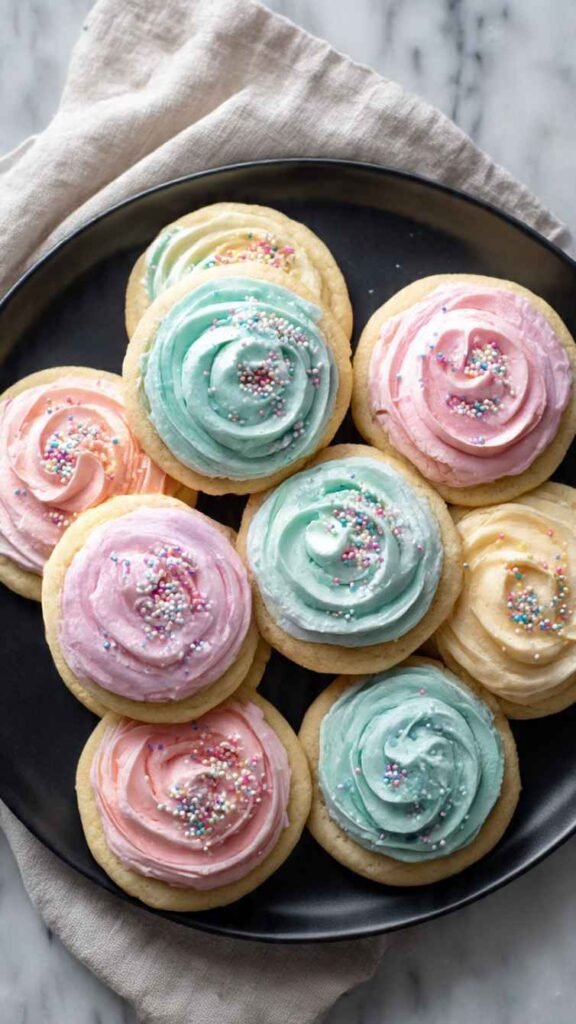
Frosted sugar cookies are topped with sweet vanilla buttercream creating the ultimate indulgent treat. The combination of soft cookie and creamy frosting is absolutely irresistible. I developed this recipe when I wanted cookies that rivaled those famous mall cookies. The key is making both the cookie and frosting extra flavorful with real vanilla and butter. This has become my celebration cookie because the colorful frosting makes them festive and special. The soft cookie with generous frosting is pure heaven.
Ingredients
For the cookies:
- 2¾ cups all-purpose flour
- 1 teaspoon baking soda
- ½ teaspoon baking powder
- ½ teaspoon salt
- 1 cup (2 sticks) unsalted butter, softened
- 1½ cups granulated sugar
- 1 large egg
- 2 teaspoons vanilla extract
For the frosting:
- 1 cup (2 sticks) unsalted butter, softened
- 4 cups powdered sugar
- 3-4 tablespoons heavy cream
- 2 teaspoons vanilla extract
- Pinch of salt
- Food coloring as desired
- Sprinkles for decorating
Steps
Step 1: Preheat your oven to 350°F and line baking sheets with parchment paper. Whisk together the flour, baking soda, baking powder, and salt in a medium bowl. In a large bowl, cream the butter and sugar for three to four minutes until fluffy. Add the egg and vanilla, beating until smooth. Gradually add the dry ingredients, mixing until just combined. The dough should be soft but not sticky.
Step 2: Chill the dough for thirty minutes. This prevents spreading and helps cookies stay thick. Scoop dough into balls using a large cookie scoop (about 2 tablespoons). Place on prepared baking sheets two inches apart. Flatten each ball slightly with the bottom of a glass dipped in sugar. This creates an even surface perfect for frosting.
Step 3: Bake for nine to eleven minutes until edges are just set but centers still look soft. They should be pale with barely any color – don’t overbake or they won’t be soft. Let cool on the baking sheet for five minutes, then transfer to a wire rack to cool completely. Cookies must be completely cool before frosting or it will melt.
Step 4: Make the buttercream frosting: In a large bowl using an electric mixer, beat the softened butter for two to three minutes until light and fluffy. Gradually add the powdered sugar one cup at a time, mixing on low speed. Add the heavy cream, vanilla extract, and salt. Beat on high speed for three to four minutes until light, fluffy, and spreadable. The extended beating time incorporates air and makes the frosting smooth and creamy.
Step 5: Divide the frosting into bowls and add food coloring as desired. Spread or pipe generous amounts of frosting onto each cooled cookie. Top with sprinkles while the frosting is still wet. Let the frosting set for about thirty minutes before stacking. These frosted sugar cookies are soft, sweet, and topped with incredible buttercream. The generous frosting makes them extra special and perfect for celebrations. They’re indulgent, colorful, and absolutely delicious.
Prep Time: 20 minutes (plus 30 minutes chilling)
Baking Time: 11 minutes per batch
Servings: 24 cookies
5. Almond Sugar Cookies
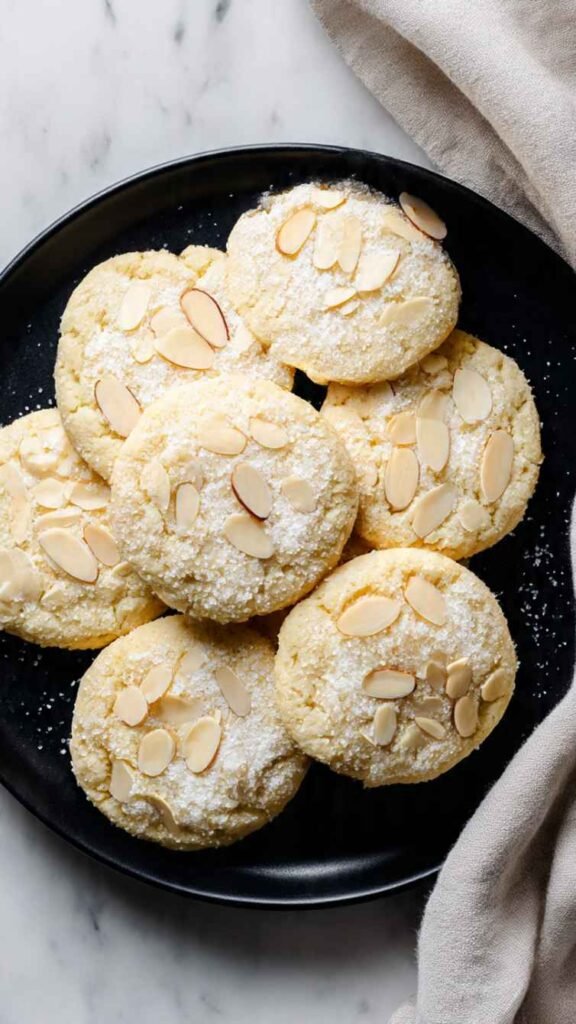
Almond sugar cookies feature wonderful almond flavor throughout with almond extract creating distinctive taste. The combination of vanilla and almond extracts adds complexity that makes these special. I created this recipe when I wanted to emphasize almond flavor because it’s so classic for sugar cookies. The almond adds sophistication and makes these taste more gourmet. This has become my favorite version for giving as gifts because the almond flavor makes them feel more special than plain vanilla. Every bite has that lovely almond aroma.
Ingredients
- 2¾ cups all-purpose flour
- 1 teaspoon baking powder
- ½ teaspoon salt
- 1 cup (2 sticks) unsalted butter, softened
- 1½ cups granulated sugar
- 1 large egg
- 1 teaspoon vanilla extract
- 1½ teaspoons almond extract
- ½ cup sliced almonds for topping (optional)
- Additional sugar for rolling
Steps
Step 1: Preheat your oven to 350°F and line baking sheets with parchment paper. In a medium bowl, whisk together the flour, baking powder, and salt. Set aside. In a large bowl, cream the softened butter and sugar for three to four minutes until light and fluffy. The creaming process incorporates air that makes cookies tender.
Step 2: Add the egg, vanilla extract, and almond extract to the butter mixture. Beat until well combined. The almond extract is what makes these cookies special – it provides that distinctive almond flavor that’s so classic. Gradually add the dry ingredients to the wet ingredients, mixing on low speed until just combined. The dough should be soft and slightly sticky.
Step 3: Cover the dough and refrigerate for at least one hour. Chilling makes the dough easier to handle and prevents excessive spreading during baking. Once chilled, scoop the dough into balls using a cookie scoop (about 1½ tablespoons each). Roll each ball between your palms to make it smooth. Roll in granulated sugar to coat completely.
Step 4: Place the sugar-coated balls on prepared baking sheets about two inches apart. If using sliced almonds, press a few onto the top of each cookie before baking. The almonds add extra almond flavor and visual appeal. Bake for ten to twelve minutes until the edges are just barely set but the centers still look soft. They should be pale with minimal color.
Step 5: Let the cookies cool on the baking sheet for five minutes before transferring to a wire rack. As they cool, the almond aroma will be wonderful. These almond sugar cookies are tender and fragrant with lovely almond flavor in every bite. The almond extract makes them taste sophisticated and special. They’re perfect for anyone who loves almond-flavored treats.
Prep Time: 15 minutes (plus 1 hour chilling)
Baking Time: 12 minutes per batch
Servings: 36 cookies
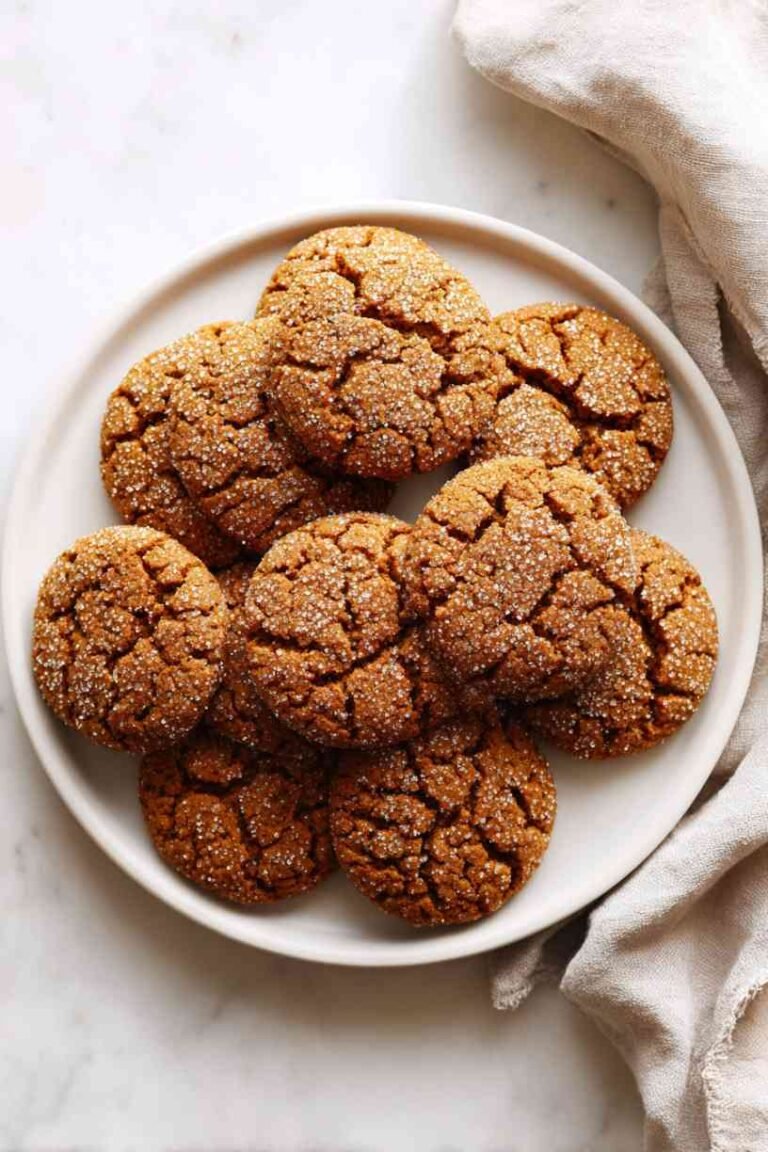
6. Brown Sugar Cookies
Brown sugar cookies have wonderful caramel flavor and deeper taste from using all brown sugar instead of white. The molasses in brown sugar creates complex flavor and extra chewiness. I developed this recipe when I wanted something richer than regular sugar cookies. The brown sugar makes these taste almost like butterscotch with wonderful depth. This has become my favorite fall cookie because the caramel notes feel cozy and seasonal. The deeper flavor makes these feel more sophisticated.
Ingredients
- 2¾ cups all-purpose flour
- 1 teaspoon baking soda
- ½ teaspoon baking powder
- ½ teaspoon salt
- 1 cup (2 sticks) unsalted butter, softened
- 2 cups packed light brown sugar
- 2 large eggs
- 2 teaspoons vanilla extract
- ½ teaspoon cinnamon (optional)
- Coarse sugar for rolling
Steps
Step 1: Preheat your oven to 350°F and line baking sheets with parchment paper. In a medium bowl, whisk together the flour, baking soda, baking powder, salt, and cinnamon if using. The cinnamon complements the brown sugar beautifully. In a large bowl using an electric mixer, cream the softened butter and brown sugar for four to five minutes until light and fluffy. Brown sugar takes longer to cream than white sugar.
Step 2: Add the eggs one at a time, beating well after each addition. Add the vanilla extract and mix until combined. The mixture should be smooth and creamy. Gradually add the dry ingredients to the wet ingredients, mixing on low speed until just combined. The dough will be darker in color from the brown sugar and have a wonderful caramel aroma.
Step 3: Cover and refrigerate the dough for at least one hour or up to overnight. Chilling is important for preventing spread and developing flavor. The brown sugar dough benefits from chilling as the flavors meld. Once chilled, let the dough sit at room temperature for ten minutes to soften slightly.
Step 4: Scoop the dough into balls using a cookie scoop (about 1½ tablespoons each). Roll each ball in coarse sugar for a sparkly coating. Place on prepared baking sheets about two inches apart. The brown sugar makes these cookies naturally chewy, so they won’t spread much. Bake for ten to twelve minutes until the edges are set but the centers still look soft and slightly underbaked.
Step 5: Let the cookies cool on the baking sheet for five minutes before transferring to a wire rack. They’ll firm up as they cool but maintain wonderful chewiness from the brown sugar. These brown sugar cookies have incredible caramel flavor and deeper taste than regular sugar cookies. The brown sugar creates wonderful complexity and makes these feel special. They’re rich, chewy, and absolutely delicious.
Prep Time: 15 minutes (plus 1 hour chilling)
Baking Time: 12 minutes per batch
Servings: 36 cookies
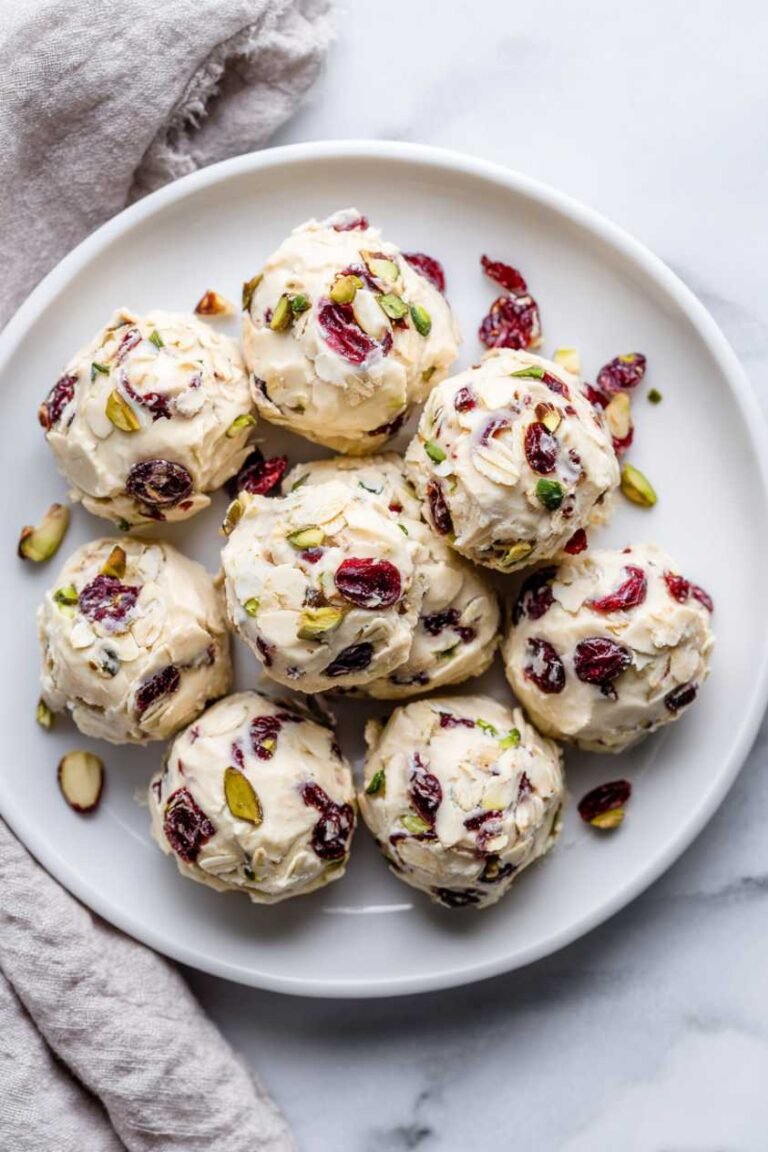
7. Cream Cheese Sugar Cookies
Cream cheese sugar cookies are incredibly soft and tender with a slight tang from cream cheese. The addition of cream cheese creates the softest texture imaginable while adding subtle richness. I developed this recipe when I wanted the ultimate soft cookie. The cream cheese is the secret ingredient that makes these impossibly tender. This has become my most beloved recipe because these cookies literally melt in your mouth. The texture is unlike any other sugar cookie – they’re almost cake-like but still recognizably cookies.
Ingredients
- 2½ cups all-purpose flour
- 1 teaspoon baking powder
- ½ teaspoon salt
- ½ cup (1 stick) unsalted butter, softened
- 4 oz cream cheese, softened
- 1½ cups granulated sugar
- 1 large egg
- 2 teaspoons vanilla extract
- ¼ teaspoon almond extract
- Additional sugar for rolling
Steps
Step 1: Preheat your oven to 350°F and line baking sheets with parchment paper. In a medium bowl, whisk together the flour, baking powder, and salt. Set aside. In a large bowl using an electric mixer, beat together the softened butter and softened cream cheese for two to three minutes until smooth and creamy. Make sure both are at room temperature so they blend smoothly.
Step 2: Add the sugar to the butter-cream cheese mixture and beat for three to four minutes until light and fluffy. The mixture should be pale and airy. Add the egg, vanilla extract, and almond extract. Beat until well combined and smooth. The cream cheese adds wonderful richness and creates incredibly tender cookies.
Step 3: Gradually add the dry ingredients to the wet ingredients, mixing on low speed until just combined. The dough will be very soft and slightly sticky – this is correct. Don’t add more flour. Cover the bowl with plastic wrap and refrigerate for at least two hours or overnight. The dough must be well-chilled because it’s so soft. Chilling makes it manageable and prevents excessive spreading.
Step 4: Once chilled, the dough will be firm enough to handle. Scoop into balls using a cookie scoop (about 1½ tablespoons each). Roll each ball in granulated sugar to coat completely. Place on prepared baking sheets about two inches apart. Don’t flatten – you want them to stay thick. Bake for nine to eleven minutes until the edges are just barely set but the centers still look very soft and puffy.
Step 5: Let the cookies cool on the baking sheet for five minutes. They’ll look very soft and you might think they’re underbaked, but they’re perfect. Transfer to a wire rack to cool completely. They’ll firm up slightly but stay incredibly soft and tender. These cream cheese sugar cookies are the softest, most tender cookies imaginable. The cream cheese creates unbelievable texture that makes these absolutely melt in your mouth. They’re simple but extraordinary.
Prep Time: 15 minutes (plus 2 hours chilling)
Baking Time: 11 minutes per batch
Servings: 30 cookies
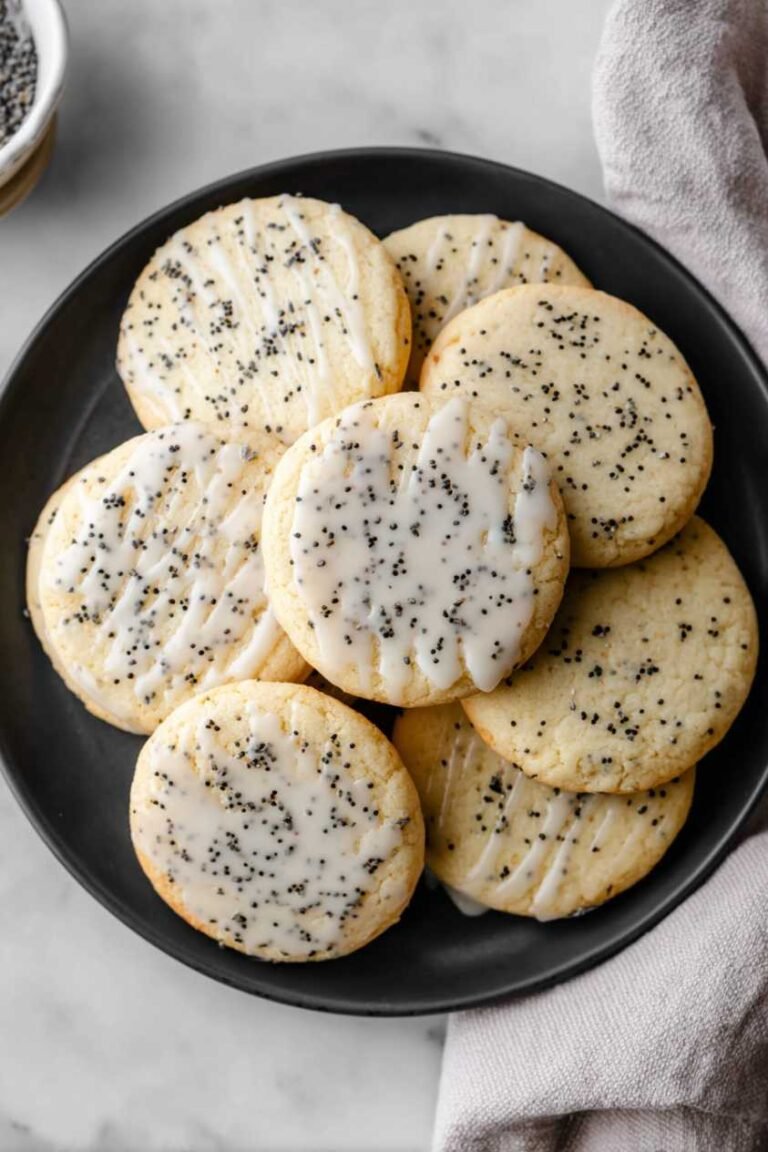
8. Lemon Sugar Cookies
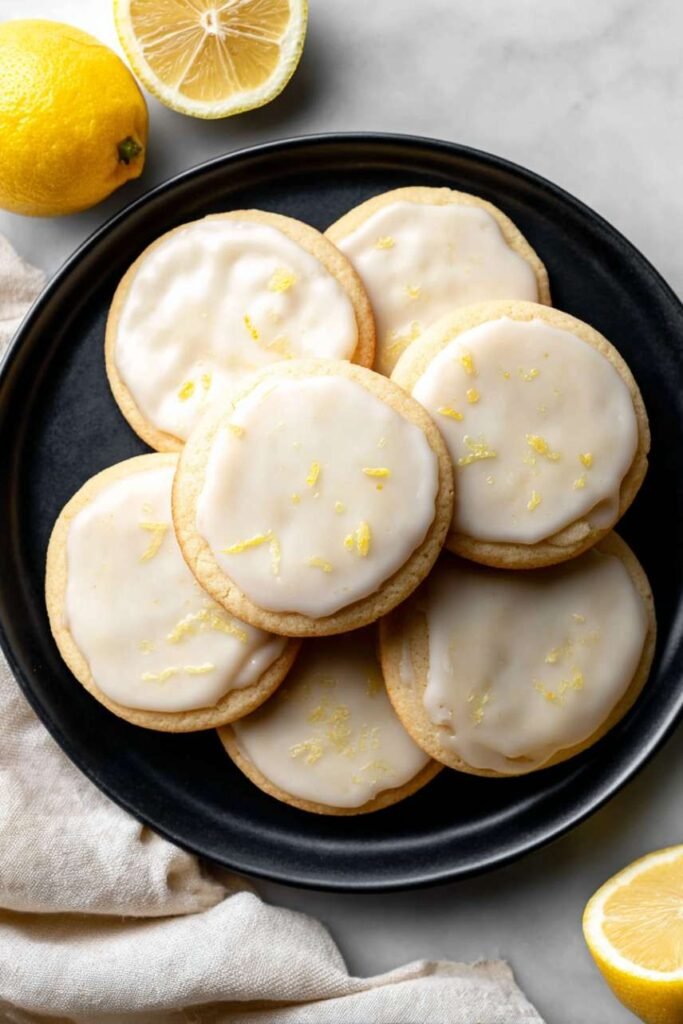
Lemon sugar cookies are bright, fresh, and bursting with citrus flavor. The combination of lemon zest and juice creates wonderful tangy sweetness throughout. I created this recipe when I wanted sugar cookies with more personality and brightness. The lemon adds refreshing flavor that makes these perfect for spring and summer. This has become my favorite warm-weather cookie because they taste light and sunny. The citrus makes every bite bright and cheerful.
Ingredients
- 2¾ cups all-purpose flour
- 1 teaspoon baking powder
- ½ teaspoon salt
- 1 cup (2 sticks) unsalted butter, softened
- 1½ cups granulated sugar
- Zest of 2 lemons
- 1 large egg
- 2 tablespoons fresh lemon juice
- 1 teaspoon vanilla extract
- ½ teaspoon lemon extract (optional)
For lemon glaze:
- 2 cups powdered sugar
- 3-4 tablespoons fresh lemon juice
- Zest of 1 lemon
Steps
Step 1: Preheat your oven to 350°F and line baking sheets with parchment paper. In a medium bowl, whisk together the flour, baking powder, and salt. Set aside. In a large bowl, cream the softened butter, sugar, and lemon zest together for three to four minutes until light and fluffy. The lemon zest releases its oils as you cream it with the sugar, infusing the entire cookie with lemon flavor.
Step 2: Add the egg, lemon juice, vanilla extract, and lemon extract if using to the butter mixture. Beat until well combined. The mixture might look slightly curdled from the lemon juice – this is normal. Gradually add the dry ingredients to the wet ingredients, mixing on low speed until just combined. The dough will smell wonderfully lemony. Cover and refrigerate for thirty minutes to make handling easier.
Step 3: Once chilled, scoop the dough into balls using a cookie scoop (about 1½ tablespoons each). Roll each ball between your palms to make it smooth. Place on prepared baking sheets about two inches apart. Flatten each ball slightly with the bottom of a glass dipped in sugar. This creates an even surface and adds a subtle sugar coating.
Step 4: Bake for ten to twelve minutes until the edges are just set but the centers still look soft. The cookies should be pale with minimal browning – you want them to stay light to showcase the lemon flavor. Let cool on the baking sheet for five minutes, then transfer to a wire rack to cool completely before glazing.
Step 5: Make the lemon glaze by whisking together the powdered sugar, lemon juice, and lemon zest until smooth. The glaze should be thick but pourable – add more lemon juice if too thick or more powdered sugar if too thin. Dip the top of each cooled cookie into the glaze or drizzle it over. Let the glaze set for about thirty minutes before serving or stacking. These lemon sugar cookies are bright, tangy, and refreshing with wonderful citrus flavor. The lemon glaze adds extra brightness and makes these absolutely irresistible. They’re perfect for spring and summer or anytime you want something fresh and sunny.
Prep Time: 15 minutes (plus 30 minutes chilling)
Baking Time: 12 minutes per batch
Servings: 30 cookies
9. Funfetti Sugar Cookies
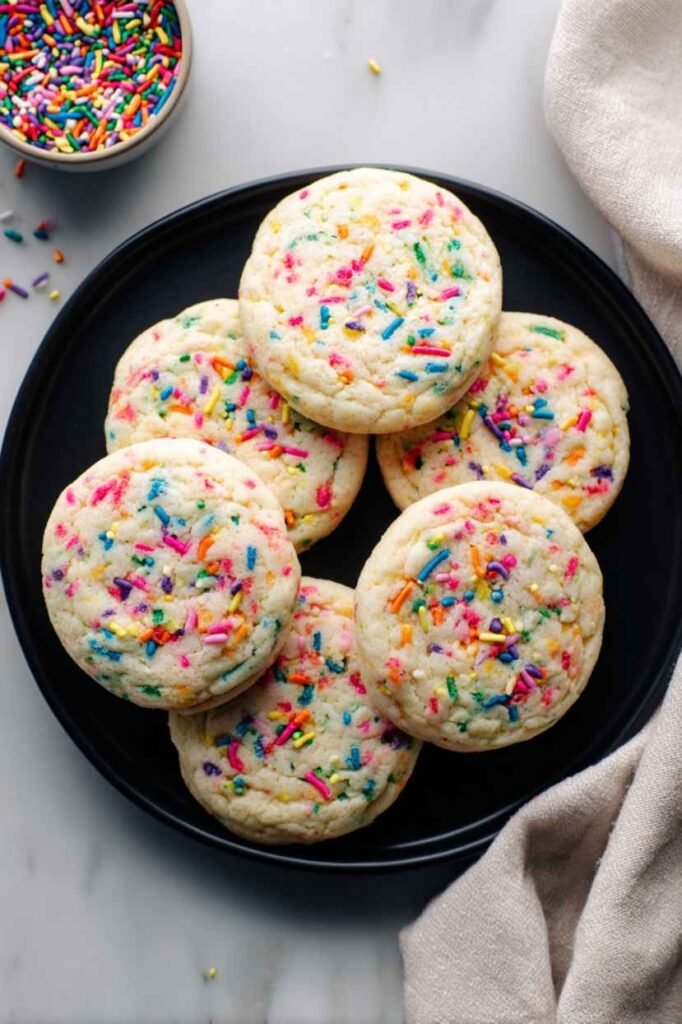
Funfetti sugar cookies are filled with rainbow sprinkles creating festive, colorful cookies perfect for celebrations. The sprinkles throughout the dough make every bite fun and festive. I created this recipe for birthday parties and celebrations when I wanted cookies that looked as fun as they tasted. The rainbow sprinkles make these feel special and exciting. This has become my go-to party cookie because everyone loves the colorful appearance and they’re perfect for celebrations. Every bite is like a little party.
Ingredients
- 2¾ cups all-purpose flour
- 1 teaspoon baking soda
- ½ teaspoon baking powder
- ½ teaspoon salt
- 1 cup (2 sticks) unsalted butter, softened
- 1½ cups granulated sugar
- 1 large egg
- 2 teaspoons clear vanilla extract
- ½ teaspoon almond extract
- ¾ cup rainbow sprinkles (use jimmies, not nonpareils)
- Additional sprinkles for rolling
Steps
Step 1: Preheat your oven to 350°F and line baking sheets with parchment paper. In a medium bowl, whisk together the flour, baking soda, baking powder, and salt. Set aside. In a large bowl, cream the softened butter and sugar for three to four minutes until light and fluffy. Use clear vanilla extract instead of regular if you want the cookies to stay bright white – regular vanilla will give them a slightly tan color.
Step 2: Add the egg, vanilla extract, and almond extract to the butter mixture. Beat until well combined and smooth. Gradually add the dry ingredients to the wet ingredients, mixing on low speed until just combined. Gently fold in the ¾ cup of rainbow sprinkles using a spatula. Be careful not to overmix or the sprinkles will bleed color into the dough. Use jimmies-style sprinkles, not nonpareils, as they hold their shape and color better during baking.
Step 3: Cover the dough and refrigerate for thirty minutes. Chilling prevents the sprinkles from bleeding too much and helps cookies maintain thickness. Place additional sprinkles in a shallow bowl. Once chilled, scoop the dough into balls using a cookie scoop (about 1½ tablespoons each). Roll the outside of each ball in more sprinkles for extra color and festiveness.
Step 4: Place the sprinkle-coated balls on prepared baking sheets about two inches apart. Don’t flatten – you want thick cookies that showcase the sprinkles throughout. Bake for nine to eleven minutes until the edges are just set but the centers still look soft and puffy. Don’t overbake or the sprinkles will fade and the cookies will be dry.
Step 5: Let the cookies cool on the baking sheet for five minutes before transferring to a wire rack. The sprinkles should still be colorful and vibrant. These funfetti sugar cookies are festive, colorful, and absolutely perfect for celebrations. The rainbow sprinkles make them fun and exciting while tasting like classic sugar cookies. They’re party-perfect and guaranteed to make people smile.
Prep Time: 15 minutes (plus 30 minutes chilling)
Baking Time: 11 minutes per batch
Servings: 36 cookies
10. Vanilla Bean Sugar Cookies
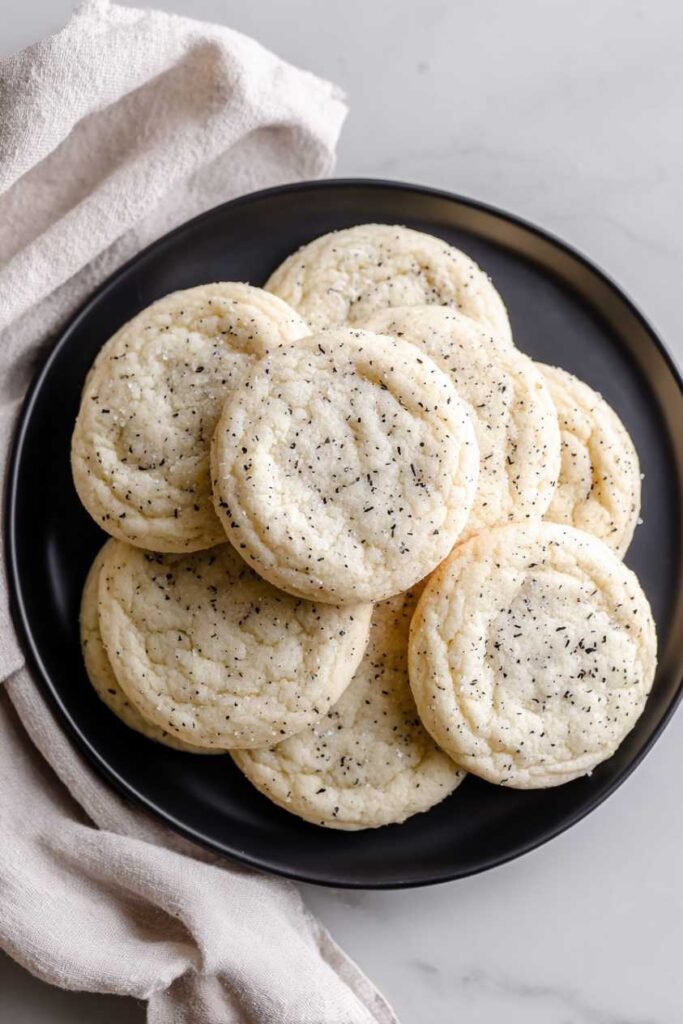
Vanilla bean sugar cookies feature real vanilla bean seeds creating incredible vanilla flavor and beautiful specks throughout. The use of vanilla bean paste or fresh vanilla beans elevates these from ordinary to extraordinary. I developed this recipe when I wanted to showcase high-quality vanilla. The visible vanilla seeds and intense vanilla flavor make these feel gourmet and special. This has become my favorite recipe for when I want to impress because the vanilla bean makes these absolutely extraordinary. Every bite is packed with pure vanilla flavor.
Ingredients
- 2¾ cups all-purpose flour
- 1 teaspoon baking powder
- ½ teaspoon salt
- 1 cup (2 sticks) unsalted butter, softened
- 1½ cups granulated sugar
- 1 large egg
- 1 tablespoon vanilla bean paste (or seeds from 2 vanilla beans)
- 1 teaspoon vanilla extract
- Vanilla sugar for rolling (or regular sugar mixed with vanilla bean seeds)
Steps
Step 1: Preheat your oven to 350°F and line baking sheets with parchment paper. In a medium bowl, whisk together the flour, baking powder, and salt. Set aside. In a large bowl, cream the softened butter and sugar for three to four minutes until light and fluffy. The mixture should be pale and airy.
Step 2: Add the egg, vanilla bean paste (or vanilla bean seeds), and vanilla extract to the butter mixture. Beat until well combined. You should see the beautiful black vanilla bean specks distributed throughout the dough. If using fresh vanilla beans, split them lengthwise and scrape out the seeds with the back of a knife. The vanilla bean paste or fresh seeds are what make these cookies special – don’t skip them.
Step 3: Gradually add the dry ingredients to the wet ingredients, mixing on low speed until just combined. The dough should be soft and smell incredibly fragrant with vanilla. Cover and refrigerate for at least one hour or up to overnight. Chilling helps the vanilla flavor develop and makes the dough easier to handle.
Step 4: Prepare vanilla sugar by mixing granulated sugar with a pinch of vanilla bean seeds (optional, but adds extra flavor). Once the dough is chilled, scoop into balls using a cookie scoop (about 1½ tablespoons each). Roll each ball in the vanilla sugar to coat completely. The sugar coating adds subtle crunch and sparkle while the vanilla bean specks remain visible.
Step 5: Place the sugar-coated balls on prepared baking sheets about two inches apart. Bake for ten to twelve minutes until the edges are just barely set but the centers still look soft. They should be pale with minimal color to showcase the vanilla bean specks. Let cool on the baking sheet for five minutes before transferring to a wire rack. These vanilla bean sugar cookies are absolutely incredible with intense vanilla flavor and beautiful vanilla bean specks throughout. The real vanilla bean makes these taste gourmet and special. They’re simple but extraordinary, perfect for anyone who appreciates high-quality vanilla.
Prep Time: 15 minutes (plus 1 hour chilling)
Baking Time: 12 minutes per batch
Servings: 36 cookiesRetry