Some days I just want to make something sweet without turning my whole kitchen upside down. At this stage in my life, I love recipes that feel special but don’t take all day. That’s how these 3 Ingredient Chocolate Truffles became one of my favorite little treats to make.
One evening after dinner, my husband said he was craving chocolate. The kids were already in their pajamas, and the house felt calm. I looked in my pantry and saw whipping cream, butter, and a bar of good quality dark chocolate. That was it. Just three simple ingredients, and I knew they could turn into something rich and beautiful.
I warmed the whipping cream with the butter in a small saucepan until it was hot but not boiling. Then I poured it over the chopped dark chocolate and let it sit for a minute. Slowly, I stirred everything together and watched it turn into the smoothest, glossiest chocolate mixture. It looked so silky, almost like chocolate velvet.
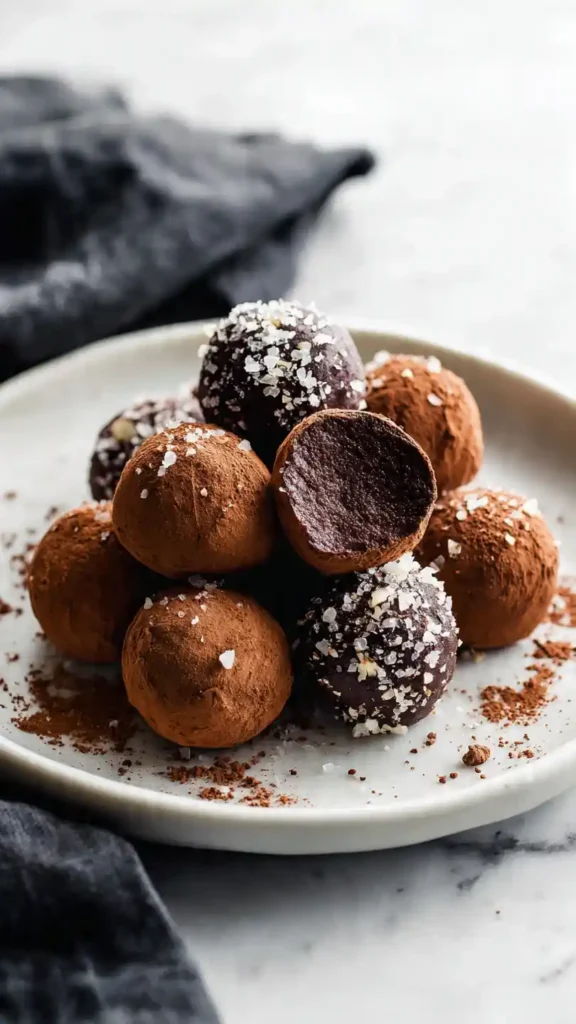
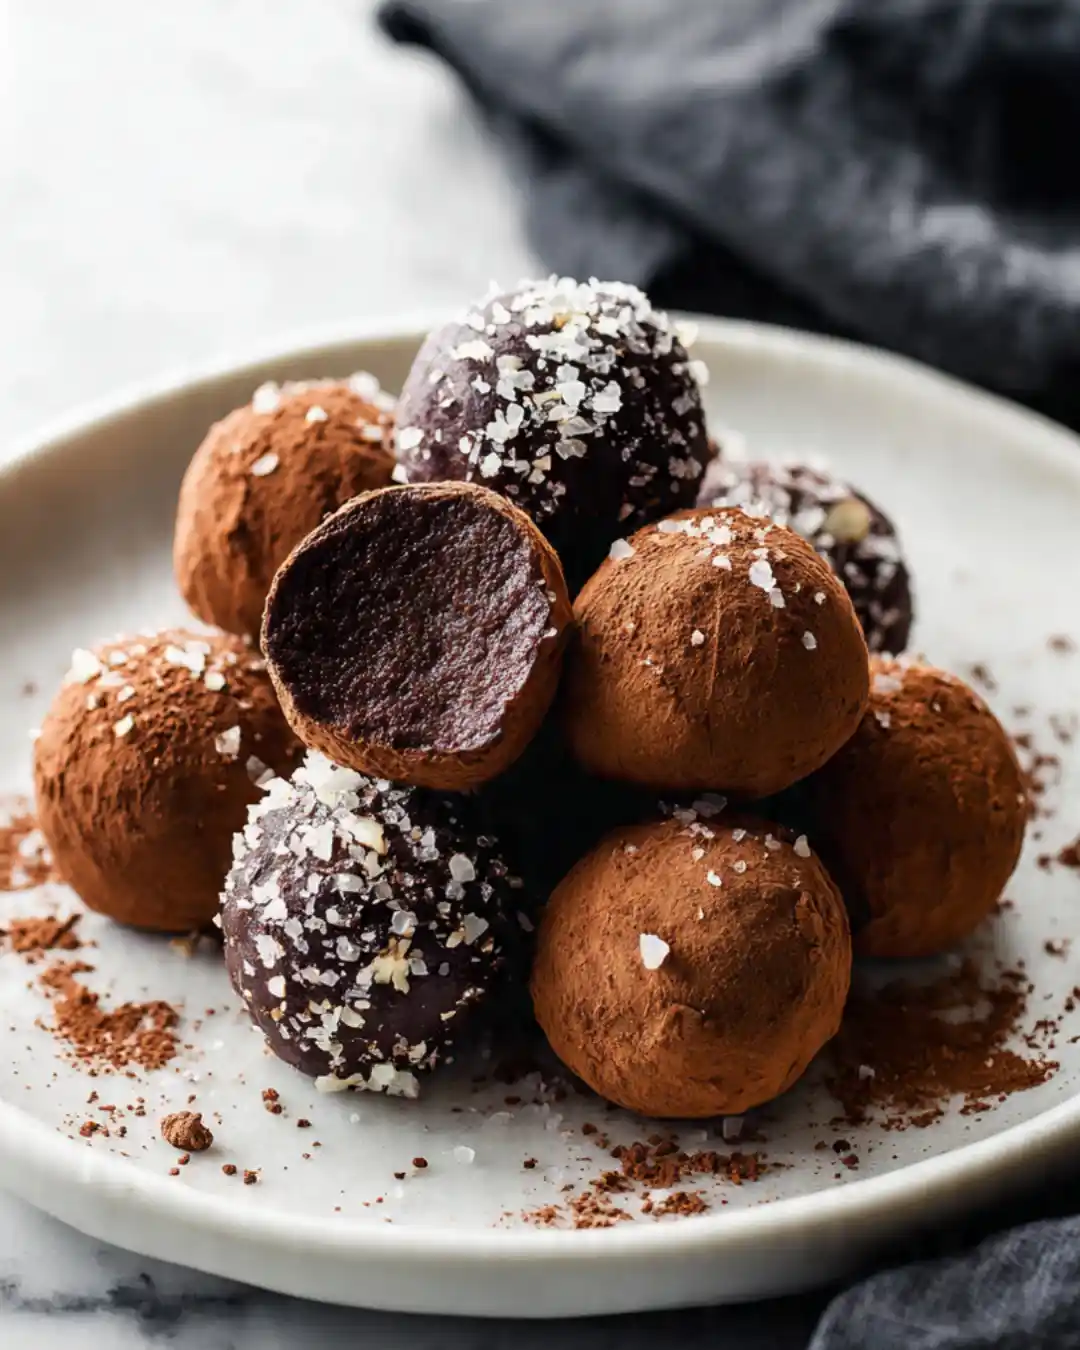
After chilling the mixture until it was firm, I scooped small portions and rolled them gently in my hands. The kids came into the kitchen curious about what I was doing. We rolled some in unsweetened cocoa powder, some in crushed candy, and a few in chopped nuts. Each one looked different, like tiny handmade gifts.
When we tasted them, they melted softly in our mouths. Rich, creamy, and perfectly chocolatey. I love how something so simple can feel so elegant. Sometimes the best recipes remind you that you don’t need many ingredients to create something truly special.
What Is Chocolate Truffles
When I think of chocolate truffles, I picture small, round candies made from melted chocolate mixed with cream and butter. For me, they are simple treats that feel elegant even though they require very few ingredients. The mixture starts smooth and glossy, then firms up after chilling so it can be rolled into soft balls. I like how the outside can be coated in cocoa powder, crushed nuts, or candy pieces for different finishes. Chocolate truffles are usually served in small portions, making them easy to share. In my kitchen, they are a quick homemade sweet that looks neat and thoughtful.
Why You’ll Love This Chocolate Truffles
From the first time I made these chocolate truffles, I was surprised by how easy they were. I love that this recipe uses only three main ingredients and does not require baking. The process feels simple: melt, chill, roll, and coat. I also enjoy choosing different toppings to change the look and taste each time. Even if the truffles are not perfectly round, they still look beautiful and homemade. For me, this recipe is dependable and quick, perfect when I want a small chocolate treat that feels special without spending hours in the kitchen.
Ingredients for Chocolate Truffles
- Whipping cream – heats gently with the chocolate to create a smooth, rich base.
- Unsalted butter – melts into the mixture and adds a silky texture.
- Good quality dark chocolate (chopped) – forms the main structure and deep chocolate taste of the truffles.
- Toppings as desired – cocoa powder, crushed nuts, or crushed candy coat the outside and add texture and variety to each piece.
Kitchen Equipment Needed
- Microwave safe bowl – melts the chocolate, cream, and butter together evenly.
- Spatula or spoon – stirs the mixture until smooth and fully combined.
- Measuring cups and spoons – ensure the ingredients are added in the correct amounts.
- Tablespoon or small cookie scoop – portions the chilled mixture into even pieces.
- Baking sheet or plate – holds the rolled truffles while you coat them.
- Parchment or wax paper – lines the container to prevent sticking during storage.
- Airtight container – keeps the finished truffles fresh in the refrigerator or freezer.
What to Serve with Chocolate Truffles
Whenever I serve chocolate truffles, I like to keep the setting simple and neat. I usually arrange them on a small plate and place them next to a cup of coffee or hot tea. Sometimes I serve them with fresh berries to add a fresh contrast. They also pair well with a glass of milk or even sparkling water during gatherings. If I am hosting, I mix different coatings on one tray so guests can choose their favorite. In my experience, chocolate truffles work best as a small bite at the end of a meal or during a quiet break.
How to Store Chocolate Truffles
After I finish rolling and coating the chocolate truffles, I place them in a single layer inside an airtight container. I like to separate the layers with parchment or wax paper so they do not stick together. I store them in the refrigerator, where they stay firm and fresh for about one week. If I want to keep them longer, I freeze them and let them thaw in the fridge before serving. In my experience, bringing them to room temperature for a few minutes before eating helps soften the texture and makes them easier to enjoy.

FAQs
1. What are the three ingredients?
Most simple chocolate truffles are made with chocolate, heavy cream, and a little butter. That’s all you need for a smooth, rich center.
2. Why is my truffle mixture too soft to roll?
It probably needs more time to chill. Let the mixture rest in the refrigerator until it’s firm enough to scoop and shape easily.
3. Can I use chocolate chips instead of baking chocolate?
Yes, chocolate chips work well. Choose good-quality semi-sweet or dark chocolate chips for the best flavor and texture.
4. Can I add extra flavors to the truffles?
Absolutely. A splash of vanilla, a pinch of sea salt, or a little espresso powder can deepen the chocolate flavor beautifully.
3-Ingredient Chocolate Truffles
Ingredients
Equipment
Method
- Place the chocolate, cream, and butter in a microwave safe bowl. Heat on 50% power for 2 minutes, then stir. Continue heating for another 1 minute, or in 30 second intervals, until the chocolate is about 80% melted.
- Stir until the chocolate is fully melted and smooth. Let it cool at room temperature for about 1 hour, then place it in the refrigerator until firm enough to handle, about 1 more hour.
- Scoop the chocolate mixture in tablespoon portions and roll them between your palms to shape into balls. It is fine if they look a little uneven, that adds to their homemade feel. Roll each truffle in your chosen toppings right away, since the warmth of your hands will slightly melt the surface and help them stick. This step can get messy, so keep a damp cloth nearby to wipe the chocolate from your hands.
- Arrange the truffles in an airtight container, placing parchment or waxed paper between the layers. Store in the refrigerator for up to 1 week or freeze for up to 3 months. Let them sit at room temperature before serving.