Red velvet brownies are one of those show-stopping desserts that look incredibly impressive but are actually surprisingly easy to make – that gorgeous deep red color instantly makes people stop and ask what they are. I love making these for Valentine’s Day, Christmas, or honestly any time I want something that looks bakery-fancy without spending hours decorating cookies. These 10 red velvet brownie recipe ideas take that beloved red velvet flavor and transform it into rich, fudgy brownies that are even easier to make and serve than traditional cake, with variations that range from classic to totally over-the-top indulgent.
The Classic Red Velvet Brownies are where everyone should start – that perfect balance of chocolate and vanilla with cream cheese frosting. The Cream Cheese Swirl Red Velvet Brownies marble tangy cream cheese throughout for extra richness, while the Fudgy Red Velvet Brownies maximize that dense, chocolatey texture. The adorable Red Velvet Brownie Bites are perfect for parties or portion control, and the White Chocolate Red Velvet Brownies add sweet white chips throughout. The Red Velvet Cheesecake Brownies layer cheesecake on top of brownies for ultimate decadence, the Frosted Red Velvet Brownies get topped with traditional cream cheese frosting, and the Red Velvet Oreo Brownies are loaded with crushed cookies. The Red Velvet Crinkle Brownies have that gorgeous crackled powdered sugar coating, while the Holiday Red Velvet Brownies get decorated festively for Christmas or Valentine’s celebrations.
What makes red velvet brownies so perfect is how that vibrant red color makes them naturally festive without needing complicated decorating – they’re eye-catching all on their own. They’re easier than layer cakes, more impressive than regular brownies, and that subtle cocoa flavor with tangy cream cheese is absolutely irresistible. These are guaranteed to disappear fast at any gathering!
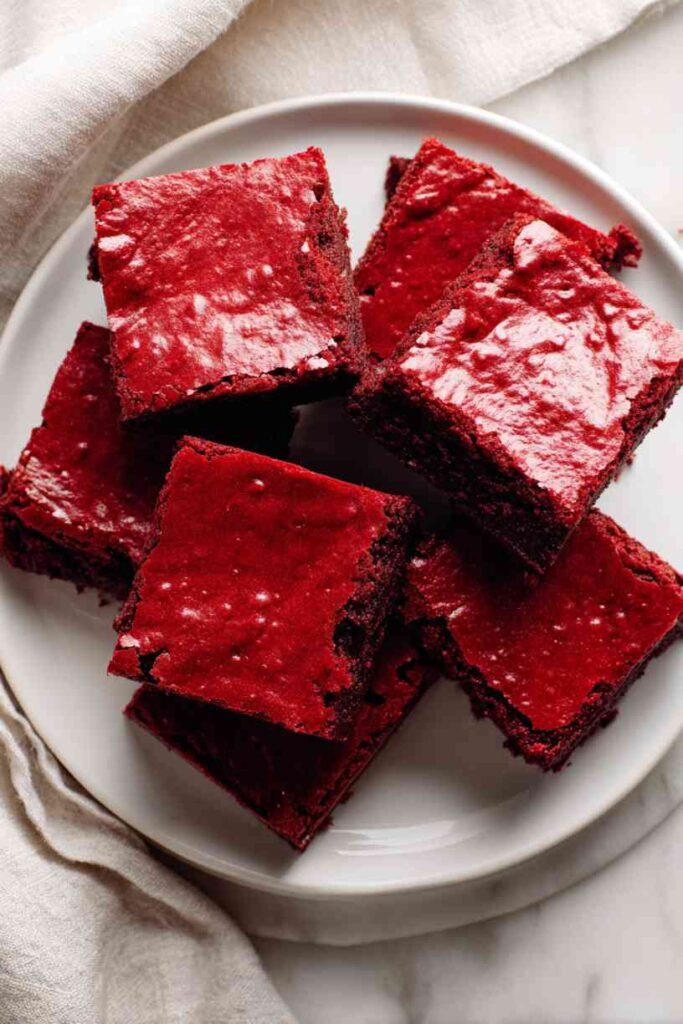
1. Classic Red Velvet Brownies
Classic Red Velvet Brownies have always felt like a little celebration in the middle of an ordinary day. There’s something about their deep red color and soft cocoa flavor that brings warmth and happiness to the kitchen. The texture is tender and slightly fudgy, almost like a cross between cake and brownie. I love baking these when I want something simple but pretty, something that feels special without needing too much effort. They come out beautifully every time—bright, rich, and comforting, the kind of treat you make when you want to share a little sweetness with people you love.
Ingredients
- ½ cup unsalted butter, melted
- 1 cup sugar
- 2 large eggs
- 1 teaspoon vanilla
- 1 tablespoon red food coloring
- ¾ cup all-purpose flour
- ¼ cup cocoa powder
- ½ teaspoon salt
- ½ teaspoon vinegar
Steps
Step 1: Preheat oven to 350°F (175°C) and line an 8×8 pan with parchment, leaving extra on the sides for lifting. This helps the brownies release easily, keeping their smooth red surface intact and making slicing much cleaner after cooling completely.
Step 2: Whisk melted butter and sugar until glossy. Add eggs, vanilla, vinegar, and food coloring, mixing until the batter turns a deep, even red. This creates that classic velvety texture and color that makes red velvet desserts so charming.
Step 3: Add flour, cocoa, and salt. Fold gently until combined. The batter should be thick and smooth. Overmixing can make brownies tough, so gentle folding helps keep the texture soft and tender with just the right amount of chew.
Step 4: Spread batter evenly into the pan. Bake 22–26 minutes, removing when the edges are set and the center looks slightly soft. This gives the brownies a fudgy finish as they cool. Underbaking slightly is key to perfect red velvet texture.
Step 5: Cool completely before slicing. This rest time lets the brownies firm up while keeping their velvety center. Cut into neat squares and enjoy their mild cocoa flavor and beautiful red color.
Prep Time: 10 minutes
Bake Time: 25 minutes
Servings: 9
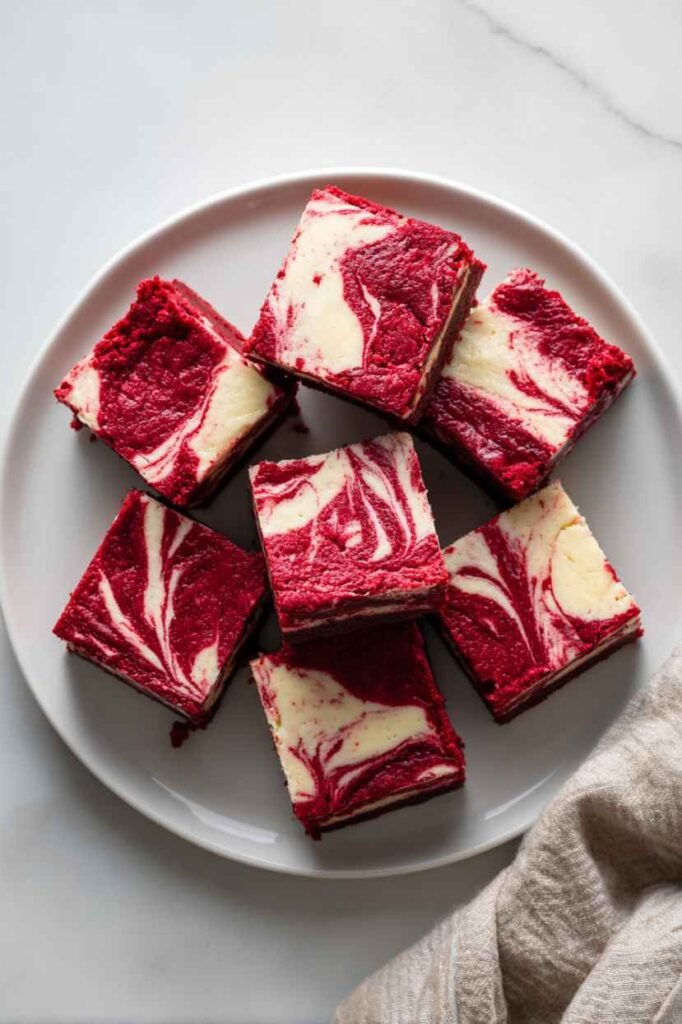
2. Cream Cheese Swirl Red Velvet Brownies
Cream Cheese Swirl Red Velvet Brownies feel like a little gift baked right into a pan. The soft red velvet base pairs beautifully with the creamy sweetness of the cheesecake ribbon on top. Every swirl looks different, making each batch feel special. I love making these when I want something pretty enough to serve guests but simple enough for a quiet evening at home. The flavors blend into a rich, smooth bite that feels comforting and elegant at the same time.
Ingredients
For the brownie layer:
- ½ cup melted butter
- 1 cup sugar
- 2 eggs
- 1 teaspoon vanilla
- 1 tablespoon red food coloring
- ¾ cup flour
- ¼ cup cocoa powder
- ½ teaspoon salt
- ½ teaspoon vinegar
Cream cheese swirl:
- 4 oz cream cheese, softened
- ¼ cup sugar
- 1 egg
- ½ teaspoon vanilla
Steps
Step 1: Heat oven to 350°F (175°C) and line an 8×8 pan with parchment. This helps the swirl stay clean when slicing, keeping each brownie neat and showing the creamy ribbon beautifully across every square when fully cooled.
Step 2: Make brownie batter by mixing butter, sugar, eggs, vanilla, food coloring, and vinegar. Add flour, cocoa, and salt. Stir gently until smooth. The batter should feel thick and velvety, ready to hold the cheesecake swirl.
Step 3: Prepare cream cheese swirl by beating cream cheese, sugar, egg, and vanilla until smooth. This mixture should be creamy and pourable, perfect for swirling into the brownie batter without sinking too deeply.
Step 4: Spread brownie batter into the pan. Spoon the cream cheese mixture on top and swirl gently with a knife. Bake 25–28 minutes until the edges set and the center has a soft wobble. Do not overbake.
Step 5: Cool completely before cutting. The swirl firms as it rests, allowing clean slices and a creamy texture. Enjoy chilled or room temperature for the best flavor.
Prep Time: 12 minutes
Bake Time: 28 minutes
Servings: 9
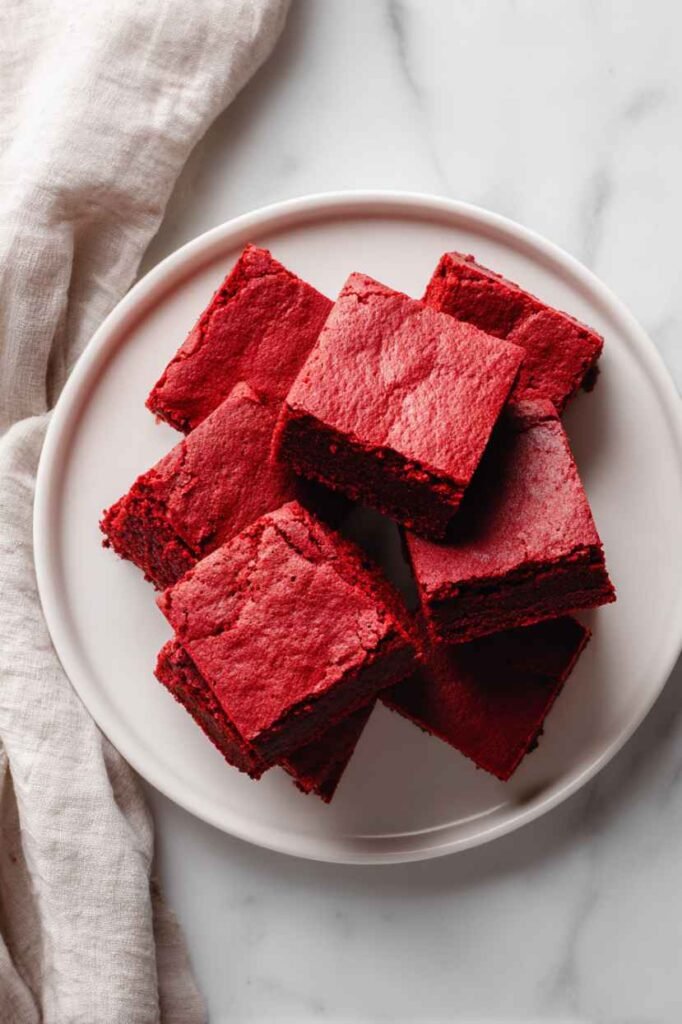
3. Fudgy Red Velvet Brownies
Fudgy Red Velvet Brownies are the kind of dessert I make when I’m craving something rich and deeply satisfying. They have a dense, chocolatey texture that feels indulgent without being overly sweet. The red velvet flavor adds warmth and elegance, making these brownies perfect for special occasions or slow evenings when you want something sweet and comforting. I love how the center stays soft and velvety, almost melting on the tongue. They’re simple, beautiful, and always hit the spot when you need a little chocolate comfort.
Ingredients
- ½ cup butter, melted
- 1 cup sugar
- 2 eggs
- 2 teaspoons vanilla
- 1 tablespoon red food coloring
- ½ cup cocoa powder
- ¾ cup flour
- ½ teaspoon salt
- ½ teaspoon baking powder
Steps
Step 1: Preheat oven to 350°F (175°C) and line an 8×8 baking dish. Fudgy brownies can be delicate when warm, so parchment makes it easier to lift them out while preserving their soft, rich texture.
Step 2: Mix butter, sugar, eggs, vanilla, and food coloring until glossy. This creates the foundation for a velvety, fudgy brownie with a beautiful deep red hue throughout the batter.
Step 3: Fold in cocoa, flour, salt, and baking powder. Mix only until combined to maintain softness. The batter should be thick, dark, and smooth, promising that rich fudgy bite once baked.
Step 4: Spread evenly into the pan and bake 22–26 minutes. Remove while the center still appears slightly underdone. This ensures the brownies remain fudgy rather than cakey once cooled.
Step 5: Cool completely before slicing. Fudgy brownies firm as they rest, deepening their chocolate flavor while keeping that soft, satisfying middle.
Prep Time: 10 minutes
Bake Time: 25 minutes
Servings: 9
4. Red Velvet Brownie Bites
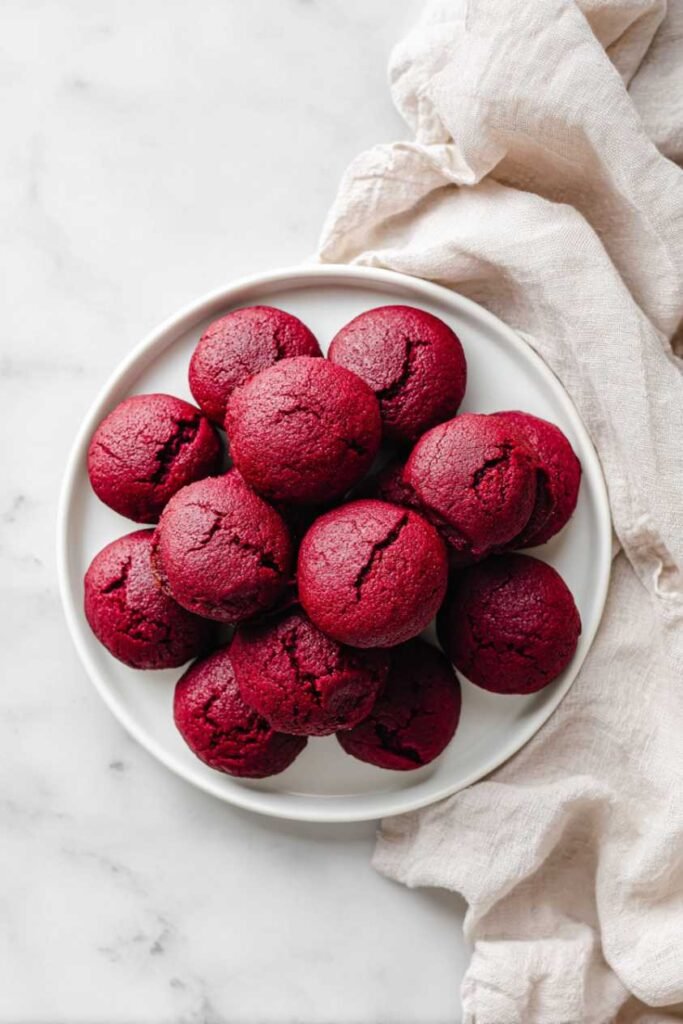
Red Velvet Brownie Bites are perfect for days when you want something sweet in small, pretty portions. They bake quickly and come out of the oven looking adorable—tiny red squares with soft cocoa flavor and a tender crumb. I love making these for gatherings, school events, or moments when I want a treat without committing to a whole pan. They’re simple, charming, and bring a touch of joy wherever they’re served. Each bite feels soft, warm, and just sweet enough to brighten your day.
Ingredients
- ½ cup melted butter
- 1 cup sugar
- 2 eggs
- 1 teaspoon vanilla
- 1 tablespoon red food coloring
- ¾ cup flour
- ¼ cup cocoa powder
- ½ teaspoon salt
- ½ teaspoon vinegar
Steps
Step 1: Preheat oven to 350°F (175°C). Grease a mini muffin tin to help the brownie bites release smoothly after baking. These small portions bake fast, so preparing the pan keeps them perfectly shaped and easy to handle.
Step 2: Whisk butter, sugar, eggs, vanilla, vinegar, and food coloring until smooth. This mixture becomes the soft red velvet base, with a bright color that stands out beautifully in bite-sized squares.
Step 3: Add flour, cocoa, and salt. Fold gently until just combined. The batter should be thick enough to hold shape inside each muffin well without spreading too thin as it bakes.
Step 4: Spoon batter into each well about two-thirds full. Bake 12–15 minutes until the edges are set but the centers remain soft. This creates a tender, velvety bite that doesn’t dry out.
Step 5: Cool in the pan before removing. The bites firm as they cool, making them easy to lift out. Serve warm or chilled as a fun, easy treat.
Prep Time: 10 minutes
Bake Time: 15 minutes
Servings: 20–24 bites
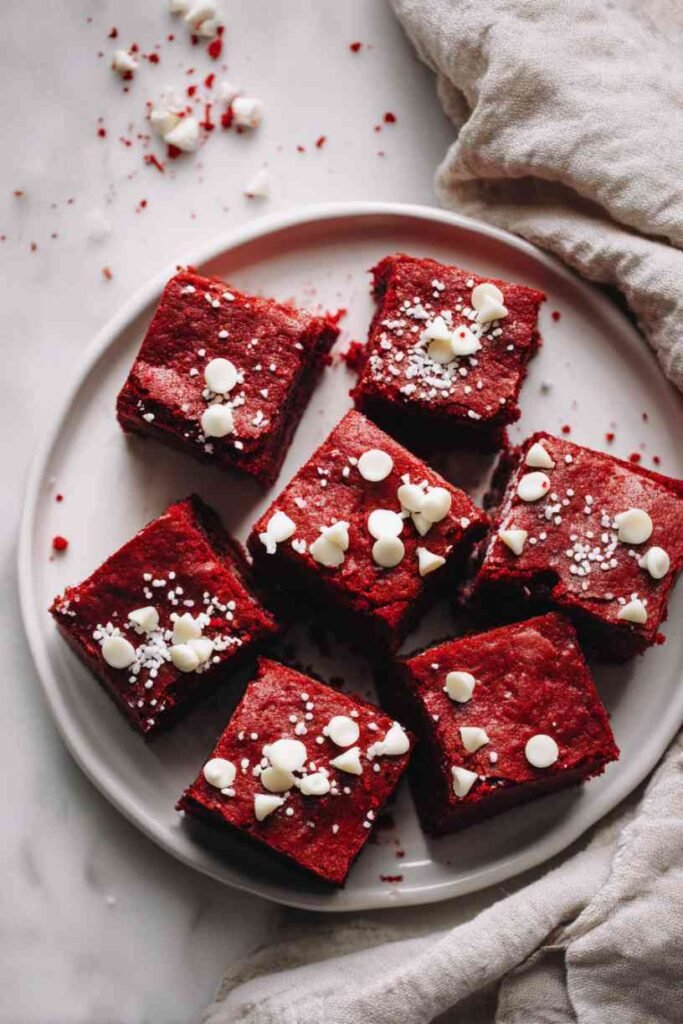
5. White Chocolate Red Velvet Brownies
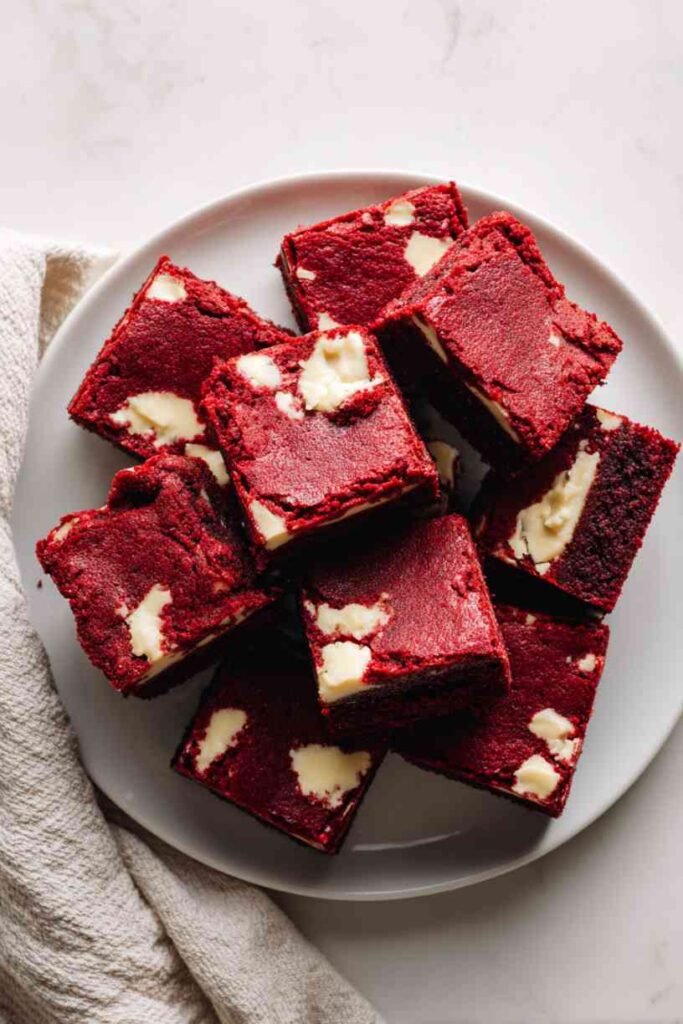
White Chocolate Red Velvet Brownies bring together the beautiful red velvet flavor with the creamy sweetness of white chocolate. The combination feels luxurious but comforting, the kind of dessert you make when you want something special without spending hours in the kitchen. The white chocolate melts into the batter, adding softness and richness that pairs perfectly with the mild cocoa flavor. These brownies feel elegant enough for celebrations yet easy enough for a cozy night at home.
Ingredients
- ½ cup butter
- 1 cup sugar
- 2 eggs
- 1 teaspoon vanilla
- 1 tablespoon red food coloring
- ¾ cup flour
- ¼ cup cocoa powder
- ½ teaspoon salt
- ½ cup white chocolate chips
Steps
Step 1: Heat oven to 350°F (175°C) and line an 8×8 pan with parchment. White chocolate melts easily, so lining helps prevent sticking and keeps the brownies’ rich texture intact when slicing after they cool completely.
Step 2: Mix butter, sugar, eggs, vanilla, and food coloring until smooth. The mixture should be glossy and thick, creating the velvety base red velvet brownies are known for.
Step 3: Fold in flour, cocoa, and salt gently. Add white chocolate chips and stir just until combined. The chips will melt slightly during baking, adding creamy richness to every bite.
Step 4: Spread batter evenly into the pan. Bake 22–25 minutes until the edges set and the center remains soft. This keeps the brownies tender and prevents the white chocolate from overcooking.
Step 5: Cool fully before slicing. The white chocolate firms into creamy pockets throughout the brownies, giving each square a deliciously smooth finish.
Prep Time: 10 minutes
Bake Time: 25 minutes
Servings: 9
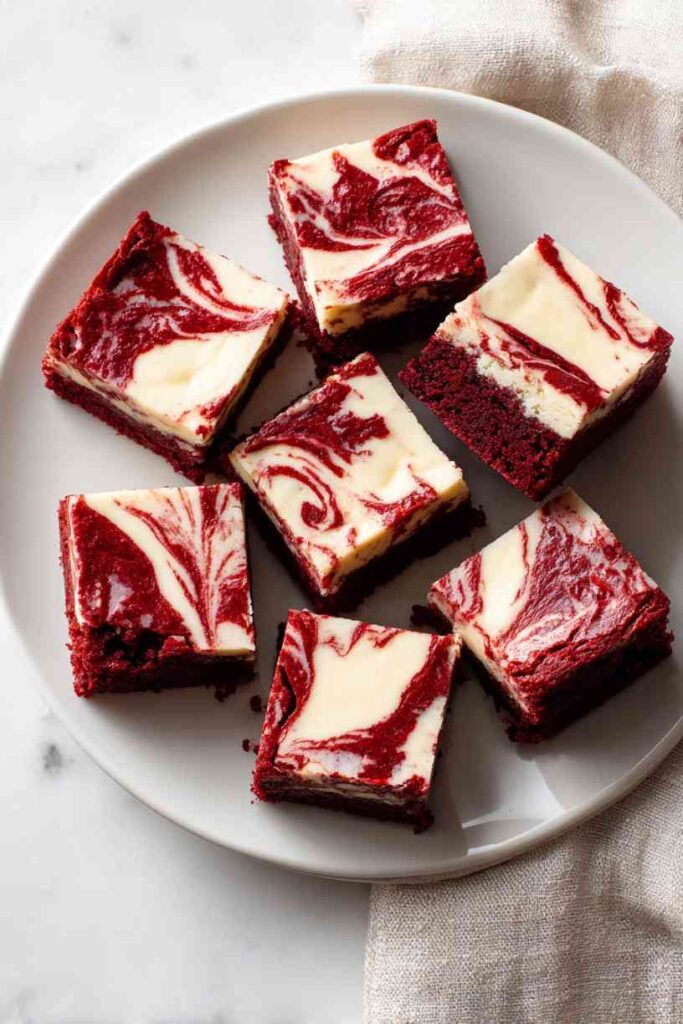
6. Red Velvet Cheesecake Brownies
Red Velvet Cheesecake Brownies are the kind of dessert that always feels like a little luxury, even on an ordinary evening. The rich red velvet base pairs beautifully with the creamy cheesecake swirl, creating a treat that’s both elegant and comforting. I love making these when I want something that looks special without needing complicated steps. Every swirl feels unique, and the combination of cocoa, sweetness, and tangy cream cheese brings a lovely balance. These brownies are perfect for sharing, yet comforting enough to enjoy quietly with a cup of coffee after a long day.
Ingredients
For the red velvet layer:
- ½ cup melted butter
- 1 cup sugar
- 2 eggs
- 1 teaspoon vanilla
- 1 tablespoon red food coloring
- ¾ cup flour
- ¼ cup cocoa powder
- ½ teaspoon salt
- ½ teaspoon vinegar
For the cheesecake swirl:
- 8 oz cream cheese, softened
- ¼ cup sugar
- 1 egg
- ½ teaspoon vanilla
Steps
Step 1: Heat oven to 350°F (175°C) and line an 8×8 pan with parchment, making sure the edges hang over. This helps lift the brownies out cleanly so the beautiful cheesecake swirl stays intact when slicing later.
Step 2: Make the red velvet batter by whisking butter, sugar, eggs, vanilla, vinegar, and food coloring until smooth. Fold in flour, cocoa, and salt gently to maintain a soft, velvety texture. Spread most of the batter into the pan, reserving a few spoonfuls.
Step 3: Prepare the cheesecake swirl by mixing cream cheese, sugar, egg, and vanilla until smooth and creamy. Dollop over the red velvet layer to create patches of cheesecake across the surface.
Step 4: Add the remaining red velvet batter in small spoonfuls and swirl gently with a knife. Bake 25–30 minutes until edges set and the center has a slight wobble, ensuring a creamy finish without overbaking.
Step 5: Cool completely before slicing. The cheesecake firms as it rests, creating clean layers and a beautifully marbled top that tastes as lovely as it looks.
Prep Time: 15 minutes
Bake Time: 30 minutes
Servings: 9
7. Frosted Red Velvet Brownies
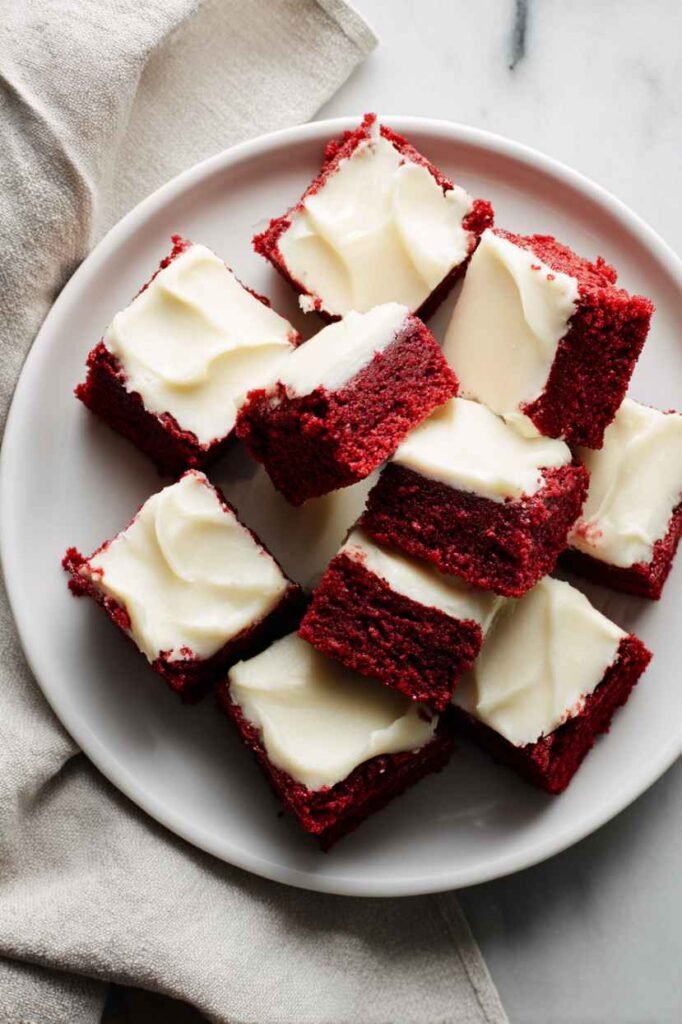
Frosted Red Velvet Brownies feel like the kind of treat you make when you want something soft, sweet, and a little nostalgic. The brownie base is tender with a light cocoa flavor, and the frosting adds creamy sweetness that makes each bite feel warm and comforting. I often bake these for birthdays or potlucks because they travel well and look beautiful with their bright red color and smooth white frosting. They’re simple, pretty, and always bring smiles, especially when you want a dessert that feels a little extra special.
Ingredients
For the brownies:
- ½ cup melted butter
- 1 cup sugar
- 2 eggs
- 1 teaspoon vanilla
- 1 tablespoon red food coloring
- ¾ cup flour
- ¼ cup cocoa powder
- ½ teaspoon salt
- ½ teaspoon vinegar
For the frosting:
- 4 oz cream cheese, softened
- 2 tablespoons butter, softened
- 1 cup powdered sugar
- ½ teaspoon vanilla
Steps
Step 1: Preheat oven to 350°F (175°C) and line an 8×8 pan with parchment. This gives clean edges and prevents sticking, especially since frosted brownies can be delicate once topped with creamy frosting.
Step 2: Combine butter, sugar, eggs, vanilla, vinegar, and food coloring until smooth and shiny. Fold in flour, cocoa, and salt. Spread batter evenly into the pan, ensuring a level surface for smooth frosting later.
Step 3: Bake 22–26 minutes until edges set and the center is slightly soft. Avoid overbaking to maintain a tender texture that pairs perfectly with frosting. Cool completely before adding the topping.
Step 4: Make frosting by beating cream cheese and butter until smooth. Add powdered sugar and vanilla, mixing until creamy. Spread a generous layer over cooled brownies for a rich, comforting finish.
Step 5: Chill briefly before slicing. This helps clean cuts and keeps the frosting smooth. Serve as a sweet, nostalgic treat perfect for celebrations or cozy nights.
Prep Time: 15 minutes
Bake Time: 25 minutes
Servings: 9
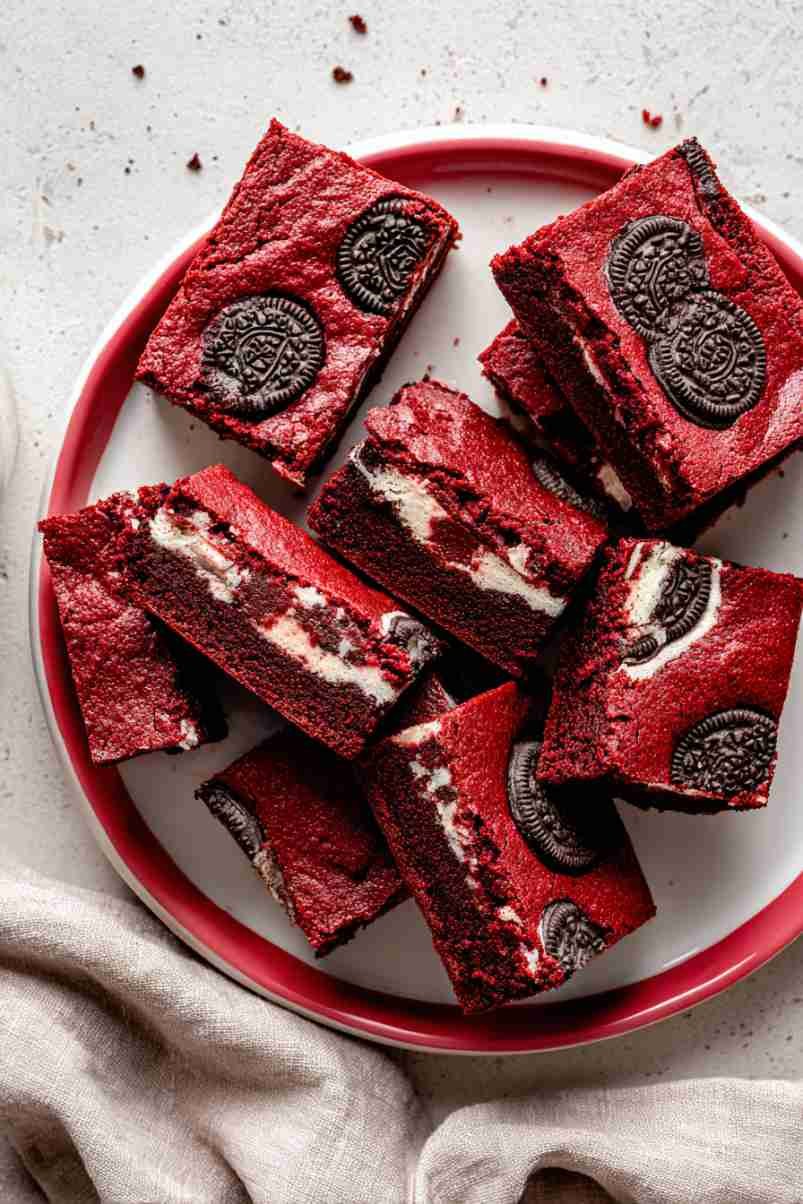
8. Red Velvet Oreo Brownies

Red Velvet Oreo Brownies are a fun, decadent twist that always brings excitement to the kitchen. The combination of soft red velvet batter and crunchy Oreo pieces creates a mix of textures that feels playful and indulgent. I love baking these when I want something surprising and comforting—something that makes both kids and adults smile. The cookies soften slightly as they bake, adding creamy chocolate flavor without overpowering the red velvet. They’re simple to make, pretty to serve, and perfect for sharing on a day when you want dessert to feel a little extra joyful.
Ingredients
- ½ cup melted butter
- 1 cup sugar
- 2 eggs
- 1 teaspoon vanilla
- 1 tablespoon red food coloring
- ¾ cup flour
- ¼ cup cocoa powder
- ½ teaspoon salt
- 12 Oreo cookies, chopped
Steps
Step 1: Preheat oven to 350°F (175°C) and line an 8×8 pan with parchment. Oreo pieces can stick to the pan edges, so lining ensures you can lift the brownies cleanly without breaking their soft texture.
Step 2: Whisk butter, sugar, eggs, vanilla, and food coloring until smooth. Add cocoa, flour, and salt. Mix gently until everything blends into a thick, velvety batter ready for folding in the cookies.
Step 3: Fold chopped Oreos into the batter, distributing them evenly. The cookies will soften slightly during baking, creating creamy chocolate pockets in every bite.
Step 4: Spread batter into the pan and smooth the surface. Bake 22–26 minutes until edges set and the middle stays soft, ensuring a fudgy texture that pairs beautifully with the Oreos.
Step 5: Cool completely before slicing. The Oreos firm slightly as they rest, giving each brownie a perfect blend of crunch and softness. Serve chilled or room temperature.
Prep Time: 10 minutes
Bake Time: 25 minutes
Servings: 9
9. Red Velvet Crinkle Brownies
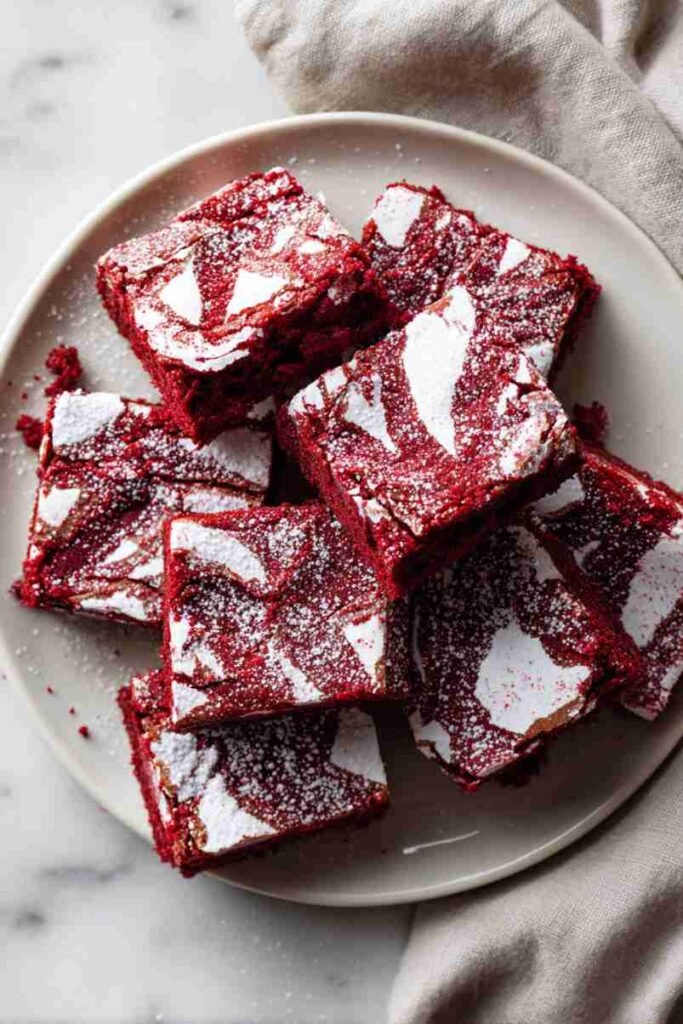
Red Velvet Crinkle Brownies bring together the rich softness of brownies with the pretty crackled top of crinkle cookies. They’re the kind of dessert that looks festive without any extra effort—bright red centers with delicate powdered sugar patterns on top. I love making these for holidays or gatherings because they always stand out on the table and feel welcoming. The texture is soft and slightly fudgy, with a gentle cocoa flavor that pairs beautifully with the sweet crinkle coating. They’re simple, eye-catching, and full of charm.
Ingredients
- ½ cup melted butter
- 1 cup sugar
- 2 eggs
- 1 teaspoon vanilla
- 1 tablespoon red food coloring
- ¾ cup flour
- ¼ cup cocoa powder
- ½ teaspoon salt
- ½ cup powdered sugar (for coating)
Steps
Step 1: Preheat oven to 350°F (175°C) and line an 8×8 pan. Powdered sugar can melt slightly into the batter, so lining the pan helps keep the edges clean and easy to lift once cooled.
Step 2: Mix butter, sugar, eggs, vanilla, and food coloring until smooth. Fold in flour, cocoa, and salt until just combined, keeping the batter thick and velvety for proper crinkle formation.
Step 3: Chill batter 15–20 minutes. This helps the top crackle beautifully when baking and keeps the powdered sugar from dissolving too quickly into the red surface.
Step 4: Spread batter into the pan and dust the top generously with powdered sugar. Bake 22–26 minutes until the edges are set and the top forms classic crackles.
Step 5: Cool completely before slicing. The crinkle top becomes more defined as the brownies rest, giving each square a beautiful, festive look.
Prep Time: 15 minutes
Bake Time: 25 minutes
Servings: 9
10. Holiday Red Velvet Brownies
Holiday Red Velvet Brownies are the kind of dessert that instantly brings warmth into the room. Their bright color, soft texture, and festive sweetness make them perfect for gatherings, gift boxes, or quiet winter evenings. I love adding a touch of white chocolate or sprinkles to make them feel extra special. They come out tender and smooth, with just enough cocoa to balance the sweetness. These brownies bring a little cheer to any table and make the holidays feel a bit cozier, whether you’re sharing with family or enjoying a quiet treat alone.
Ingredients
- ½ cup melted butter
- 1 cup sugar
- 2 eggs
- 1 teaspoon vanilla
- 1 tablespoon red food coloring
- ¾ cup flour
- ¼ cup cocoa powder
- ½ teaspoon salt
- ½ cup white chocolate chips or holiday sprinkles
Steps
Step 1: Heat oven to 350°F (175°C) and line an 8×8 pan. Holiday add-ins like sprinkles or white chocolate can stick, so parchment ensures clean slicing and beautiful brownie edges.
Step 2: Whisk melted butter, sugar, eggs, vanilla, and food coloring until glossy. This creates a smooth, vibrant base that gives the brownies their classic red velvet charm.
Step 3: Fold in flour, cocoa, and salt. Add white chocolate chips or sprinkles and stir gently to keep the batter soft and velvety.
Step 4: Spread evenly into the prepared pan and bake 22–26 minutes until edges set and the center stays soft. This keeps the brownies tender and festive-looking.
Step 5: Cool completely before slicing. Add extra sprinkles on top if desired for an extra holiday touch. These brownies taste even better the next day as the flavors deepen.
Prep Time: 10 minutes
Bake Time: 25 minutes
Servings: 9