My dog is genuinely one of the most spoiled creatures on the planet and I say that with zero shame because she deserves it completely. But even I had a moment of sticker shock standing in a pet store looking at dog beds that cost more than my own throw pillows and were made from materials that felt like they would last approximately four months before falling apart at the seams. I picked up a sixty dollar bed, squeezed the filling, looked at the zipper, put it back down, and went home to figure out how to make one myself.

That was honestly one of the better crafting decisions I have ever made because DIY dog beds are one of those projects where the homemade version is genuinely superior to the store-bought one in almost every way. You choose fabric that is actually durable and washable. You use filling that holds its shape. You build a frame from real wood instead of whatever engineered board those store beds use. You make it the exact size your dog needs rather than the standard small medium large sizing that never quite fits any actual dog correctly.
The other thing nobody mentions about commercial dog beds is how fast they get destroyed. A dog that chews, digs, or is just generally enthusiastic about life can demolish a forty dollar bed in a week. When you make your own you can choose chew-resistant fabrics, add extra reinforcement at the seams, and make it easier to repair if something does eventually wear out. And when it needs washing – which it will, constantly – you can design it so the cover comes off easily and goes straight into the machine.
Whether your dog is a tiny Chihuahua who needs a little nest to curl up in or a giant Great Dane who needs something closer to a twin mattress, building their bed yourself means getting it exactly right. These ten ideas range from incredibly simple no-sew projects to more involved builds that result in pieces of furniture that look genuinely beautiful in your home.
1. Wooden Pallet Dog Bed
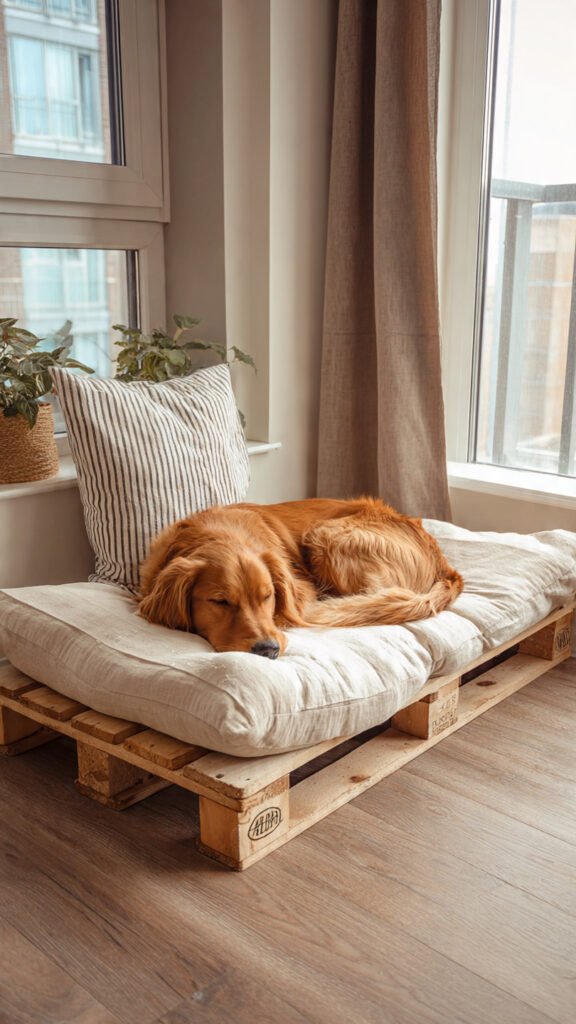
A wooden pallet turned into a dog bed is one of those upcycling projects that looks so intentional and designed when it is finished that people are genuinely surprised to hear where it started. You sand the pallet incredibly smooth to remove any splinters, paint or stain it in a color that works with your home, and add a cushion on top either purchased or made yourself. The pallet acts as a platform bed frame that keeps your dog elevated slightly off the floor, which many dogs prefer especially in cooler months, and the whole thing has this rustic casual look that works in living rooms, bedrooms, and mudrooms.
What It Is: A wooden shipping pallet sanded smooth, painted or stained, and topped with a thick cushion to create an elevated platform dog bed with a rustic aesthetic.
Supplies and Budget: Wooden pallet – HT marked (free to $10), sandpaper multiple grits ($5–8), paint or stain ($10–15), thick foam or dog bed cushion ($20–40), fabric for cushion cover if making own ($15–25). Total: $50–$98
Quick How-To: Find HT stamped pallet and sand all surfaces very thoroughly – this step is non-negotiable for dog safety. Fill gaps with wood filler if desired. Paint or stain and seal completely. Let cure fully before use. Place thick cushion on top. Optional: add short legs to the pallet corners to raise it further off the ground.
DIY Tip: Sand pallet wood through at least four grits ending at 220 – pallet wood is rough and splintery and a dog will find every single sharp spot with their paws and belly, so spending extra time on thorough sanding is genuinely the most important part of this whole project.
2. No-Sew Fleece Tie Dog Bed
This is the project for everyone who wants to make their dog something cozy and handmade but does not own a sewing machine and is not about to learn to hand sew. You take two pieces of fleece cut to the same size, cut fringe all the way around the edges, and tie the fringe pieces together in simple knots to create a sealed pouch that you stuff with filling. No needle, no thread, no machine – just scissors and fleece and stuffing. The finished bed is soft, washable, and has this chunky knotted edge detail that looks genuinely charming. Dogs love the soft fleece texture too.
What It Is: A completely no-sew dog bed made by tying fringe cut from two matching fleece pieces together to form a stuffed pouch, requiring only scissors and stuffing with no sewing of any kind.
Supplies and Budget: Two pieces of fleece fabric 1.5 yards each ($8–15 total), polyfill stuffing or old pillow filling ($8–15), scissors, ruler or chalk for marking ($0 if owned). Total: $16–$30
Quick How-To: Cut two fleece pieces to same size. Layer them together. Cut fringe strips about 1.5 inches wide and 4 inches long all around the perimeter on both layers together. Tie each pair of fringe strips in a double knot all the way around three sides. Stuff firmly with filling through open fourth side. Tie remaining fringe closed.
DIY Tip: Stuff the bed much more firmly than seems right because fleece stretches with use and polyfill compresses quickly under a dog’s weight – what feels overstuffed when you tie it closed will feel like a perfectly full comfortable bed after a week of your dog sleeping on it.
3. Upcycled Suitcase Dog Bed
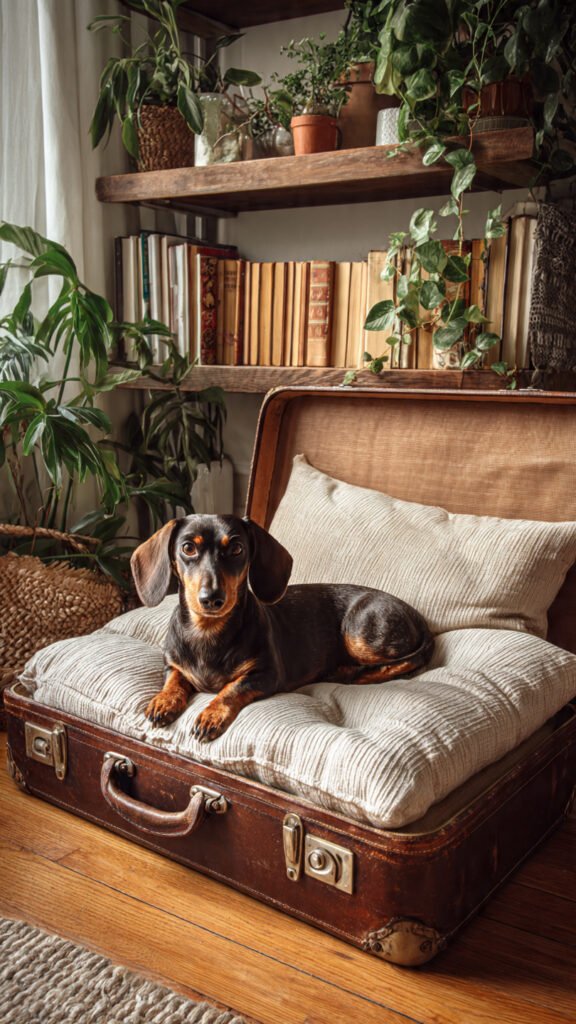
An old vintage suitcase turned into a dog bed is one of the most charming and creative pet projects you will ever see and the result is so genuinely decorative that it looks like intentional home decor rather than a pet bed. You find a vintage hard-sided suitcase at a thrift store, clean it up, add legs if desired, and line the interior with a thick cushion covered in beautiful fabric. The dog curls up inside the open case and the whole piece looks like a little piece of luggage art in your living room or bedroom. Dogs love the enclosed enclosed feeling it gives them.
What It Is: A vintage hard-sided suitcase upcycled into a dog bed by adding interior cushion padding and optional legs, creating a decorative and functional enclosed sleeping space your dog can curl up inside.
Supplies and Budget: Vintage suitcase from thrift store ($5–25), foam cut to fit interior ($15–25), fabric for cushion cover ($10–20), hairpin or furniture legs optional ($15–25), hot glue or staple gun ($5–10). Total: $50–$105
Quick How-To: Clean suitcase interior and exterior thoroughly. Measure interior dimensions and cut foam to fit exactly. Cover foam in chosen fabric using hot glue or basic sewing. Place cushion inside suitcase. Add legs by drilling through bottom corners and attaching with bolts if elevating. Set open suitcase in desired location.
DIY Tip: Choose a suitcase size that is about twice the size of your dog when they are curled up – a suitcase that is too small is uncomfortable and your dog will not use it, but one with a little extra room feels like a safe den rather than a tight squeeze which most dogs genuinely prefer.
4. Wooden Frame Upholstered Dog Bed
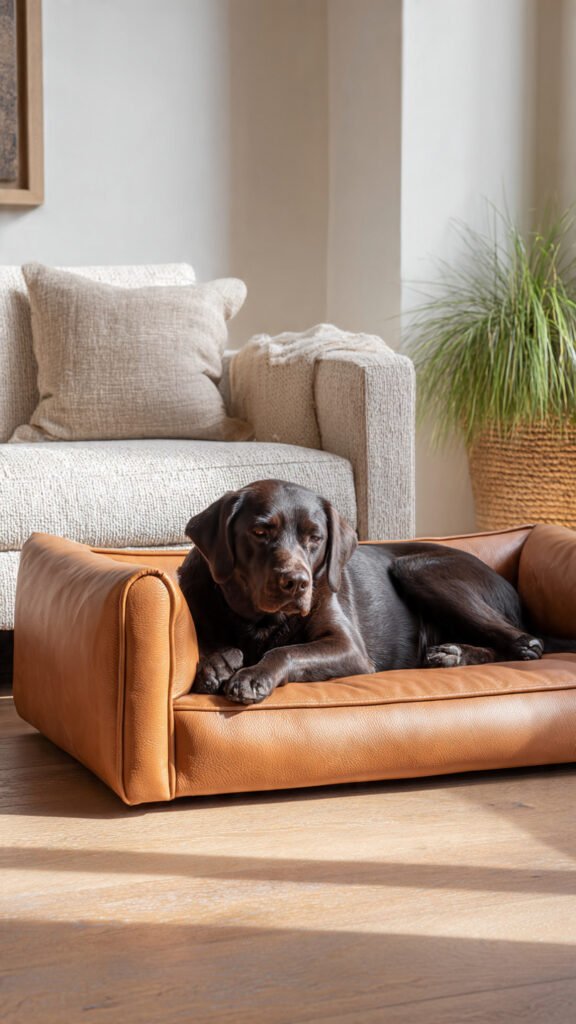
Building a proper upholstered dog bed with a wooden frame and fabric sides is essentially building a tiny piece of upholstered furniture and the result looks exactly like that – a real piece of furniture that happens to be dog-sized. You build a simple rectangular or oval wooden frame, add a foam base inside, wrap the sides in batting and fabric, and finish the top edge with a neat upholstered border. The dogs gets a defined sleeping space with soft raised sides that support their back and the whole thing looks so beautiful sitting in a room that visitors often do not realize it is a dog bed until the dog appears.
What It Is: A fully upholstered dog bed built on a wooden frame with foam base cushion and fabric-wrapped sides, resembling a miniature piece of upholstered furniture for a polished and elegant pet bed.
Supplies and Budget: Plywood for base and sides ($15–25), upholstery foam ($20–35), batting ($8–12), upholstery fabric 2 yards ($20–45), staple gun ($10–15), wood screws ($5). Total: $78–$137
Quick How-To: Cut plywood into base and four sides. Assemble rectangular box with screws. Cut foam for base and glue down. Wrap exterior sides in batting then pull fabric over and staple to inside of frame. Cut foam for side bolsters and wrap separately. Attach bolsters to top edges of frame with staples and fabric-covered finishing strips.
DIY Tip: Use outdoor or performance upholstery fabric rather than regular home decor fabric for a dog bed – fabrics marketed as performance or indoor-outdoor are genuinely more resistant to stains, hair, and the general destruction that dogs bring to everything they sleep on regularly.
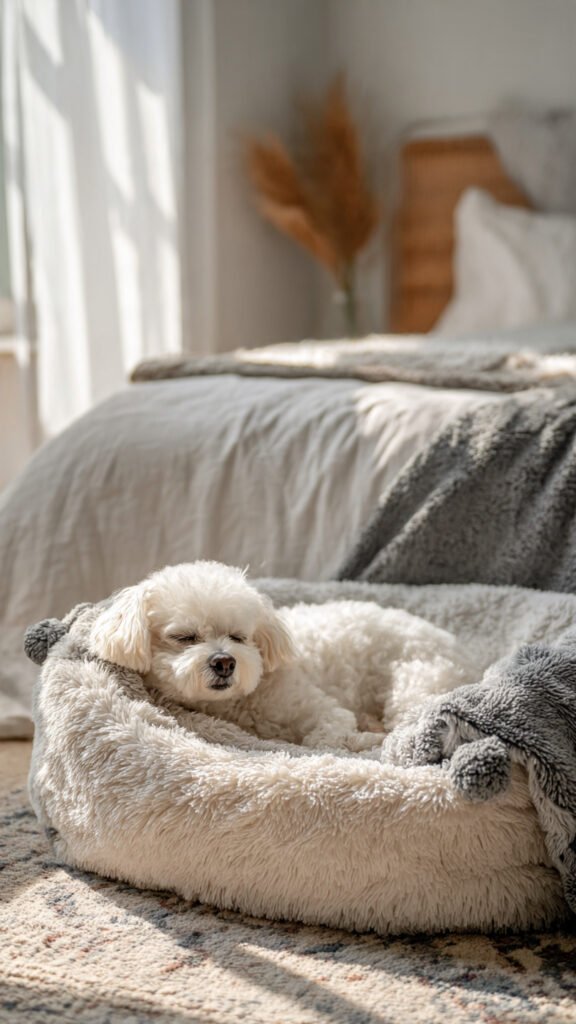
5. Giant Floor Pillow Dog Bed
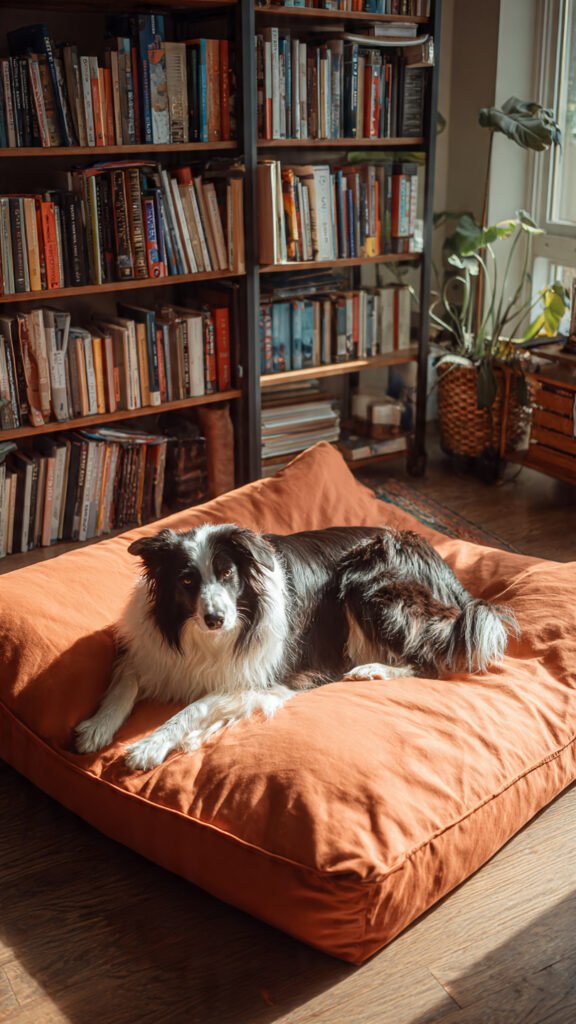
Sometimes the best dog bed is also the simplest and a giant floor pillow stuffed to maximum capacity is exactly that. You sew or knot together a large fabric cover – think about 36 by 36 inches or even larger for bigger dogs – and stuff it absolutely full with polyfill, shredded memory foam, or old blankets and pillows you are no longer using. The resulting giant cushion is incredibly comfortable, easy to wash when you can take the cover off, and works for dogs of almost any size. Use canvas, denim, or outdoor fabric for durability and the whole thing lasts surprisingly long even with heavy use.
What It Is: An oversized square or round floor pillow made with a durable fabric cover and stuffed firmly with polyfill or shredded foam, creating a comfortable giant cushion dog bed that is easy to wash and suitable for all dog sizes.
Supplies and Budget: Canvas or outdoor fabric 2 yards ($15–25), polyfill or shredded foam ($15–30), zipper ($3–5), sewing machine or no-sew fabric glue ($0 if owned or $8–15). Total: $33–$75
Quick How-To: Cut two large squares or circles of fabric. Sew three sides together or use fabric glue on three sides. Install zipper on fourth side for removable cover. Stuff very firmly through zipper opening. Close zipper. Shake and redistribute filling. Machine wash cover regularly by unzipping and removing insert.
DIY Tip: Add a zipper rather than sewing the final side closed even if it feels like extra work – a dog bed cover that can be removed and washed separately from the insert is infinitely more practical than one that has to go in the machine whole, which often does not fit and never fully dries anyway.
6. Crate Topper Dog Bed
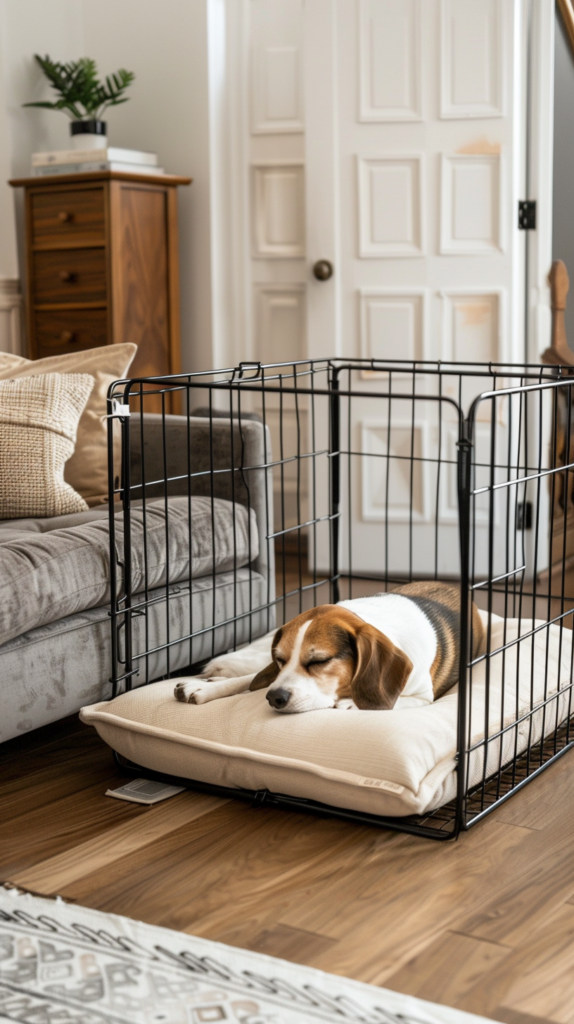
If your dog already has a wire crate and you are looking for a way to make it more comfortable and more visually appealing, a custom fitted cushion for the top of the crate is the answer. A lot of dogs actually like sleeping on top of their crate as much as inside it, and a cushion that fits the exact dimensions of your specific crate top gives them a comfortable elevated perch. You simply measure the crate top, cut foam to size, cover it in a durable washable fabric, and attach it with velcro or ties so it does not shift around when the dog jumps up.
What It Is: A custom fitted cushion made to exact crate top dimensions, covered in durable fabric and attached securely so dogs can sleep comfortably on top of their wire crate as an elevated bed.
Supplies and Budget: Foam cut to crate top dimensions ($15–25), durable fabric like canvas or outdoor cloth ($10–20), velcro strips ($5–8), sewing machine or fabric glue ($0 or $8–15). Total: $30–$68
Quick How-To: Measure your specific crate top precisely. Cut foam to exact dimensions. Cut fabric with several inches extra on all sides. Wrap foam in fabric and sew or glue edges to underside. Attach velcro strips to bottom corners of cushion and corresponding spots on crate top bars. Press cushion firmly onto crate top.
DIY Tip: Use a fabric that contrasts with your crate color rather than trying to match it – a cream or tan cushion on a black wire crate looks deliberately designed and intentional, while a cushion that is almost the same color as the crate just looks like an afterthought that does not quite match.
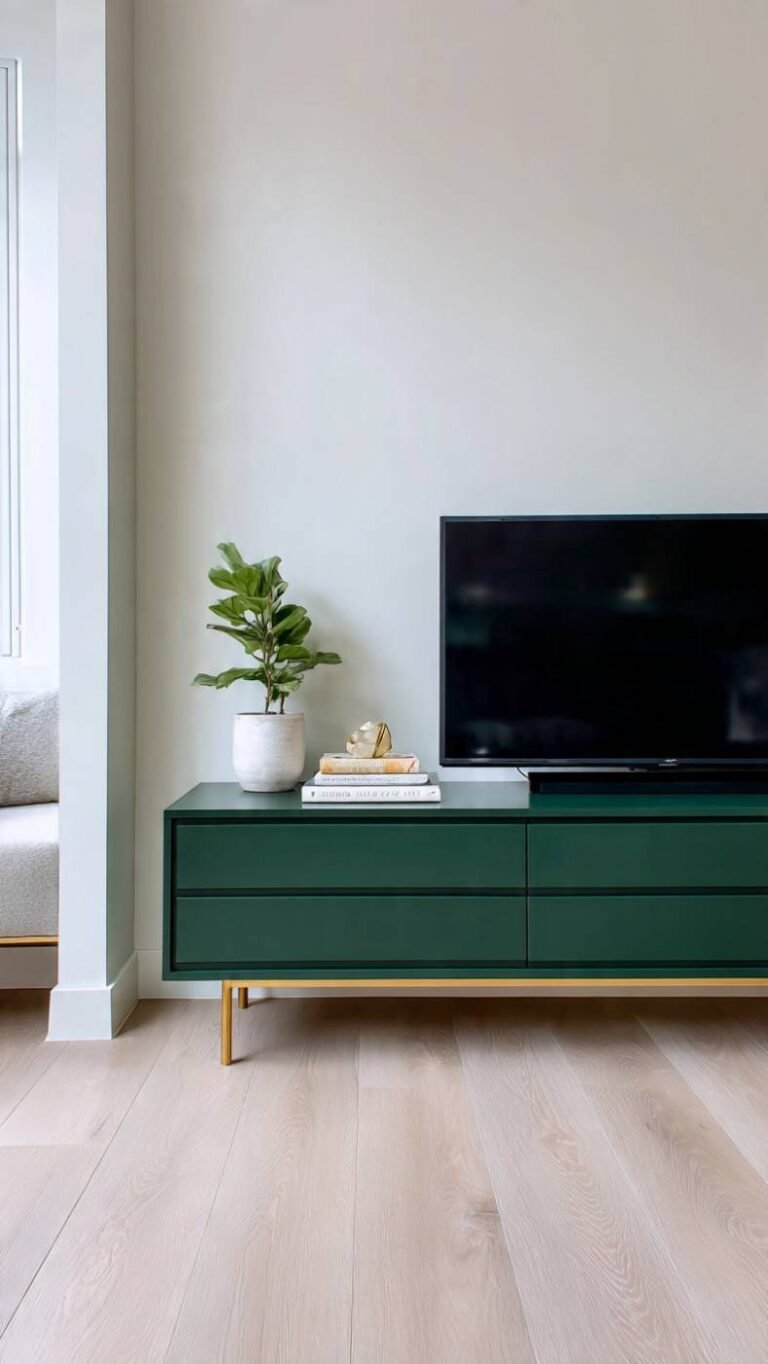
7. Repurposed Dresser Drawer Dog Bed
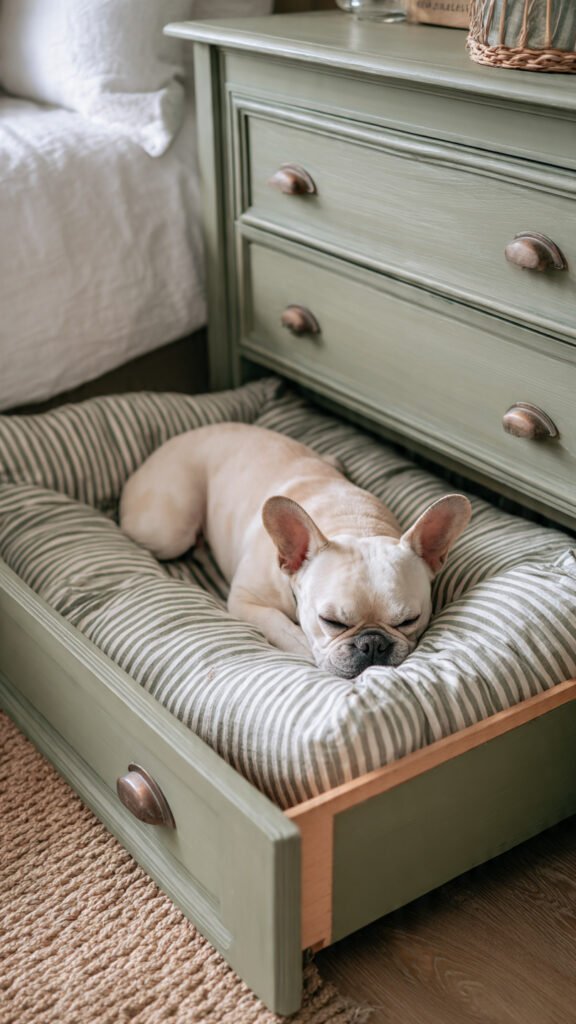
Pulling out a deep dresser drawer and turning it into a dog bed is one of those ideas that is so simple it feels almost obvious once you hear it, but the finished result is incredibly charming especially for small and medium dogs. You take a large drawer from an old dresser, paint or stain it if needed, add a foam cushion cut to fit inside, cover the cushion in beautiful fabric, and the drawer becomes a cozy enclosed sleeping box that dogs absolutely love because the sides give them that secure enclosed feeling. It looks intentional and sweet and works especially well in bedroom settings.
What It Is: A large old dresser drawer repurposed as a dog bed by adding a custom fitted foam cushion inside, creating a cozy low-sided sleeping box that gives dogs an enclosed secure feeling.
Supplies and Budget: Old dresser drawer (free or $5–15 thrifted), paint or stain ($10–15), foam cut to interior dimensions ($15–25), fabric for cushion cover ($10–20), hot glue or basic sewing. Total: $35–$75
Quick How-To: Remove drawer hardware and sand smooth. Paint or stain exterior in desired color and let cure fully. Measure interior and cut foam to fit. Sew or glue fabric around foam cushion. Place cushion inside drawer. Add drawer pull back on if desired for aesthetic. Place finished drawer bed in chosen location.
DIY Tip: Paint the exterior of the drawer in a color that coordinates with your bedroom or living room rather than just leaving it as raw wood or its original color – a painted drawer bed that matches your room palette looks like intentional pet decor rather than a recycled piece of furniture and the difference in how it looks in your home is significant.
8. Memory Foam Orthopedic Dog Bed
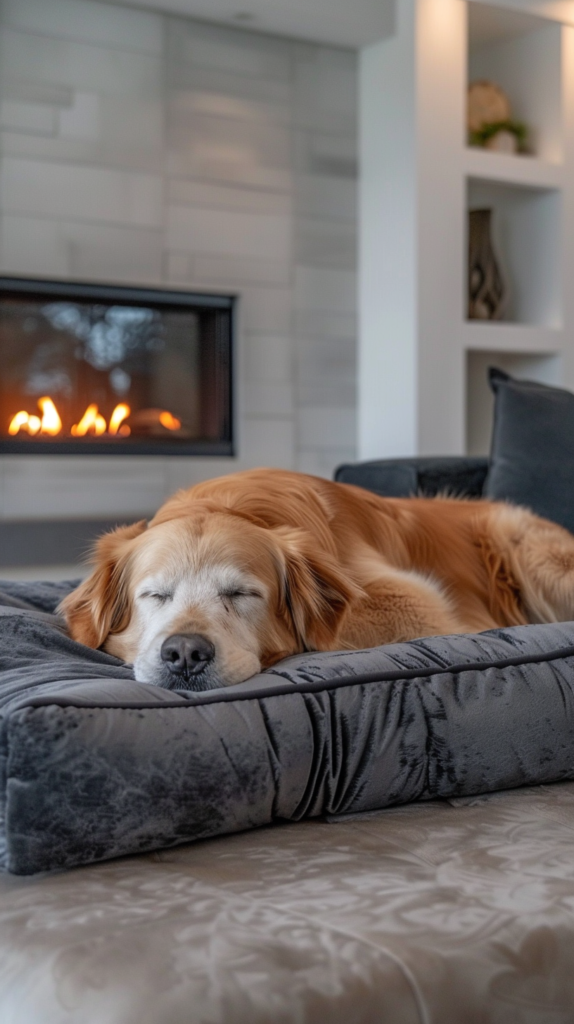
Older dogs and large breed dogs genuinely benefit from sleeping on memory foam the same way people do – it relieves joint pressure, supports proper spine alignment, and means they wake up more comfortable and mobile. Making your own orthopedic dog bed with real memory foam is actually more affordable than buying a commercial orthopedic pet bed because you source the foam directly and make a proper removable washable cover yourself. The result is a real memory foam bed in exactly the right size with a cover that actually comes off and goes in the washing machine, which commercial versions often do not allow.
What It Is: An orthopedic dog bed made with a real memory foam insert in a custom size, covered in a removable washable fabric cover for dogs who need joint support, especially older or large breed dogs.
Supplies and Budget: Memory foam mattress topper cut to size or memory foam offcuts ($25–50), waterproof liner fabric ($10–15), outer cover fabric – performance or microfiber ($15–30), zipper ($3–5). Total: $53–$100
Quick How-To: Cut memory foam to desired bed dimensions. Make a waterproof inner liner that zips or velcros closed around the foam. Make a separate outer cover in soft washable fabric with zipper closure. Slip foam into inner liner, close. Slip into outer cover, close. Outer cover can be washed weekly while inner liner protects foam from accidents.
DIY Tip: Make two outer covers at the same time when you make the first one – having a second cover means you can put one straight on after washing the other without leaving the bed bare for a day while the cover dries, which matters because dogs almost always want to use their bed immediately after you clean it.
9. Rope Coil Dog Bed
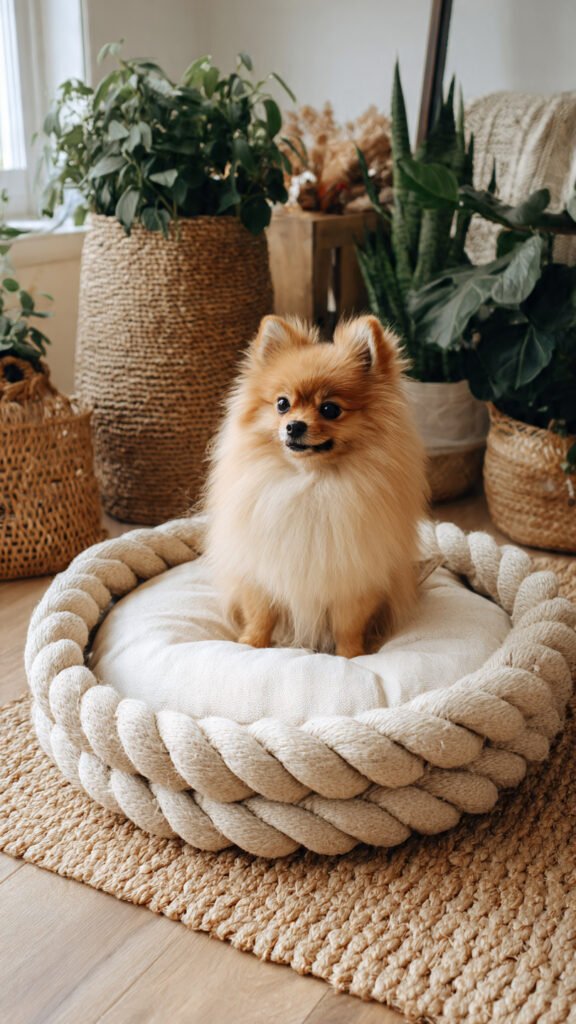
A coiled rope dog bed made from cotton rope is one of those crafts that looks incredibly impressive but is essentially just gluing rope in circles, which really is as simple as it sounds. You hot glue thick cotton rope in a flat coil starting from the center and working outward until you have the right diameter, then continue building up the sides by coiling the rope on top of the flat base to create walls. The rope texture looks beautiful, the natural cotton is soft and comfortable, and the whole thing has this artisanal handmade quality that looks great in almost any style home. Add a cushion inside for extra comfort.
What It Is: A dog bed made entirely from coiled thick cotton rope hot-glued into a flat circular base with built-up rope sides, creating a natural textured basket-style bed that is both decorative and functional.
Supplies and Budget: Thick cotton rope 3/4 inch diameter ($20–35 for a large coil), hot glue gun and plenty of glue sticks ($8–15), round cushion to fit inside optional ($15–25), scissors. Total: $43–$75
Quick How-To: Begin coiling rope from a tight center point on a flat heat-safe surface. Apply hot glue between each rope row as you coil outward. Press firmly and hold each section until glue sets. When base reaches desired diameter, begin coiling rope on top of outer edge to build up sides. Continue until sides reach desired height. Add cushion inside.
DIY Tip: Work on a silicone mat or parchment paper rather than directly on a table while coiling – hot glue inevitably drips and strings and cleaning hardened glue off a table surface without damaging it is significantly more annoying than just protecting the surface from the beginning.
10. Window Seat Dog Bed
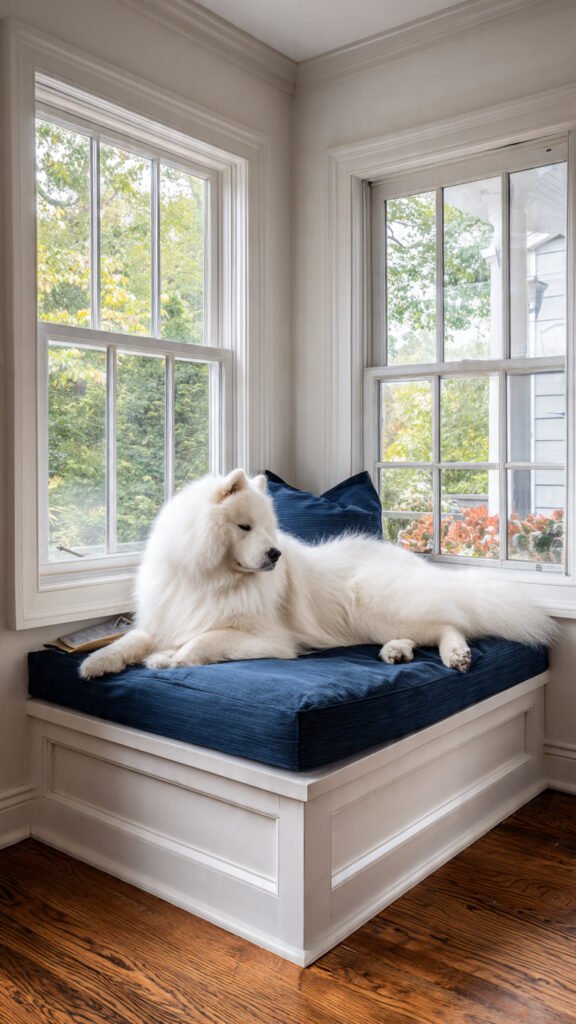
If you have a window seat, bay window area, or even just a spot under a window where your dog always gravitates to lie in the sunbeam, building a dedicated raised dog bed platform in that spot turns their favorite lounging location into a proper comfortable sleeping space that is also genuinely beautiful. You build a low wooden platform that fits the window space, top it with a thick custom cushion, and the result is a built-in looking dog bed that looks like architectural detail in your home. Dogs who love watching out windows are absolutely obsessed with these and you will barely get them off it.
What It Is: A low raised wooden platform bed built to fit a specific window or bay area, topped with a custom fitted cushion, creating a built-in-looking elevated dog sleeping and lounging space in the sunniest spot of the room.
Supplies and Budget: Plywood for platform ($20–35), 2×4 lumber for legs or base frame ($15–20), foam and fabric for cushion ($25–50), paint or stain ($10–15), wood screws ($5). Total: $75–$125
Quick How-To: Measure window area precisely. Build low platform box from plywood and 2×4 frame at a height of about 8 to 12 inches. Paint or stain to match window trim or room palette. Measure platform top and cut foam to fit. Sew or glue cushion cover with zipper. Place cushion on platform. Position under window.
DIY Tip: Build the platform with a hollow interior rather than solid construction and add a small hinged lid or access panel on one side – this turns the dog bed platform into storage for dog toys, blankets, and supplies which makes the whole thing even more useful in your living space.