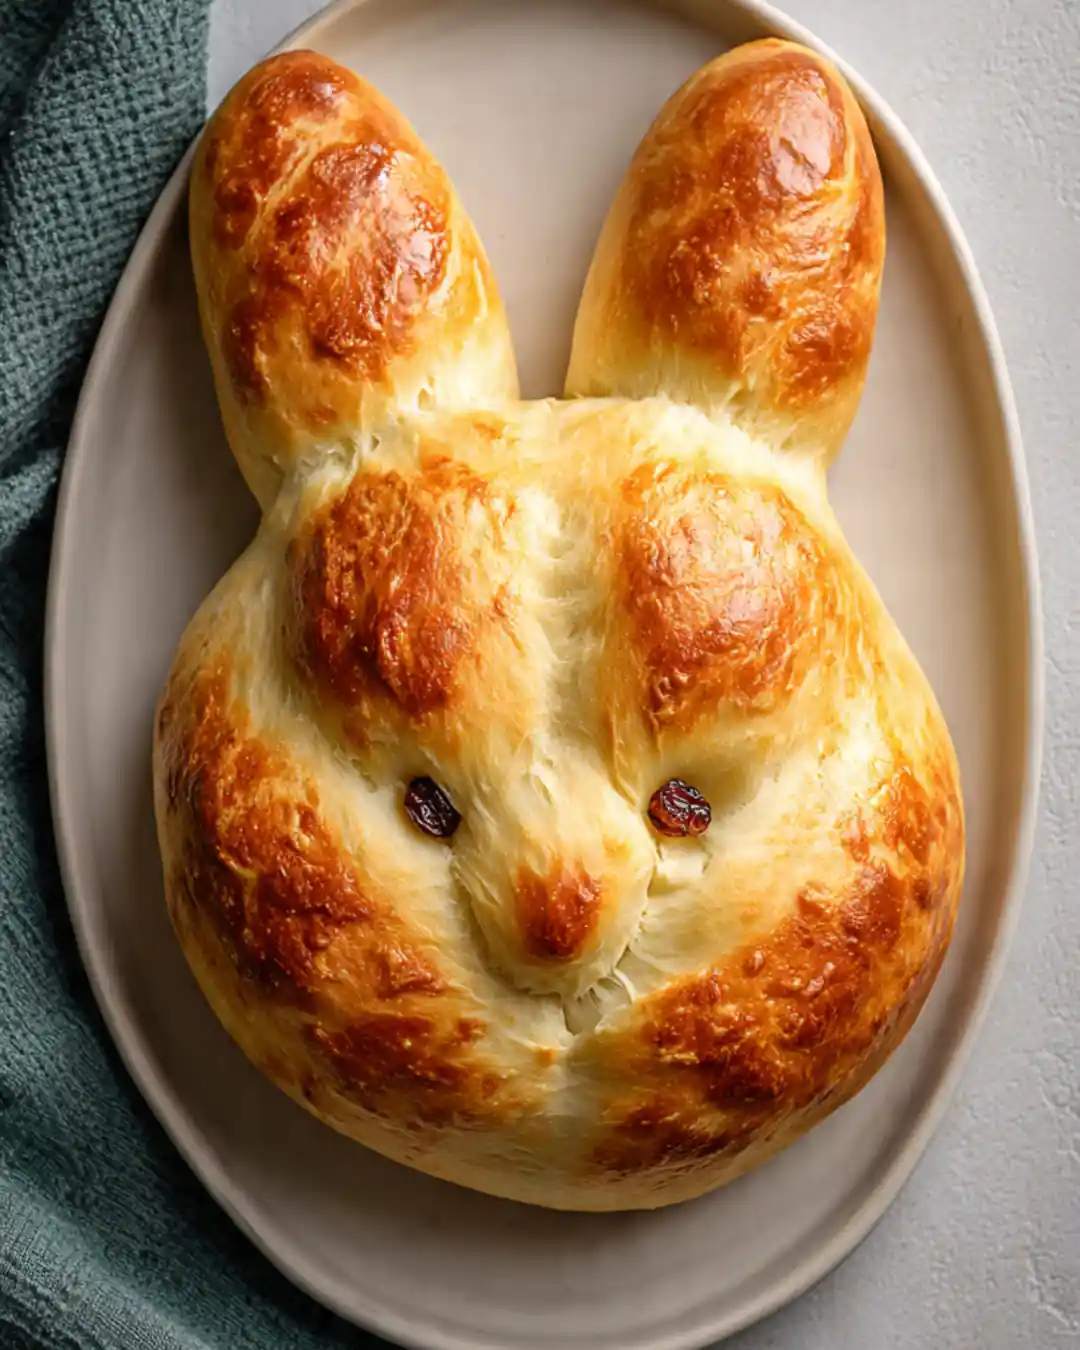
There are some bakes that are simply about bringing a smile to your face, and this Easter Bunny Bread is at the top of that list. It’s not just a delicious, soft-crusted loaf of bread; it’s an edible piece of art that makes a fantastic centerpiece for an Easter brunch. I remember the first time I shaped a loaf into a bunny—it felt like a fun, creative experiment, and the result was so charming that it’s become a tradition in our home ever since.
I love this recipe because it’s surprisingly straightforward. You don’t need to be a sculptor; you just need a basic, reliable brioche-style dough, some patience, and a bit of playful imagination. The scent of yeast and butter filling the house is the ultimate welcoming sign of spring. Whether you’re making this for the kids, for a family gathering, or just for your own joy, it’s a beautiful reminder that baking is as much about the process as it is about the final, delicious slice.
What Is Bunny Bread?
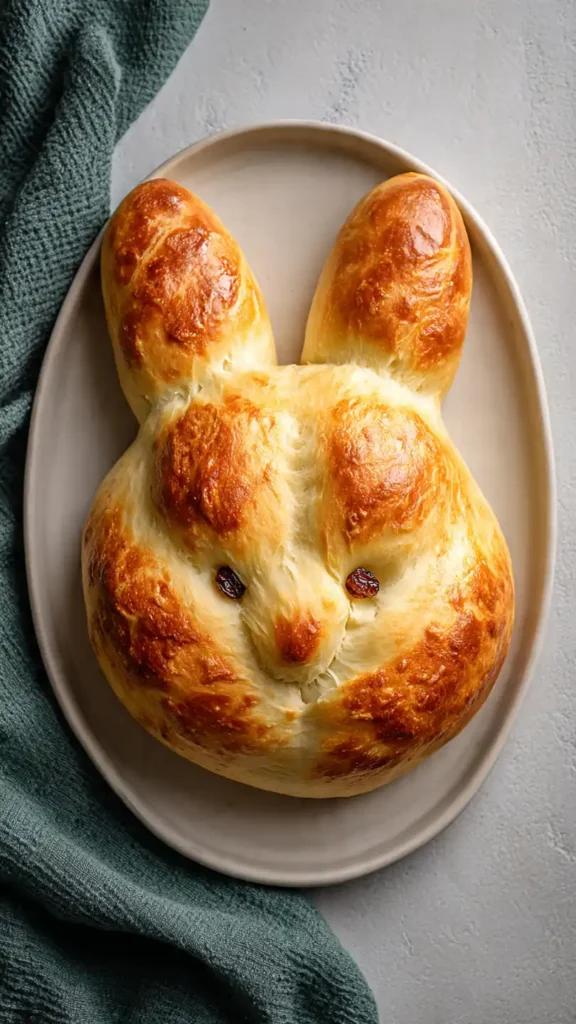
Bunny bread is a shaped, enriched dough (typically brioche or a soft white milk bread) that is molded into the iconic shape of a bunny. By splitting the dough, rolling long ears, and using raisins or dried fruit for the eyes, you create a characterful loaf that bakes into a golden, buttery, and incredibly tender treat. It’s a fun, family-friendly project that turns standard bread baking into a celebratory event, perfect for marking the season with something homemade and whimsical.
Why You’ll Love This Recipe
You’ll love this recipe because it makes a simple activity—baking bread—feel like a holiday tradition. It’s an excellent project to involve children in; letting them shape the “ears” and place the “eyes” is a wonderful way to get them excited about being in the kitchen.
The bread itself is delightful—rich, soft, and slightly sweet. Because it’s an enriched dough (using butter and milk), it stays moist for days. It’s perfect for slathering with some fresh honey-butter or a little bit of fruit preserves. It’s a low-stress, high-reward bake that turns your dinner table into a festive scene, and the joy of slicing into that golden bunny is absolutely unbeatable.
Ingredients
- Bread Flour: Provides the strength and structure needed for shaping the dough.
- Whole Milk: Warmed slightly, it creates the tender, soft crumb that makes this bread so addictive.
- Unsalted Butter: Added for richness and that classic brioche-like golden crust.
- Sugar: A touch of sweetness helps feed the yeast and gives the loaf its beautiful, deep color.
- Active Dry Yeast: For a reliable, steady rise.
- Egg: Acts as both a binder and a rich, golden glaze for the outside.
- Raisins or Currants: Used to make the eyes and nose of the bunny!
Kitchen Equipment Needed
- Stand Mixer: Very helpful for kneading the rich dough.
- Large Mixing Bowl: For the proofing stage.
- Baking Sheet: A large, flat surface to accommodate your bunny shape.
- Sharp Kitchen Shears: Essential for making the precise cuts to shape the ears and toes.
- Parchment Paper: Prevents the bunny from sticking to the pan while baking.
What to Serve with Bunny Bread
This loaf is spectacular when served warm with a side of honey-whipped butter or a bright strawberry jam. If you’re serving it at brunch, a side of fresh seasonal fruits or a simple egg-based dish like a frittata makes it a complete, festive breakfast.
How to Store and Reheat
Since this is an enriched bread, it’s best enjoyed fresh within 2 days. Store it in a bread bag or airtight container. If you’re not planning on eating it all at once, you can slice and freeze it; then, simply pop a slice in the toaster to restore that fresh, soft-inside-and-crisp-outside texture!
FAQs
Can I use a store-bought dough?
Yes, if you’re short on time, a high-quality refrigerated pizza dough or frozen bread dough works just fine! Just let it reach room temperature before you start shaping.
How do I prevent the ears from burning?
Since the ears are thinner than the rest of the bunny, they can brown faster. If you notice them getting too dark halfway through, cover the ear tips loosely with a little piece of aluminum foil for the remainder of the bake.
Can I make multiple bunnies?
Absolutely! Just divide your dough into smaller portions to create a “family” of mini-bunnies. They bake faster, so start checking them at the 15-minute mark!
Whimsical Easter Bunny Bread
Ingredients
Equipment
Method
- Activate Yeast: Mix the warm milk, sugar, and yeast in your mixer bowl. Let sit until foamy (about 5–10 mins).
- Make the Dough: Add the flour, salt, softened butter, and egg. Knead with the dough hook until the dough is smooth, elastic, and pulls away from the sides of the bowl (about 8–10 mins).
- First Rise: Cover the bowl and let the dough rise in a warm spot until doubled in size (about 1.5 hours).
- Shape: Divide the dough into two portions—one large (the body) and one smaller (the head). Roll them into balls and place on the baking sheet. Pinch the pieces together where the head meets the body. Take small pieces of dough to shape two long ears and a tail. Attach them firmly to the body.
- Face: Press two raisins into the head for the eyes, and one for the nose.
- Second Rise: Cover and let the bunny rise again for 30–45 minutes.
- Egg Wash and Bake: Brush the entire surface with an egg wash (1 egg beaten with a splash of water). Bake at 350°F (175°C) for 25–30 minutes, or until the bread is golden brown and sounds hollow when tapped.
- Serve: Let it cool completely on a wire rack before showing off your festive creation!