There is something so comforting about the smell of caramel slowly cooking on the stove. It takes me back to cooler evenings when the house feels quiet and warm at the same time. I never thought I would make Soft and Chewy Homemade Caramels myself. I used to believe they were too tricky, something only candy shops could get just right. But one afternoon, I decided to try.
I set everything out on the counter like I always do when I want to feel organized. Granulated sugar, brown sugar, light corn syrup, cubes of butter, salt, heavy cream, and vanilla. Simple ingredients, but I knew they would turn into something special.
As the sugars, corn syrup, and butter melted together in the pot, the mixture slowly changed color. It went from pale and bubbly to a deeper golden shade. I added the heavy cream carefully, stirring gently and watching the caramel thicken. It takes patience, and at this stage in my life, I have learned not to rush these moments.
The smell was rich and sweet, filling the whole kitchen. My husband came in and said it smelled like a candy store. When the caramel reached the right color and thickness, I stirred in the vanilla and poured it into a prepared pan.
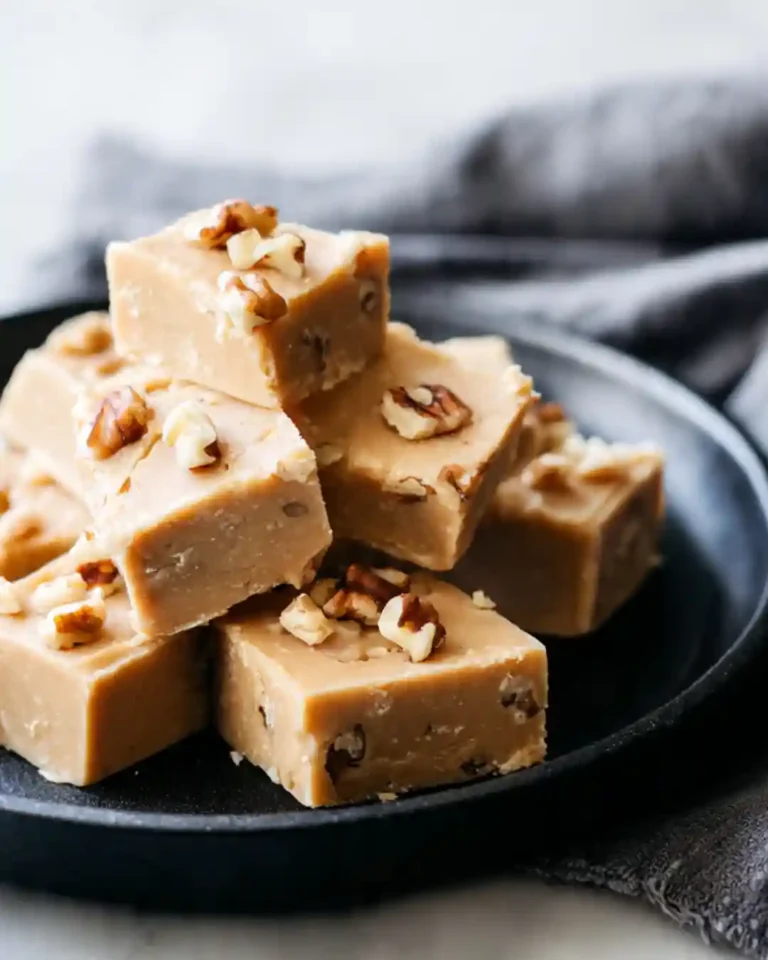
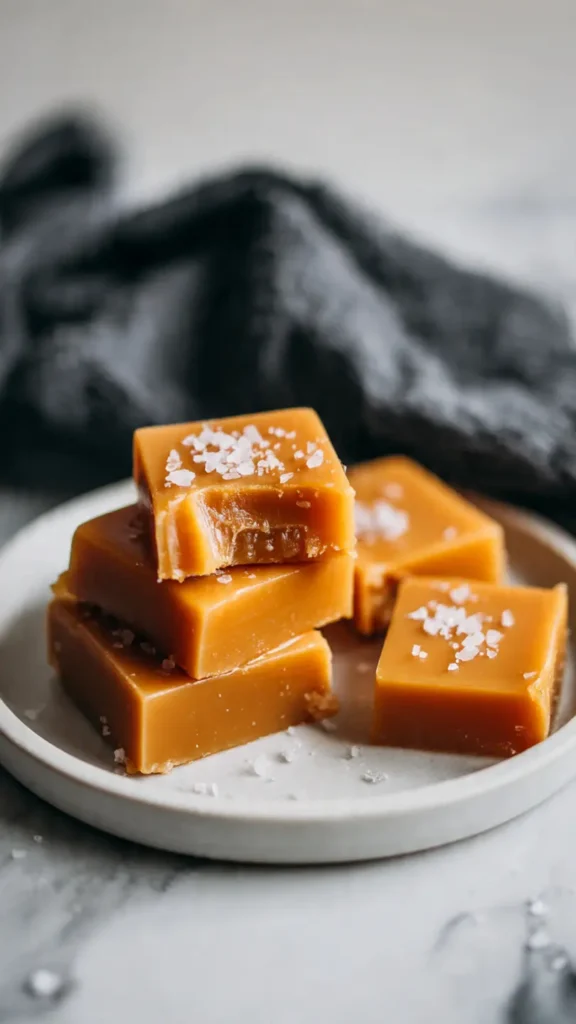
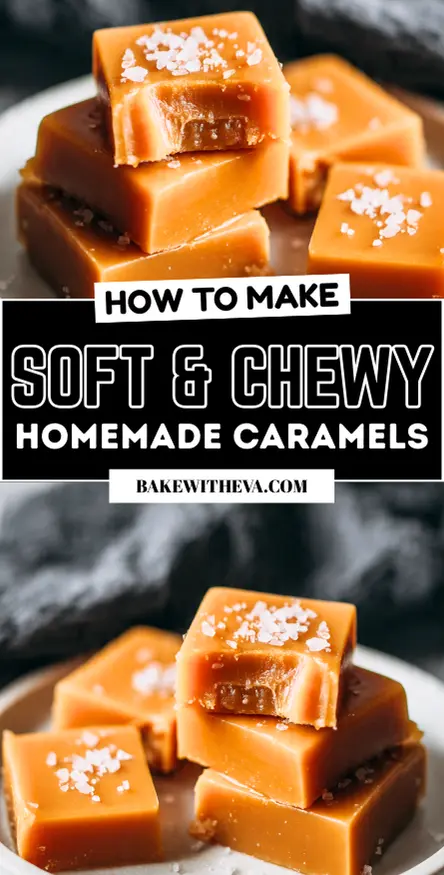
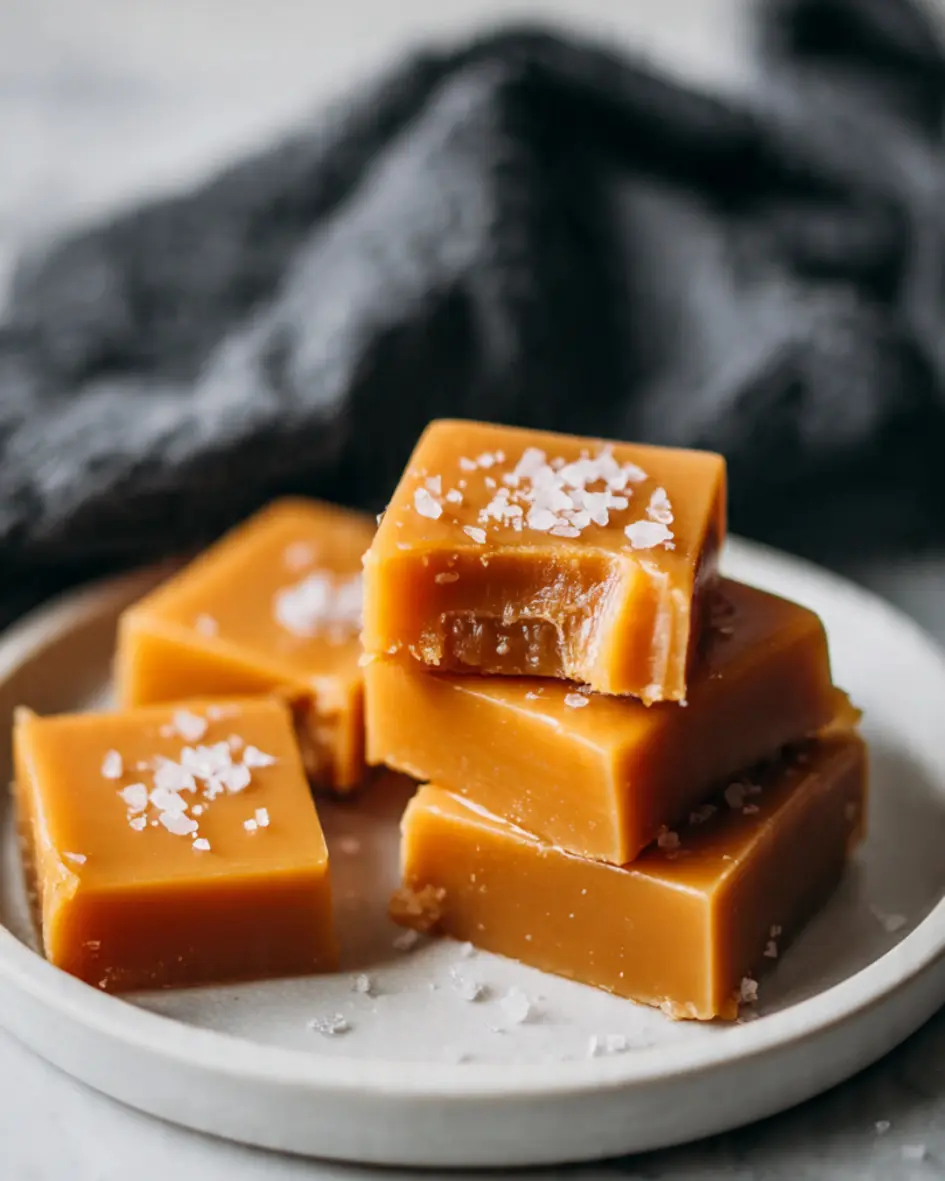
After it cooled and set, I cut it into small squares and wrapped them in little pieces of paper. When we tasted the first one, it was soft, chewy, and buttery. Making them reminded me that some of the sweetest things in life just need time and a little care.
What Is Homemade Caramels
To me, homemade caramels are soft, chewy candies made by slowly cooking sugar, butter, cream, and syrup together until they reach the right temperature. As the mixture heats, it thickens and turns a warm golden color. Once poured into a pan and cooled, it sets into a smooth slab that can be cut into small squares. I like how the texture stays firm yet flexible, making each piece easy to unwrap and enjoy. Making caramels at home feels precise but manageable. With patience and attention, simple ingredients transform into neat, sweet bites ready to share.
Why You’ll Love This Homemade Caramels
From the first batch I made, I appreciated how rewarding homemade caramels can be. I like that the ingredients are simple, yet the final result looks polished and impressive. Watching the mixture slowly reach the right temperature makes me feel more confident each time I prepare it. The texture turns out soft and chewy, easy to cut and wrap for sharing. I also enjoy that they keep well at room temperature, which makes them convenient for gifts or gatherings. For me, this recipe feels dependable and worth the little extra attention it requires during cooking.
Ingredients for Homemade Caramels
- Granulated sugar – creates the base structure and sweetness of the caramel.
- Brown sugar – adds depth and helps give the caramels their golden color.
- Light corn syrup – keeps the mixture smooth and prevents crystallization while cooking.
- Unsalted butter – melts into the sugars and adds richness and smooth texture.
- Salt – balances the sweetness and sharpens the overall taste.
- Heavy cream (room temperature) – blends slowly into the hot mixture and creates the soft, chewy consistency.
- Vanilla extract – stirred in at the end for a gentle aroma and balanced sweetness.
Kitchen Equipment Needed
- 9×13 inch baking pan – holds the caramel mixture and helps create evenly sized squares once cooled.
- Parchment paper – lines the pan and makes it easier to lift the caramel slab out after setting.
- Large heavy bottom saucepan (4 to 5 quart) – provides enough space for the mixture to cook safely and evenly.
- Candy thermometer – monitors the temperature closely to reach the correct stage for soft, chewy caramels.
- Wooden spoon or heatproof spatula – stirs the mixture constantly to prevent burning.
- Sharp knife – cuts the cooled caramel into neat squares for wrapping and serving.
What to Serve with Homemade Caramels
Whenever I serve homemade caramels, I like to keep the presentation simple and clean. I usually place a few wrapped pieces on a small plate next to a cup of hot coffee or tea. Sometimes I add them to a dessert tray with chocolate squares or shortbread cookies. I also enjoy pairing them with sliced apples or pears for a balanced bite. For special occasions, I arrange them in small boxes as edible gifts. In my experience, homemade caramels work well as a small sweet treat after a meal or as part of a simple dessert spread.
How to Store Homemade Caramels
After the caramels have cooled and been cut into squares, I like to wrap each piece in wax paper to keep them from sticking together. I place the wrapped caramels in an airtight container and store them at room temperature in a cool, dry spot. In my experience, they stay fresh for up to one month when sealed properly. If my kitchen is warm, I sometimes refrigerate them, but I always let them sit out for a while before serving so they soften slightly. Keeping them tightly sealed helps maintain their smooth texture and shape.
FAQs
1. Why did my caramels turn out too hard?
They likely cooked a little too long. Caramels need to reach the right temperature, but even a few extra degrees can make them firm instead of soft and chewy.
2. Do I need a candy thermometer?
A candy thermometer is very helpful for perfect texture. It ensures the caramel mixture reaches the proper stage without overcooking.
3. Why are my caramels grainy?
Graininess can happen if the sugar crystals weren’t fully dissolved. Stir gently and consistently while cooking, and avoid scraping the sides of the pan too much.
4. Can I add flavors to homemade caramels?
Absolutely. A splash of vanilla, a sprinkle of sea salt, or even a hint of espresso powder can add a beautiful twist to the classic flavor.
Soft & Chewy Homemade Caramels
Ingredients
Equipment
Method
- Grease a 9×13-inch pan with a light layer of butter, then line it with parchment paper, allowing the extra paper to hang over the sides. Lightly butter the parchment as well.
- In a large heavy-bottom saucepan, about 4 to 5 quarts in size, combine the sugars, corn syrup, butter, and salt. Set the pan over medium heat and stir constantly until the butter melts and the sugars dissolve. Let the mixture heat until it begins to bubble gently but is not at a full boil, about 5 minutes. If you notice sugar crystals clinging to the sides of the pan, use a damp pastry brush to wipe them down and help them dissolve.
- While whisking steadily, slowly pour in the cream, taking about 1 minute to add it all. Clip on a candy thermometer and bring the mixture to a boil, stirring nonstop until it reaches 245°F to 248°F, about 20 to 25 minutes. You can also test it by dropping a small bit of caramel into a glass of cold water. If it forms a firm ball that you can still shape, it is ready.
- Take the pan off the heat right away and carefully stir in the vanilla. Pour the caramel into the prepared pan and let it cool completely, about 4 hours. If you like, sprinkle flaked sea salt over the top after it has cooled for around 30 minutes. To speed things up, you can place the pan in the refrigerator until firm. Just take the slab out about 30 minutes before cutting, since very cold caramel can crack or break when sliced.
- Lift the cooled caramel slab out of the pan and peel away the parchment paper. Slice into squares and wrap each piece in wax paper. Store the caramels at room temperature for up to 1 month, or keep them in the refrigerator for several weeks. For the best texture and flavor, let them come to room temperature before enjoying.