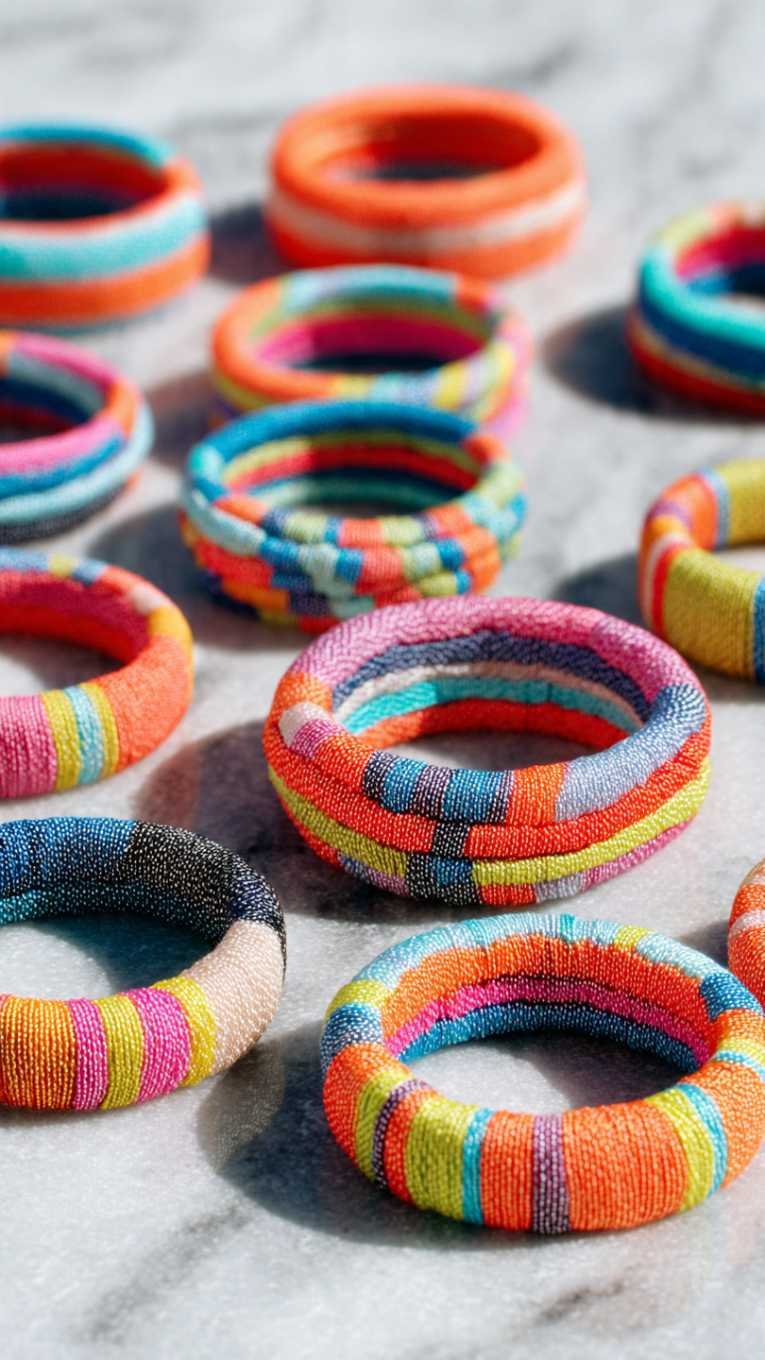
String bracelets are one of those crafts that I genuinely never got tired of making, starting from when I was nine years old sitting on a beach with a safety pin stuck into a towel and a pile of embroidery floss in every color I could find. Something about the repetitive knotting is genuinely meditative and satisfying in a way that other crafts are not, and the end result is something wearable and personal and completely handmade in a way that feels different from other jewelry.
What I love about string bracelets as an adult is that they have completely evolved from the rainbow striped friendship bracelets of childhood into something genuinely sophisticated and fashion-forward. The techniques are the same but the color palettes, the materials, and the styling have grown up significantly. A stack of neutral toned braided bracelets in cream, tan, and gold thread looks genuinely chic on a wrist alongside fine jewelry. A single bracelet in a complex chevron pattern with metallic thread running through it looks like something from a boutique jewelry brand. The craft has grown up and it is worth revisiting if your last attempt was in middle school.
The other thing that makes string bracelets such a good craft is the accessibility. You need almost nothing to start – embroidery floss costs almost nothing, you likely already have scissors and tape, and the learning curve is gentle enough that you can be making something wearable within twenty minutes of your first attempt. There is no equipment to buy, no special workspace needed, and the materials are portable enough to work on anywhere.
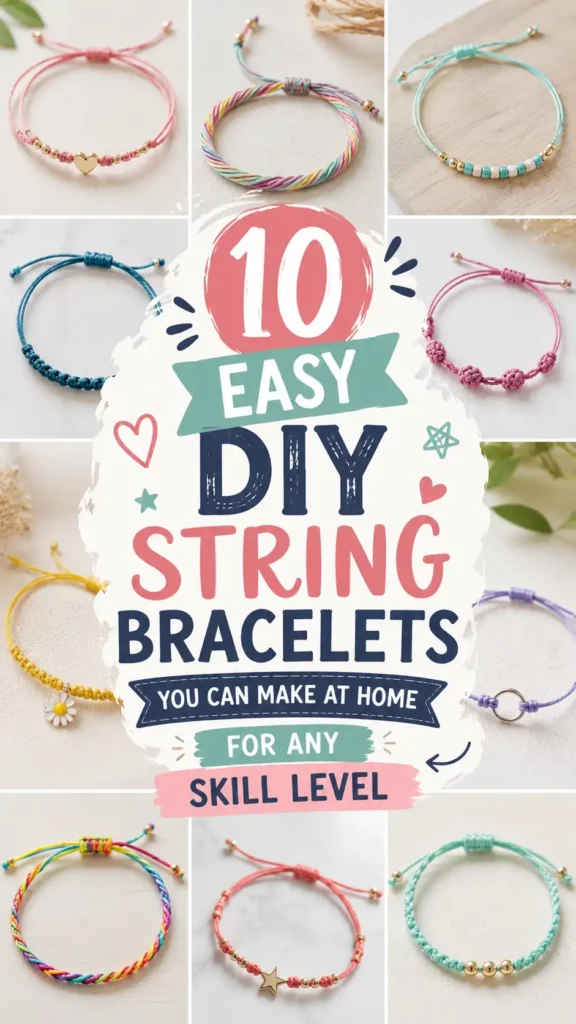
These ten bracelet ideas go from the simplest two-strand braid that anyone can do in minutes all the way to more complex knotting patterns that give you something to work toward as your skills build. Make one for yourself, make them for friends, stack them up until your whole wrist is covered – there is really no wrong way to approach this.
1. Classic Chevron Friendship Bracelet
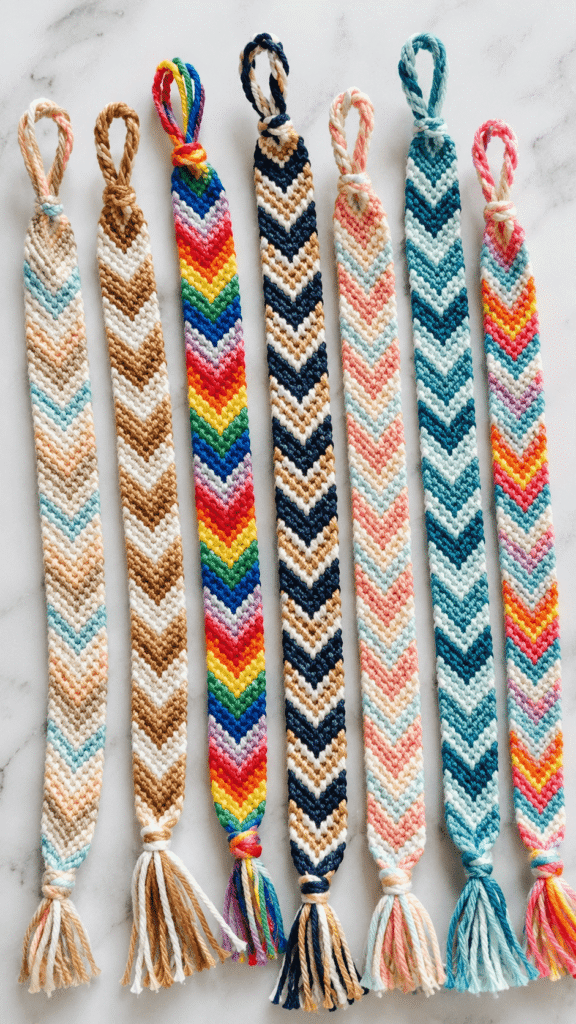
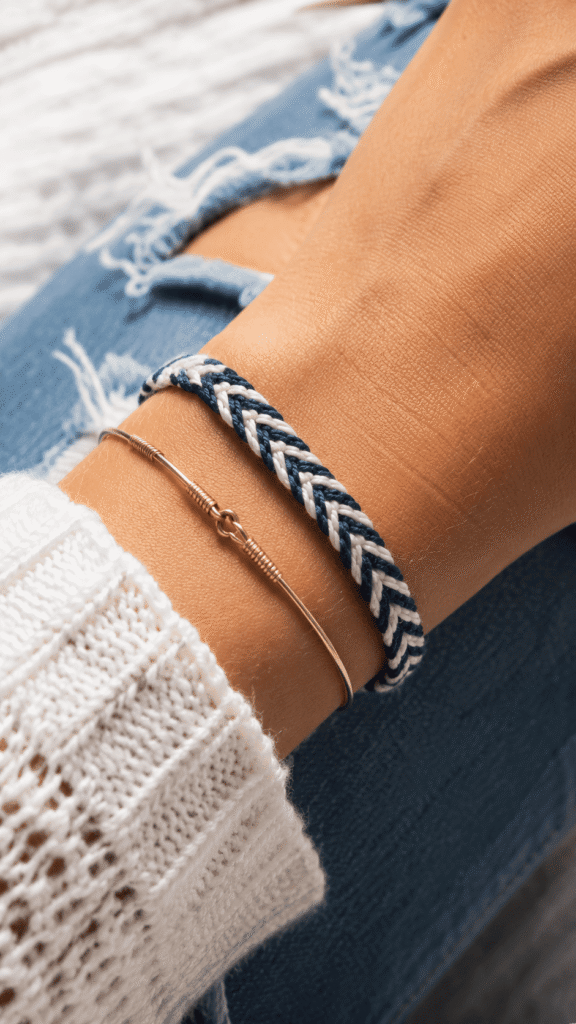
The chevron friendship bracelet with its iconic V-shaped pattern is the one that most people think of when they think of friendship bracelets and it remains one of the most satisfying makes in the whole string bracelet world. The pattern is created entirely through forward and backward knots arranged in a specific order and once you understand the knotting sequence it becomes almost automatic. The V-shapes appear as you work and watching the pattern build row by row is genuinely addictive. Use traditional rainbow colors for nostalgia or go for a sophisticated neutral palette for something more grown up and wearable.
What It Is: A classic friendship bracelet featuring a repeating V-shaped chevron pattern created through forward and backward knots using multiple strands of embroidery floss in two or more alternating colors.
Supplies and Budget: Embroidery floss in 4–6 colors ($3–6 for a multipack), tape or safety pin to anchor while working ($0 if owned), scissors. Total: $3–$6 makes multiple bracelets
Quick How-To: Cut two strands of each color about 60 inches long. Fold all strands in half and knot at top. Tape to surface. Arrange colors in mirror-image order. Knot outer left strand across all strands to center using forward knots. Knot outer right strand to center using backward knots. Tie both center strands together. Repeat until desired length.
DIY Tip: Keep your knots consistently tight and at the same tension throughout the bracelet – loose knots in some rows and tight knots in others create an uneven wavy bracelet that looks unfinished, while consistent even tension produces the clean geometric chevron lines that make these bracelets look so satisfying and professional.
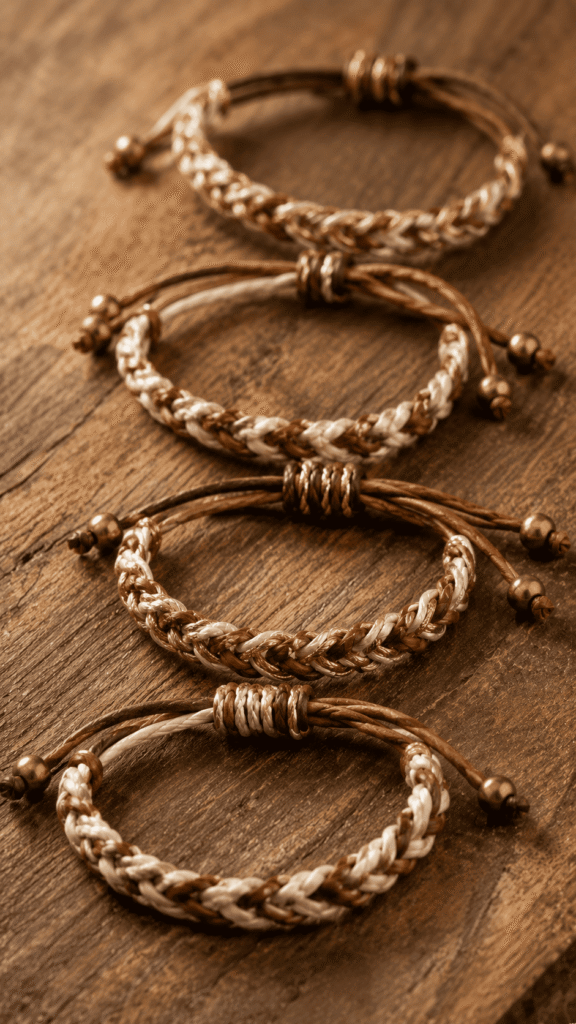
2. Simple Braided Thread Bracelet
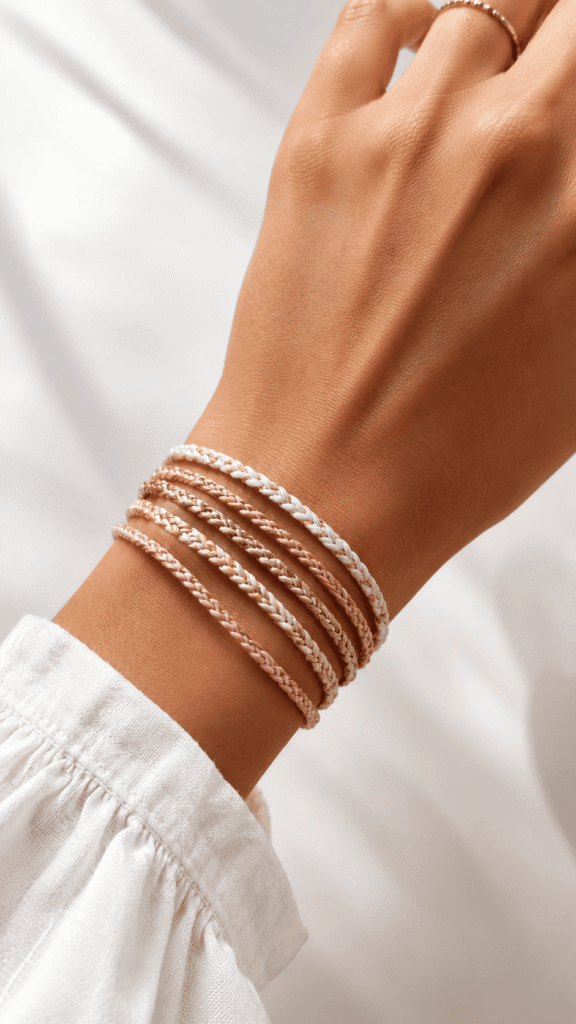
The three-strand braid is genuinely the most beginner-friendly bracelet you can make and before you think that sounds too simple to be worth making let me tell you that a braided bracelet in the right colors and materials looks incredibly chic and is one of the most consistently worn pieces in any bracelet stack. The key is choosing colors and materials that elevate the basic braid – metallic gold thread braided with cream, a thin braid in burgundy and blush, a monochromatic braid in three slightly different tones of the same color. The technique is foolproof and the result depends entirely on your material choices.
What It Is: A simple three-strand braided bracelet made from embroidery floss, metallic thread, or thin cord for a minimalist wearable piece that works perfectly as part of a layered bracelet stack.
Supplies and Budget: Embroidery floss or metallic thread ($3–6), tape or safety pin to anchor ($0), scissors, optional clasp or tie closure ($1–3). Total: $3–$9 makes many bracelets
Quick How-To: Cut three strands about 24 inches long. Fold in half and create a loop knot at top for closure. Tape folded end to surface. Braid three strands in simple over-under pattern until desired length. Tie finishing knot at end. Thread ending strands through starting loop for an adjustable sliding closure or tie onto wrist with ending strands.
DIY Tip: Use six strands folded into three groups of two rather than three single strands for a fuller braid that has more visual weight on the wrist – single-strand braids can look very thin and almost invisible when worn, while doubled strands create a bracelet that reads clearly as a proper piece of jewelry.
3. Knotted Macrame Style Bracelet
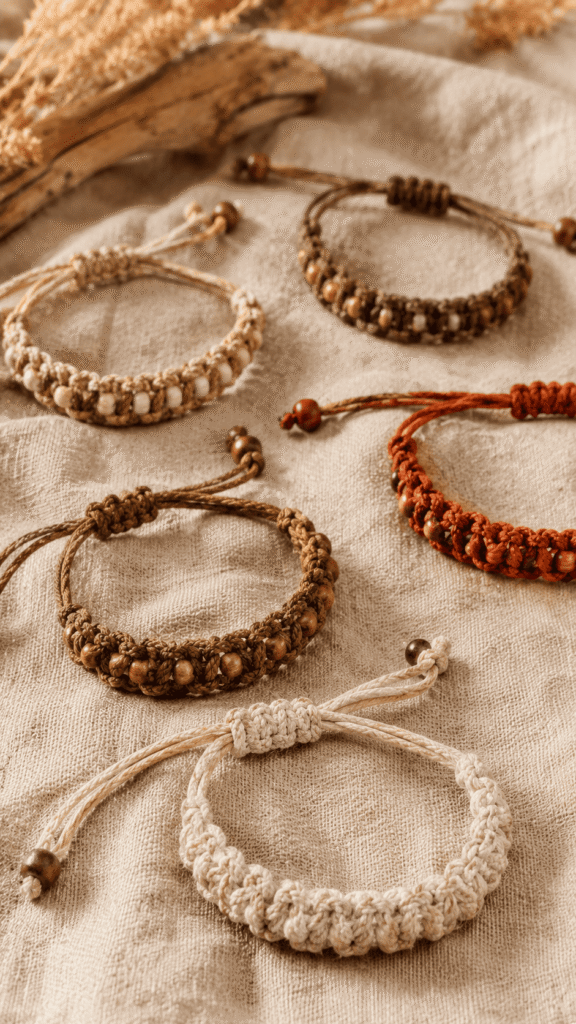
Macrame bracelets using square knots and half hitch patterns create something that looks significantly more complex and designed than the technique actually requires once you understand the basic knot structure. The square knot is the building block of macrame and a bracelet made entirely from repeating square knots has a beautiful braided texture that looks almost woven. Use thick cotton cord for a more substantial boho bracelet or thin waxed cord for something more delicate. Adding a bead at the center or at intervals creates a focal point that elevates the whole design considerably.
What It Is: A macrame-style knotted bracelet made using square knots in cotton or waxed cord for a textured, bohemian aesthetic that can be kept simple or embellished with beads.
Supplies and Budget: Cotton macrame cord or waxed cord ($5–8), optional beads with large holes ($3–6), tape or clipboard to anchor work ($0 if owned), scissors. Total: $5–$14
Quick How-To: Cut two long working cords about 60 inches and two short filler cords about 20 inches. Fold all in half and attach to anchor. Using working cords, tie square knots around the two filler cords – left cord over fillers under right, then right cord over fillers under left, pull tight. Repeat. Add bead onto filler cords when desired. Continue knotting.
DIY Tip: Keep the filler cords pulled taut and straight while you tie the working knots around them – filler cords that go loose and slack create lumpy uneven square knots that never look right, while properly tensioned filler cords give you the clean even ladder of knots that makes macrame bracelets look so neat and intentional.
4. Beaded String Bracelet
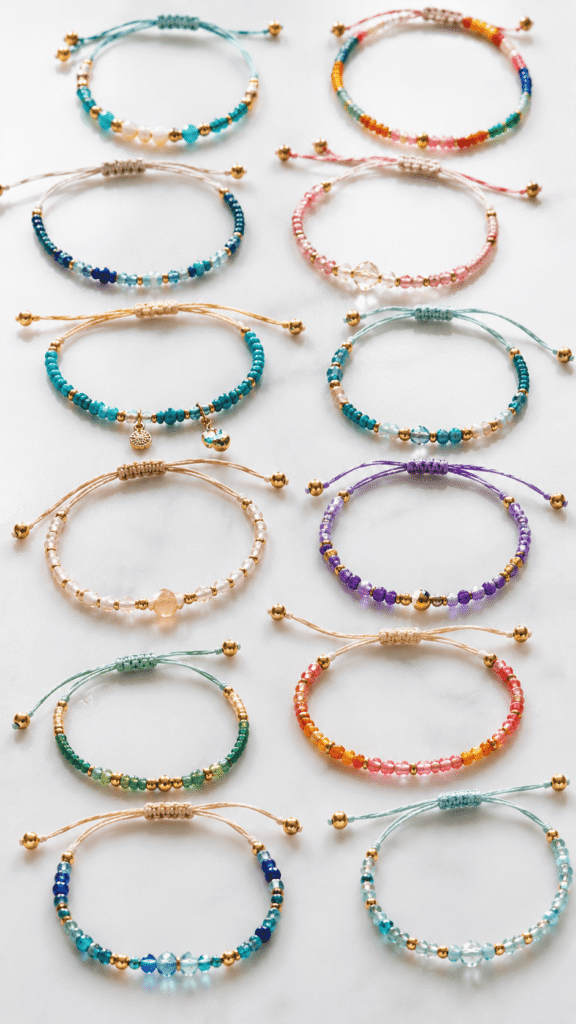
Adding beads to a simple strung or knotted bracelet is the easiest way to elevate plain string into something that looks genuinely like jewelry rather than craft. You can string beads directly onto elastic or thread for a simple no-knot version, or incorporate beads into a knotted bracelet at intervals between knots. Seed beads create delicate detailed patterns, larger focal beads create statement pieces, and mixed bead sizes create interesting visual rhythm. The combination of soft string texture and the shine of glass or metal beads creates a contrast that makes these bracelets look significantly more complex than they are.
What It Is: A bracelet made by stringing or knotting beads onto thread, elastic, or cord in patterns or at intervals for a piece that combines the texture of string with the sparkle and color of beads.
Supplies and Budget: Seed beads or mixed beads ($5–10 for a large pack), elastic cord or nylon thread ($4–6), beading needle ($2–3), clasp optional ($2–4). Total: $11–$23 makes many bracelets
Quick How-To: Cut elastic or thread to wrist measurement plus several inches. Thread beading needle. String beads in desired pattern – alternating colors, gradient sequences, or random mix. When full length reached, tie several secure knots and hide knot inside a bead. For thread version add clasp at each end using crimp beads.
DIY Tip: Plan your bead pattern on a bead mat or folded towel before stringing – laying out the sequence of colors and sizes before you pick up the needle lets you see if the pattern works visually and make changes without the frustration of unstringing beads you have already threaded onto the cord.
5. Spiral Twist Half Hitch Bracelet
The spiral bracelet created through repeating half hitch knots is one of the most visually impressive beginner-friendly patterns because the spiral appears almost automatically as you work – you make the same knot in the same direction repeatedly and the twist builds itself. It looks like a complex DNA helix pattern but it is genuinely one knot repeated over and over. Using two contrasting colors makes the spiral especially visible and striking. These are fast to make once you get the rhythm and the result looks significantly more technical than it actually is.
What It Is: A spiraling knotted bracelet created by repeating half hitch knots in one direction using two contrasting colored threads, creating an automatic twist pattern that looks complex but uses only one basic knot.
Supplies and Budget: Embroidery floss in two contrasting colors ($2–4), tape to anchor ($0), scissors. Total: $2–$4 makes multiple bracelets
Quick How-To: Cut one long strand of each color about 60 inches. Fold and knot together at top. Anchor to surface. Hold one color taut as the filler. Using the other color as the working strand, tie forward half hitches around the filler strand continuously. After several knots a spiral will appear automatically. Continue until desired length. Tie off and finish with loop and knot closure.
DIY Tip: Do not switch knotting direction during a spiral bracelet even accidentally – every single knot must go in the same direction to maintain the twist, because even one reversed knot breaks the spiral pattern visibly and there is no way to fix it other than undoing back to that point and restarting from there.
6. Metallic Thread Wrapped Bracelet
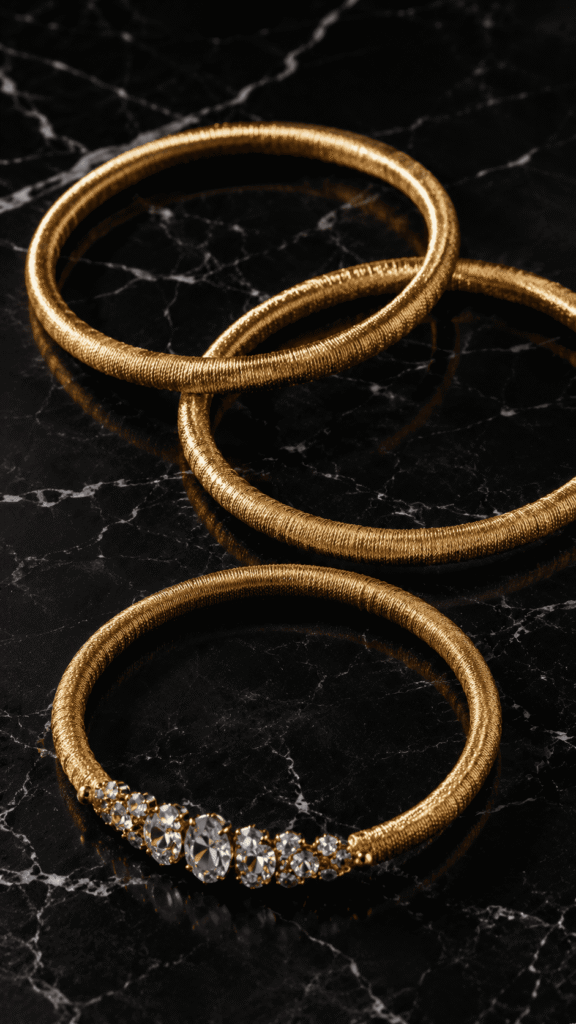
Wrapping a simple cord or wire bracelet form completely in metallic thread creates a piece of jewelry that looks genuinely expensive and intentional – the metallic thread catches light beautifully and the wrapped texture has this artisanal handwound quality that boutique jewelry brands charge a significant amount of money for. You wrap tightly and evenly around a simple base – a thin metal bangle, a piece of cord, or even a bobby pin shaped into a ring – until the entire surface is covered in gleaming thread. Add a cluster of wrapped beads for an embellished version.
What It Is: A bracelet made by tightly wrapping metallic embroidery thread or gold/silver floss around a simple base form – a thin bangle, cord loop, or wire – to create a luxurious thread-wrapped jewelry piece.
Supplies and Budget: Metallic embroidery floss or gold thread ($3–6), thin metal bangle or wire base ($3–8), strong craft glue to secure ends ($3–5), scissors. Total: $9–$19
Quick How-To: Secure thread start to base with a dot of craft glue and let dry. Begin wrapping thread tightly around base with no gaps and no overlapping – each wrap sits directly adjacent to the previous one. Keep tension even and consistent. When thread runs out join new thread with a tiny knot hidden inside wrapping. Seal final end with craft glue.
DIY Tip: Wrap over the starting thread tail for the first ten wraps rather than relying on glue alone to secure the beginning – this mechanical anchoring creates a starting point that cannot pull out even if the glue eventually weakens, and the tail disappears completely under the subsequent wraps.
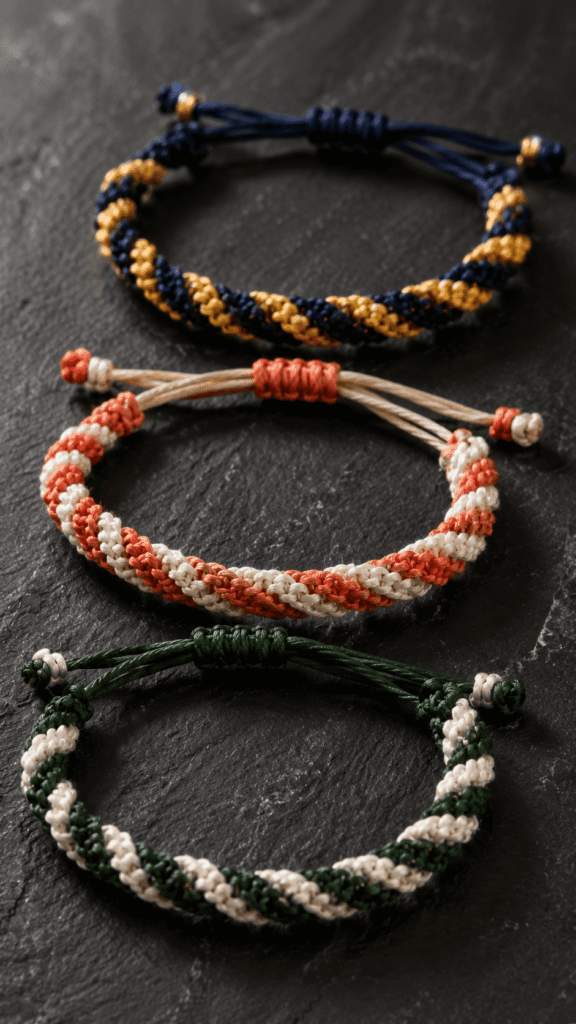
7. Fishtail Braid Bracelet
The fishtail braid pattern creates a bracelet that looks like an intricate woven texture but is actually created through a simple two-strand crossing technique that anyone can master in about ten minutes. The resulting braid has a herringbone-like pattern with a visual complexity that looks much more difficult than the actual process. Use two colors for a clear visible pattern or three colors for more visual richness. The fishtail works especially beautifully in thicker thread or thin cord where the individual strands of the weave show clearly rather than blending together.
What It Is: A bracelet featuring a fishtail braid pattern created by crossing alternating outer strands from two groups of threads, producing a herringbone-like woven texture that looks complex but uses a simple repeating motion.
Supplies and Budget: Embroidery floss in two or three colors ($3–6), tape to anchor ($0), scissors. Total: $3–$6 makes several bracelets
Quick How-To: Cut four strands of each color about 50 inches long. Group into two bundles by color. Anchor at top with a knot and tape. Take the outermost strand from the left bundle and cross it over to join the right bundle. Take outermost strand from right bundle and cross to join left bundle. Repeat alternating sides. A fishtail pattern will emerge as you work.
DIY Tip: Use four strands in each bundle rather than two for a fishtail bracelet that has enough visual weight to show the pattern clearly – a fishtail with only two strands per side produces a braid so thin that the beautiful herringbone pattern is barely visible, while four strands per side gives you a bracelet with real presence and a clearly readable pattern.
8. Leather and Thread Combination Bracelet
Combining thin leather cord with embroidery thread creates a bracelet with a material contrast that looks very intentional and designed – the natural leather warmth against the color of thread creates something that reads as genuinely sophisticated adult jewelry rather than craft project. You can braid leather and thread strands together, wrap thread sections around a leather base, or knot thread onto a leather cord in a pattern. The leather gives the bracelet structure and durability while the thread adds color and texture. These look especially good worn alongside gold jewelry.
What It Is: A bracelet combining thin leather cord and embroidery thread through braiding, wrapping, or knotting techniques to create a mixed-material piece with a sophisticated natural and earthy aesthetic.
Supplies and Budget: Thin leather cord 1mm ($5–8 for a spool), embroidery floss in complementary colors ($3–6), scissors, optional small bead or charm ($2–5). Total: $10–$19
Quick How-To: Cut leather cord to desired length plus extra for finishing. Cut thread strands two to three times longer. Braid leather with two thread colors for a simple three-strand braid. Or knot thread onto leather using lark’s head knots at even intervals for a wrapped look. Finish with a knot closure or add a small bead to the ends as a sliding closure.
DIY Tip: Condition your leather cord with a tiny amount of leather conditioner or even coconut oil before working with it – stiff dry leather is significantly harder to braid evenly and knot cleanly, while conditioned leather is supple and cooperative and the finished bracelet drapes around the wrist much more naturally and comfortably.
9. Color Block Knot Bracelet
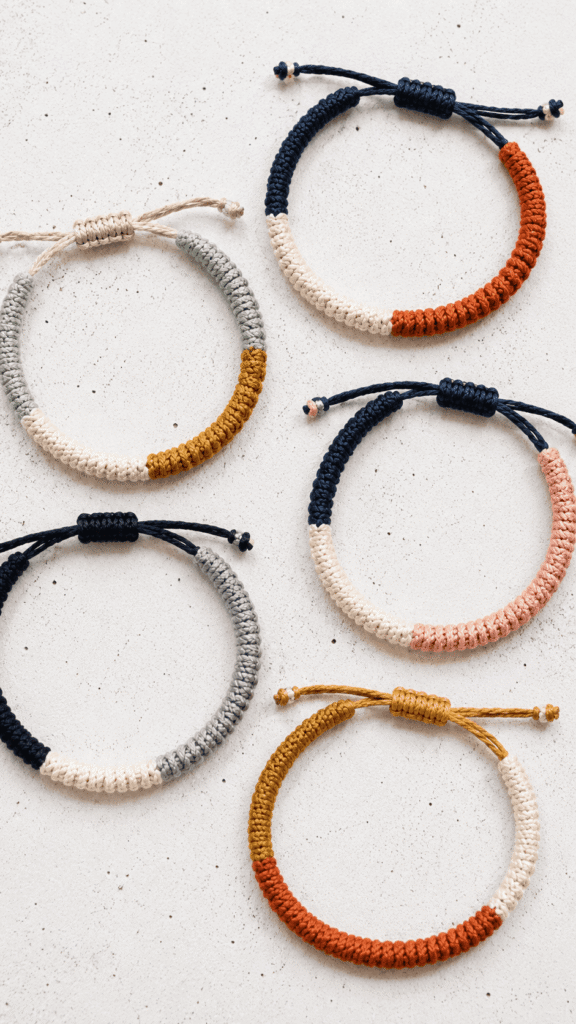
A color block bracelet with clearly defined sections of solid color created through knotting is one of the most graphic and modern-looking designs in friendship bracelet making. Instead of creating a pattern across the width of the bracelet, you work each color in a complete section that fills the whole bracelet width before transitioning to the next color. The result is bold horizontal stripes of solid color with visible texture from the underlying knots. Two or three strong contrasting colors in roughly equal sections creates the most impact and the graphic quality of the finished bracelet looks very deliberate and current.
What It Is: A knotted string bracelet featuring clearly defined sections of solid color that create a bold graphic color block effect, made by working complete rows of knots in each color before transitioning to the next.
Supplies and Budget: Embroidery floss in two or three bold contrasting colors ($3–6), tape or safety pin to anchor ($0), scissors. Total: $3–$6 makes multiple bracelets
Quick How-To: Cut multiple strands of each color about 50 inches long. Knot and anchor all strands at top. Using all strands of the first color as working strands, tie horizontal rows of knots across the full width for desired section depth. Switch to next color and continue. Each color section should be roughly equal height for the cleanest color block effect.
DIY Tip: Plan your color block sections to be at least half an inch wide each for the color blocking effect to read clearly on the wrist – sections thinner than that start to look like stripes rather than blocks and you lose the bold graphic quality that makes color block bracelets so striking and modern.
10. Tassel End Statement Bracelet
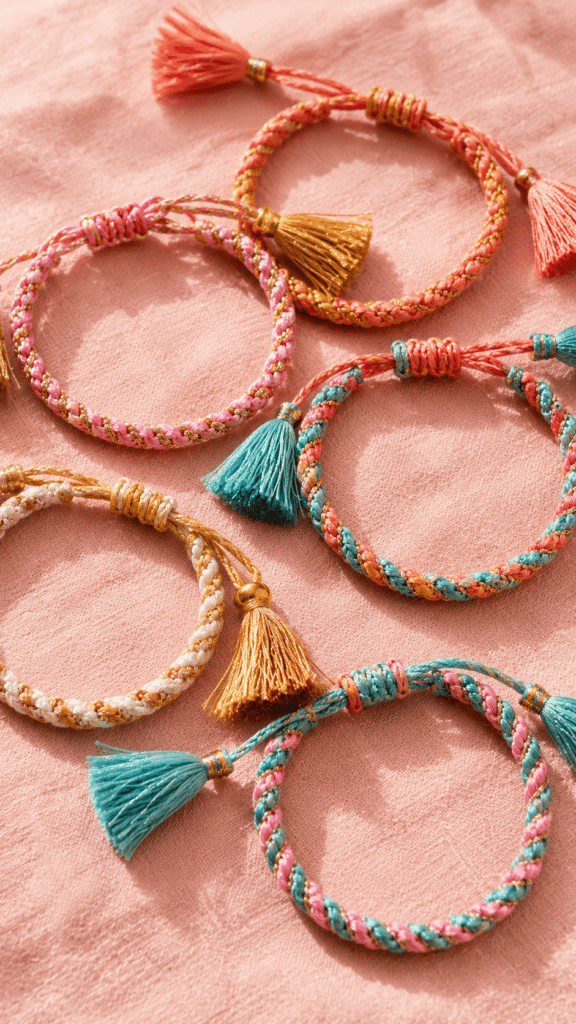
A bracelet with tassel ends is one of those small design decisions that transforms a simple piece into something that feels festive, intentional, and genuinely fun to wear. The tassel ends move and swing with the wrist in a way that catches attention and the additional color from the tassel threads adds visual interest beyond the bracelet band itself. You make the bracelet in any simple technique and then create small tassel bundles at each end rather than simple knot closures. The tassels can match the bracelet color or contrast dramatically for a bolder look.
What It Is: A string bracelet finished with decorative tassel ends rather than simple knot closures, adding movement, color, and visual interest to any bracelet technique from simple braid to complex knotted pattern.
Supplies and Budget: Embroidery floss in main bracelet color plus tassel colors ($4–8), scissors, optional small bead to cap tassel top ($2–4). Total: $4–$12 makes several bracelets
Quick How-To: Make bracelet in your chosen technique but leave long thread tails at each end rather than trimming. At each end, gather all thread tails together and add additional thread loops for fullness – fold extra threads in half over the bracelet end and incorporate into the bundle. Bind the tassel top tightly with a contrasting thread wrapped several times. Trim tassel ends to an even length.
DIY Tip: Trim tassel ends with sharp scissors in one clean cut rather than multiple small cuts to get a perfectly even tassel bottom – hold all the tassel threads together tightly compressed between two fingers so they are all the same length, then cut across all of them at once for a clean straight edge.