I have wanted wind chimes on my porch for the longest time but every time I went looking for ones I actually liked I ran into the same problem – the ones that sounded beautiful were expensive and the ones in my budget sounded like someone dropping silverware on a tile floor. I kept almost buying something and then putting it back because nothing felt right. Then my neighbor showed me the ones she made herself and I could not believe the difference. They were beautiful, they sounded genuinely musical, and she told me she made the whole thing in an afternoon for under twenty dollars.

That conversation sent me down a rabbit hole of wind chime research that I have absolutely zero regrets about. What I discovered is that making your own wind chimes is genuinely one of the most satisfying outdoor crafts you can take on because you have complete control over two things that matter enormously – the sound and the look. The sound depends on the material you use and the length of the hanging elements. The look depends on everything else. And when you make it yourself you get to decide both.
The materials that make beautiful wind chime sounds are more varied than most people realize. Copper pipe, bamboo, shells, crystals, ceramic pieces, driftwood, vintage silverware, wine corks, river stones – all of these create different tones and textures that you simply cannot find in a store-bought chime. Some are mellow and soft, some are bright and clear, some are earthy and organic. The style options range from coastal bohemian to modern minimal to whimsical and colorful.
The best part about making your own is that it becomes a genuinely personal piece for your outdoor space. These ten ideas cover every style and skill level and most of them cost less than one store-bought wind chime that you would probably not love as much anyway.
1. Copper Pipe Wind Chime
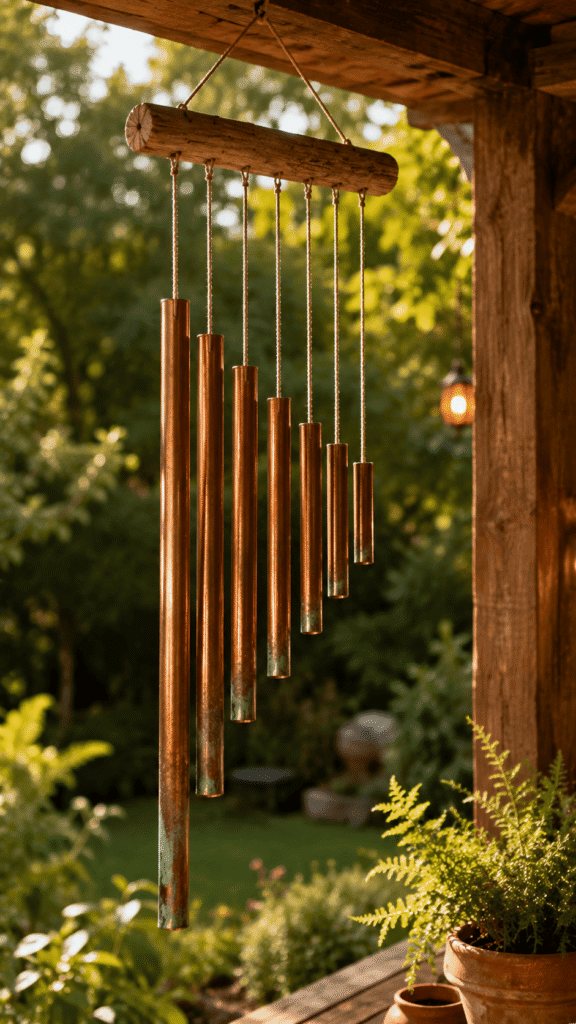
Copper pipe wind chimes produce one of the most beautiful and musical sounds of any homemade wind chime material – a clear, warm, resonant tone that genuinely sounds like a professional instrument rather than random clanging. The copper tubing is inexpensive, easy to cut to specific lengths that produce specific notes, and the warm orange-gold color of new copper or the gorgeous verdigris patina of aged copper looks stunning hanging on any porch. This is the wind chime that people always stop to comment on and ask about because the sound is so unexpectedly beautiful.
What It Is: A wind chime made from sections of copper tubing cut to specific lengths that produce musical tones when they strike each other in the wind, hung from a wooden or metal top bar.
Supplies and Budget: Copper tubing 3/4 inch diameter ($15–25 for a length), copper pipe cutter ($8–15), wooden dowel or driftwood for top bar ($3–8), nylon cord or fishing line ($4–6), drill ($0 if owned). Total: $30–$54
Quick How-To: Cut copper tubes in graduated lengths – longer tubes produce lower notes. Drill a small hole near the top of each tube. Sand cut edges smooth. String tubes onto nylon cord at even or varied intervals. Attach all strings to top bar so tubes hang at different heights. Add a wooden clapper piece in the center to strike the tubes. Hang from porch or tree.
DIY Tip: Look up a wind chime tube length calculator online before cutting your copper – specific tube lengths correspond to specific musical notes and cutting tubes to deliberate lengths that form a pentatonic scale produces a chime that always sounds harmonious regardless of which tubes strike each other in random wind patterns.
2. Bamboo Wind Chime
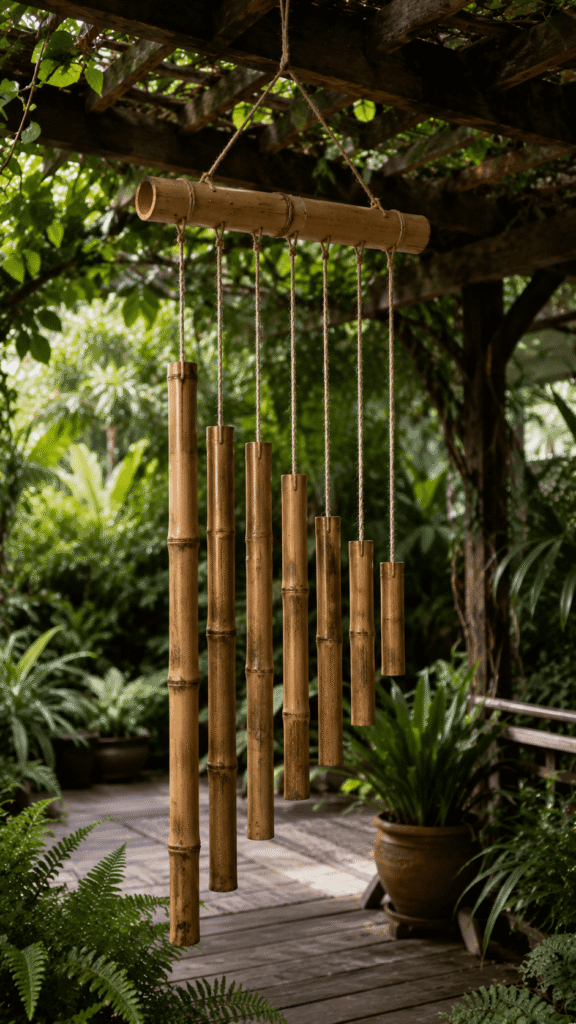
Bamboo wind chimes have a soft woody sound that is completely different from metal chimes – earthy, gentle, and almost meditation-like in its quality. The hollow bamboo tubes knock against each other in the breeze and produce a sound that feels very zen and natural rather than bright and ringing. They look incredible hanging in a garden, on a covered porch, or in a tree and the natural material fits beautifully into any outdoor space with plants and greenery. Fresh bamboo from a garden supply store or dried bamboo canes from a craft store both work well.
What It Is: A wind chime made from sections of hollow bamboo cane cut to varied lengths and hung from a natural wood or bamboo crossbar, producing a soft earthy woody sound when struck by wind.
Supplies and Budget: Bamboo canes ($8–15 from garden center or craft store), saw or sharp knife to cut bamboo ($0 if owned), natural jute twine ($4–6), wooden dowel or bamboo top bar ($3–6), drill ($0 if owned). Total: $15–$27
Quick How-To: Cut bamboo sections in graduated lengths. Cut just above a node on each piece so the tube is naturally sealed at one end. Drill hole near top of each section. Sand cut ends smooth. String on natural jute twine. Attach to crossbar in a row from longest to shortest or in a graduated arc. Add decorative carved or burned details to bamboo surface if desired.
DIY Tip: Seal the cut ends of your bamboo with a thin coat of clear outdoor sealant before hanging outside – unsealed cut bamboo absorbs moisture from rain and humidity, which causes it to crack and split over one or two seasons, while sealed bamboo lasts for years outside with minimal deterioration.
3. Seashell Wind Chime
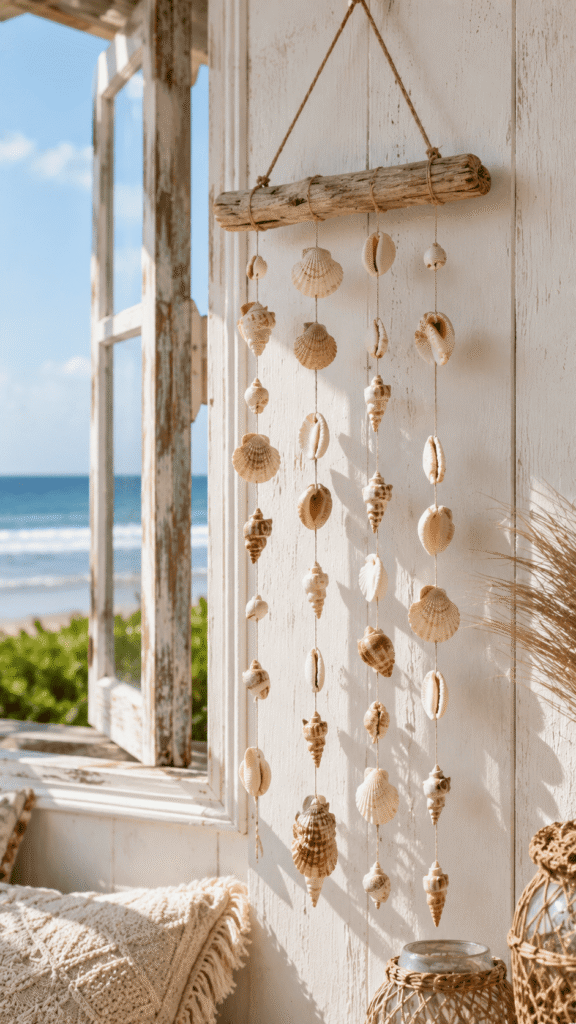
A seashell wind chime is one of those coastal crafts that looks genuinely beautiful and sounds surprisingly lovely – the shells click together in the breeze with a soft rhythmic sound that immediately makes you think of the ocean. If you collect shells from beach trips this is one of the most meaningful ways to display them because every shell in the chime has a story and the whole piece becomes a kind of memory mobile. Cowrie shells, spiral shells, clam shells, and sand dollars all work well and mixing sizes and types creates the most interesting visual effect.
What It Is: A wind chime made from collected or purchased seashells drilled and strung on nylon cord or fishing line, hung from a piece of driftwood or a wooden dowel for a coastal bohemian outdoor decoration.
Supplies and Budget: Seashells – collected free or purchased ($0–15), driftwood or dowel top bar ($0–8), nylon fishing line ($4–6), small drill bit and drill for shell holes ($0 if owned), optional beads ($3–6). Total: $7–$35
Quick How-To: Drill small holes in shells carefully – go slowly to prevent cracking. Thread shells onto individual nylon lines at varied intervals using knots to keep them spaced. Add beads between shells for color and to prevent shells from sliding. Attach completed shell strings to driftwood top bar at varied lengths. Hang from cord attached to each end of driftwood.
DIY Tip: Drill shell holes using a diamond-tipped drill bit rather than a regular drill bit and keep the drill speed slow with light pressure – shells are brittle and a fast aggressive drilling approach cracks and shatters them, while slow gentle drilling with the right bit gives you a clean hole almost every time.
4. Vintage Silverware Wind Chime
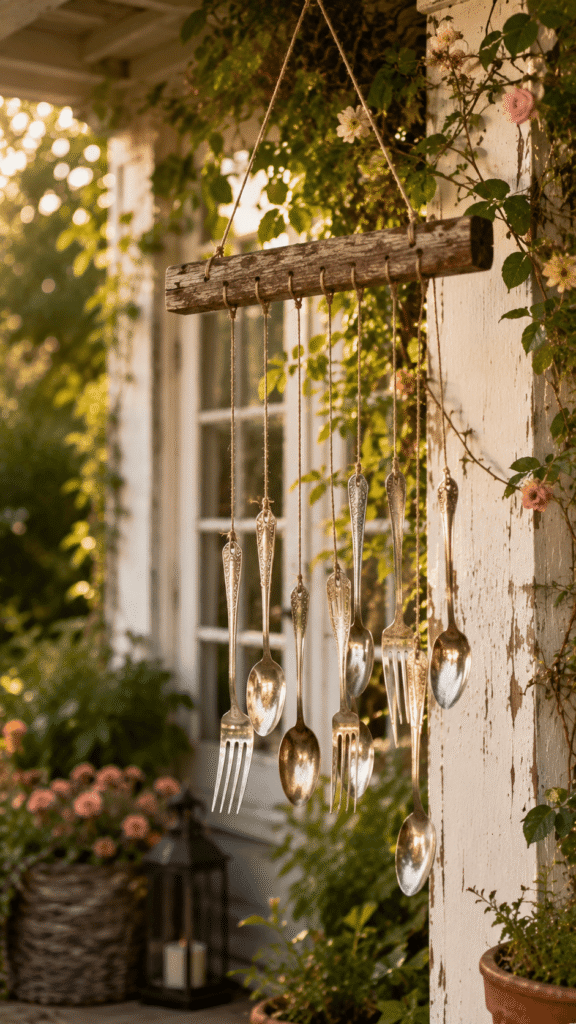
A wind chime made from vintage silverware – spoons and forks hung upside down from a piece of driftwood or a wooden hanger – is one of those whimsical, eclectic outdoor decoration ideas that always makes people smile when they see it. The silverware clinks together with a bright metallic sound and the reflective surface catches sunlight beautifully. Thrift stores and estate sales are goldmines for cheap silverware in interesting patterns, and the more varied the pieces the more interesting the final chime looks. This is quirky, personal, and genuinely one of the most charming things you can hang on a front porch.
What It Is: A whimsical wind chime made from vintage silverware pieces – spoons, forks, and small ladles – hung from a piece of driftwood or decorative metal bar, producing bright metallic sounds in the wind.
Supplies and Budget: Vintage silverware from thrift store ($3–10 for a bundle), driftwood or wooden hanger ($0–8), strong wire or nylon cord ($4–6), drill or awl to make hanging holes ($0 if owned), optional paint for handles ($5–8). Total: $12–$32
Quick How-To: Drill or punch small holes through the handle end of each piece of silverware. Bend spoon bowls slightly for visual interest if desired. Thread cord or thin wire through each hole. Attach all pieces to driftwood at varied lengths so they hang at different levels and touch each other in wind. Add a decorative knot at top for hanging.
DIY Tip: Bend a few of the spoons into gentle curves using pliers before hanging them – a straight spoon hangs predictably but a gently curved spoon swings in wider arcs that create more contact with neighboring pieces and therefore more sound, which makes the whole chime more responsive to even a light breeze.
5. Crystal and Glass Bead Wind Chime
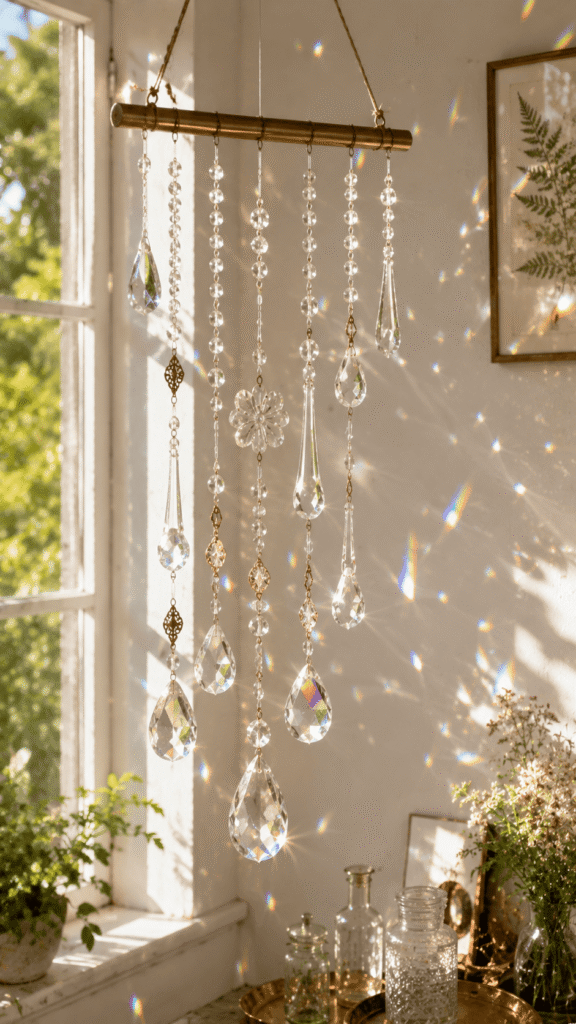
Crystal and glass bead wind chimes create the most magical visual effect of any chime on this list because they catch light and scatter it in all directions, creating tiny rainbows on surrounding walls and surfaces. The sound is bright and delicate – a gentle high-pitched tinkling that is subtle rather than loud and works beautifully in a covered porch or sunroom where sunlight comes through. Vintage chandelier crystals are perfect for this and you can find them very cheaply at thrift stores and estate sales. The more varied the crystal shapes the more interesting the light play.
What It Is: A decorative wind chime made from strung crystals, chandelier drops, and glass beads that creates magical light refraction and a delicate tinkling sound, hung in a sunny spot for maximum visual effect.
Supplies and Budget: Vintage chandelier crystals or glass drops ($10–25 thrifted or new), clear fishing line ($4–6), wooden or metal top bar ($3–8), additional glass beads for stringing ($5–10). Total: $22–$49
Quick How-To: String crystals and beads onto fishing line in varied lengths using simple overhand knots to space them. Alternate crystal drops with round glass beads for visual interest and spacing. Attach completed strings to top bar at close intervals so crystals can touch each other in a breeze. Hang in a location that receives direct sunlight for the best light refraction effect.
DIY Tip: Hang your crystal wind chime in a south or west facing location that receives afternoon sun rather than morning shade – afternoon sun at a lower angle hits crystals from the side rather than directly above, which creates the most dramatic and far-reaching rainbow light patterns on surrounding walls and floors.
6. Driftwood and Stone Wind Chime

A wind chime made entirely from natural gathered materials – pieces of driftwood as both the top bar and the hanging elements, with river stones, pebbles, and flat rocks as the weighted ends – has an incredibly organic, earthy quality that looks like something you would find in a high-end garden boutique. The stones knock against each other with a soft hollow sound and the varied natural colors and shapes of the driftwood and stones create a piece that looks completely different from every angle. This is the chime for anyone who loves natural, organic, completely chemical-free decor.
What It Is: A fully natural wind chime made from collected driftwood pieces and river stones or pebbles, assembled with natural cord or wire into a hanging decoration with an organic earthy aesthetic.
Supplies and Budget: Driftwood pieces (free from beach or river), flat river stones or pebbles (free from outdoors or $5–10), natural jute twine or waxed cord ($4–6), drill for stone holes ($0 if owned), wire optional ($3–5). Total: $7–$21
Quick How-To: Select a large interesting driftwood piece as the top bar. Drill holes in flat river stones or wrap them in wire with a hanging loop. Attach stones to varied lengths of jute twine. Tie shorter driftwood pieces into strings alongside stones for visual variety. Attach all strings to main top bar. Balance weight distribution before finalizing knots.
DIY Tip: Wrap flat stones with wire rather than drilling through them if you do not have a masonry drill bit – wrap wire around the stone tightly in a figure-eight pattern and twist to form a hanging loop, which actually holds more securely than a drilled hole for heavier stones and requires zero special equipment.
7. Ceramic and Clay Wind Chime
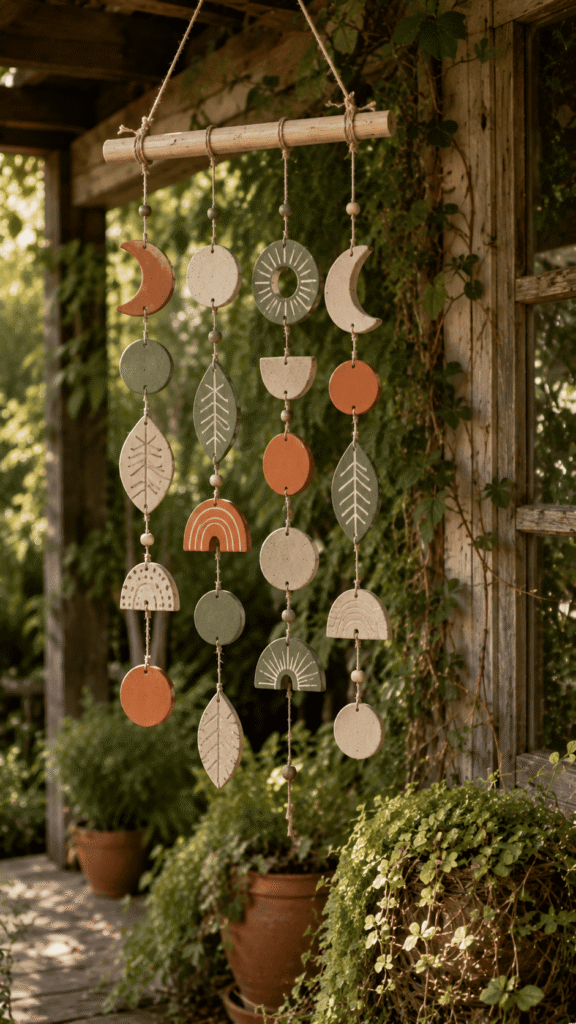
Handmade ceramic pieces hung as wind chimes create something genuinely beautiful and personal – each clay element is unique, the earthen tones are warm and natural, and the sound of ceramic pieces touching is a soft pleasant click that is gentle enough for any outdoor space. You do not need a kiln for this project because air-dry clay works well for wind chime pieces that are protected from direct rain under a covered porch. Paint or glaze the pieces for color and seal them for weather resistance. This is the craft that feels most like making actual art.
What It Is: A wind chime made from handmade air-dry clay pieces in varied shapes – moons, leaves, geometric forms, or abstract shapes – painted, sealed, and hung from a wooden crossbar.
Supplies and Budget: Air-dry clay ($8–12), acrylic paint in chosen colors ($8–12), outdoor Mod Podge or clear sealer ($5–8), wooden dowel top bar ($3–6), jute or waxed cord ($4–6). Total: $28–$44
Quick How-To: Shape clay into desired forms – flat shapes work best for wind chimes. Use a toothpick or skewer to make hanging holes before clay dries. Let dry completely per clay instructions. Paint with acrylic paints in desired designs. Seal thoroughly with outdoor Mod Podge. Thread cord through holes. Attach to top bar at varied lengths.
DIY Tip: Make your clay pieces at least a quarter inch thick rather than thinner for wind chime use – thin delicate clay pieces look beautiful but break easily when they strike each other in strong wind, while pieces with a little more thickness survive regular contact and last through multiple outdoor seasons.
8. Wine Cork Wind Chime
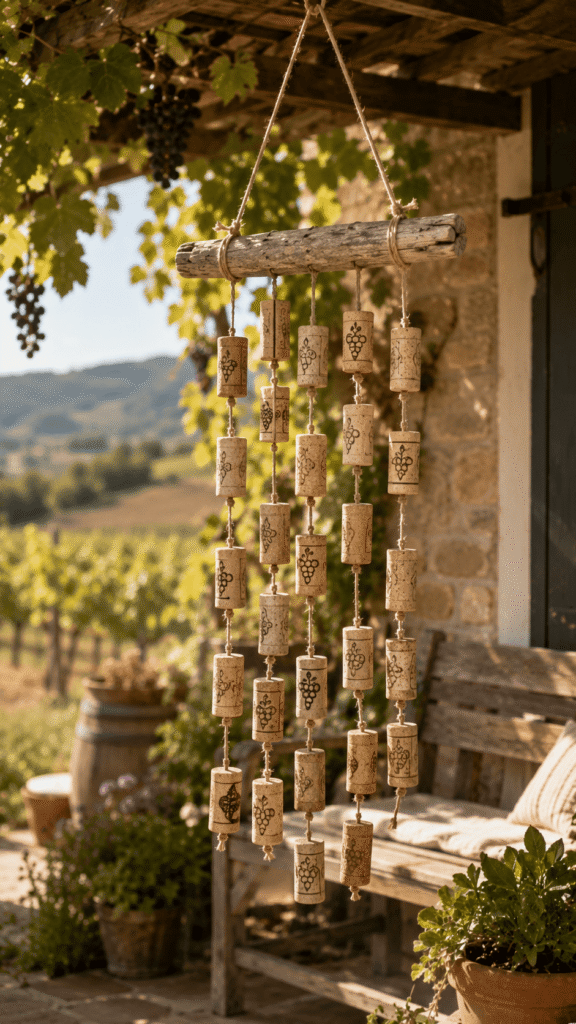
A wind chime made from wine corks is one of those clever upcycling projects that uses something most people just throw away and turns it into something genuinely charming and rustic. Corks make a soft hollow knock against each other in the breeze – very gentle and subtle – and the natural cork texture looks wonderful hanging in a garden or on a porch. If you drink wine regularly you can collect corks over time or ask friends and restaurants to save them for you. Burning or carving designs into the cork faces before assembling adds a beautiful artisanal detail.
What It Is: A rustic wind chime made from wine corks strung together on natural twine and hung from a piece of driftwood or a wine barrel stave, creating a charming and eco-friendly outdoor decoration.
Supplies and Budget: Wine corks – collected free over time or purchased ($0–10), driftwood or wood top bar ($0–8), natural jute twine ($4–6), wood burning tool optional for designs ($15–20), strong glue optional ($3–5). Total: $7–$39
Quick How-To: Thread a long needle and push twine through the center length of each cork to create cork strings. Space corks at varied intervals. For shorter cork segments, thread twine through the side of each cork for a different orientation. Attach completed cork strings to top bar at varied lengths. Add wood-burned designs on cork faces before stringing if desired.
DIY Tip: Thread your needle through the center length of the cork rather than through the side for the most secure hanging position – a cork threaded lengthwise has the twine running through the strongest center axis of the cork, while side-threaded corks are more likely to split along the grain when they knock against each other repeatedly in strong wind.
9. Macrame and Bead Wind Chime
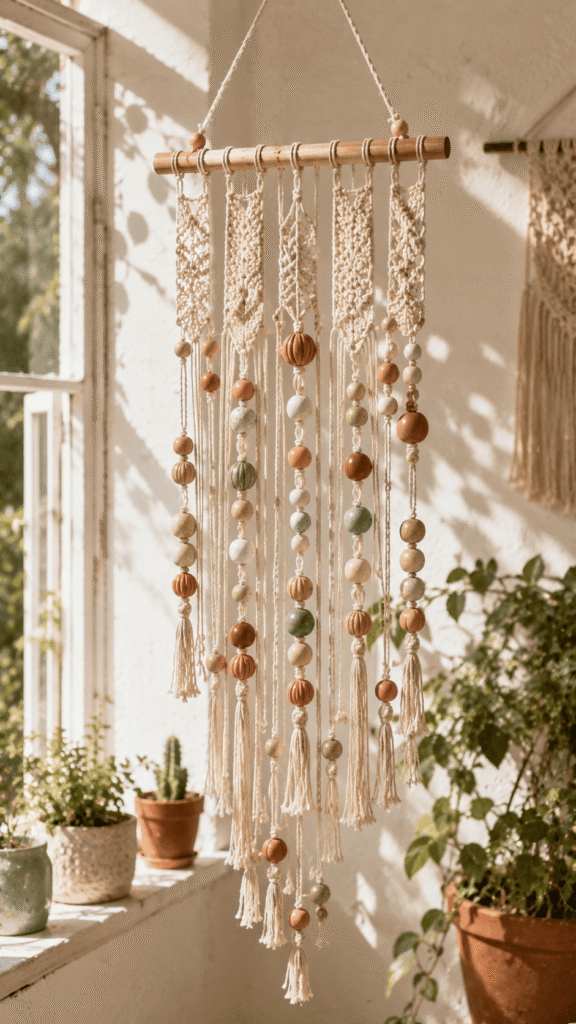
Combining macrame knotting with wooden or ceramic beads creates a wind chime that is more textile art than traditional chime and the result has a beautiful boho quality that works wonderfully in a covered outdoor space, a sunroom, or even hung indoors near an open window. The macrame strings create visual texture and movement even without wind and the beads click together softly when a breeze catches them. The warm natural tones of cotton rope and wooden beads create a piece that looks like it belongs in a thoughtfully decorated boho home.
What It Is: A decorative wind chime combining macrame knotted cord sections with wooden or ceramic beads, creating a textile-based hanging decoration with gentle sound and beautiful bohemian visual texture.
Supplies and Budget: Natural cotton macrame cord ($10–15), wooden beads with large holes ($6–10), ceramic or clay beads ($5–8), wooden dowel top bar ($3–6), scissors. Total: $24–$39
Quick How-To: Cut multiple lengths of macrame cord about four times longer than desired finished length. Attach to dowel with lark’s head knots. Work sections of square knots between bead additions. Thread large wooden or ceramic beads onto cord strands at intervals. Continue knotting below each bead. Vary the knot density in different sections for visual interest. Trim ends evenly or at varied lengths.
DIY Tip: Pre-plan the bead placement by threading them onto the cords before starting to knot so you know exactly where each bead will sit – it is very difficult to add beads to a section you have already knotted past and having them ready on the cord means you never miss the right placement point while working.
10. Upcycled Key Wind Chime
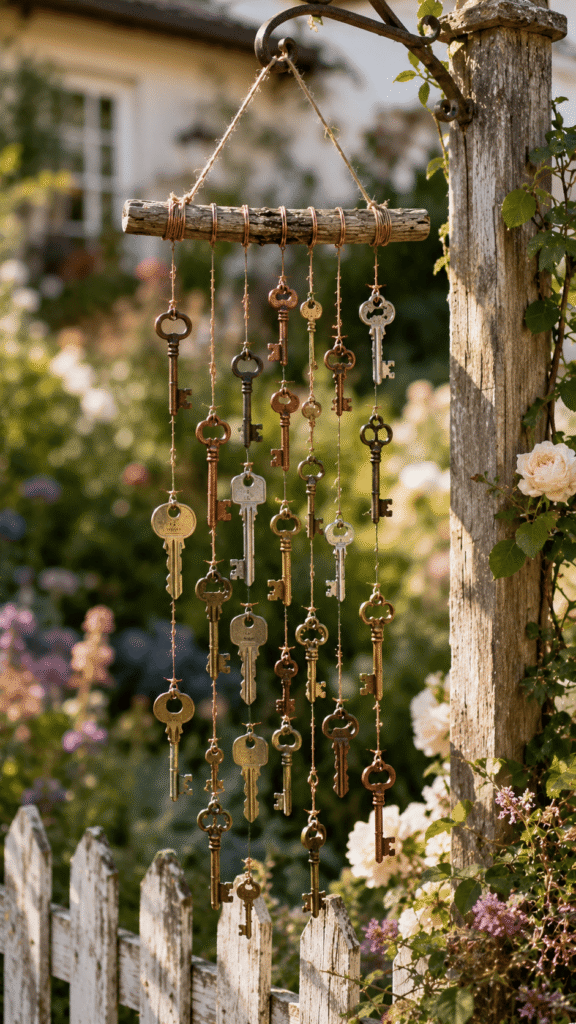
Old keys are one of those items that accumulate in everyone’s junk drawer with no clear purpose – keys to locks you no longer own, car keys from cars you no longer drive, house keys from houses you no longer live in. Turning them into a wind chime gives them a beautiful second life and the result is genuinely charming and whimsical. Keys in varied sizes clatter together with a metallic sound and the shapes are visually interesting – old skeleton keys especially look absolutely magical hanging together. Spray paint them in a single color or leave them in their natural varied metal tones.
What It Is: A whimsical wind chime made from collected old keys in varied sizes and styles strung on cord from a wooden or metal bar, producing a metallic jingling sound with a nostalgic and eclectic aesthetic.
Supplies and Budget: Collected old keys (free from junk drawer or $5–10 thrifted), wooden or metal top bar ($3–8), nylon cord or chain ($4–6), optional spray paint ($6–8), jump rings optional ($3–5). Total: $13–$37
Quick How-To: Collect keys in varied sizes – the more variety in size and style the more interesting the chime. Attach cord or jump rings through the natural hole already in each key. Hang keys from top bar at varied lengths so different sized keys hang at different heights. Cluster some keys close together for more sound contact. Spray paint entire finished chime in one metallic color if desired for a more unified look.
DIY Tip: Mix old skeleton keys with regular keys in your chime if you can find them at estate sales or antique stores – skeleton keys have a dramatically different and more decorative shape that adds visual interest to the whole composition and their different weight compared to modern keys means they swing differently creating more varied movement and sound.