Kandi is one of those crafts that just brings pure joy every single time. If you have ever been to a music festival, a rave, or an EDM concert, you have seen kandi everywhere. Those bright colorful beaded bracelets that people trade with each other using the PLUR handshake, peace, love, unity, and respect. There is something really beautiful about the culture around kandi and the way it creates instant connections between strangers through a simple handmade gift.
But kandi has grown so far beyond the festival scene now. People make kandi bracelets, cuffs, masks, headbands, and full jewelry sets just for the love of making something colorful and creative. The craft is accessible to absolutely everyone because the supplies are inexpensive, the basic technique is simple to learn, and the creative possibilities are genuinely endless. You can make something in twenty minutes or spend hours on an elaborate multi-strand cuff with complex patterns and character designs.
What makes kandi so addictive as a craft is the combination of the repetitive meditative quality of threading beads with the excitement of watching a pattern or color combination come together. There is also something very satisfying about the physical result. Kandi bracelets are lightweight, they stack beautifully, they make a wonderful soft clicking sound when they move, and the colors are so bright and cheerful that wearing a stack of them genuinely makes you feel happy.
The basic supplies for kandi are very simple. Pony beads in every color imaginable, elastic cord, a beading needle if you are doing more complex patterns, and scissors. That is genuinely all you need to get started with basic single-strand bracelets. More advanced projects like cuffs and masks require a little more technique but the same basic materials.
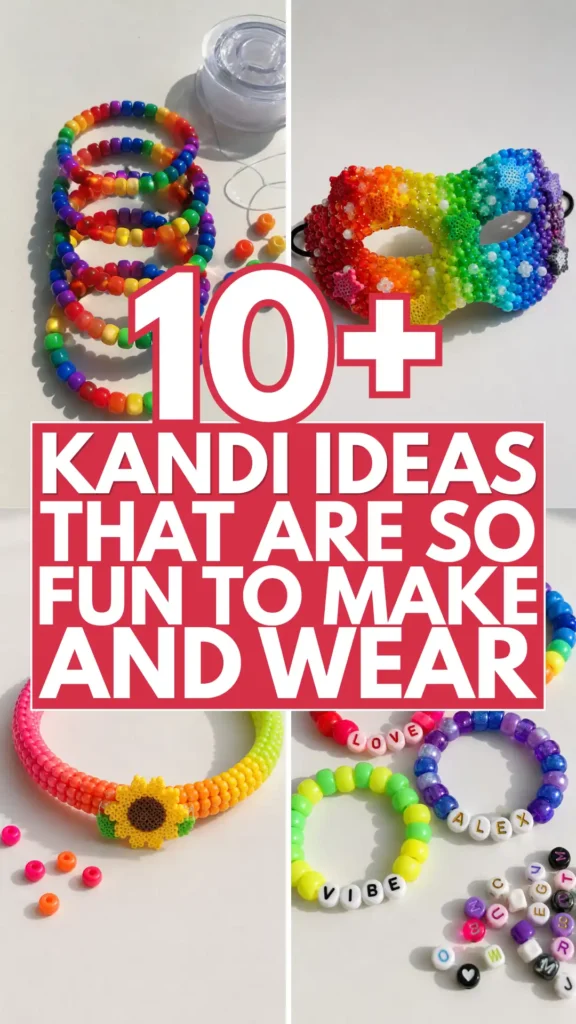
Whether you are completely new to kandi or looking for fresh ideas to add to your collection, here are 10 kandi ideas that range from simple and quick to more elaborate and impressive.
1. A Classic Single Strand Rainbow Kandi Bracelet
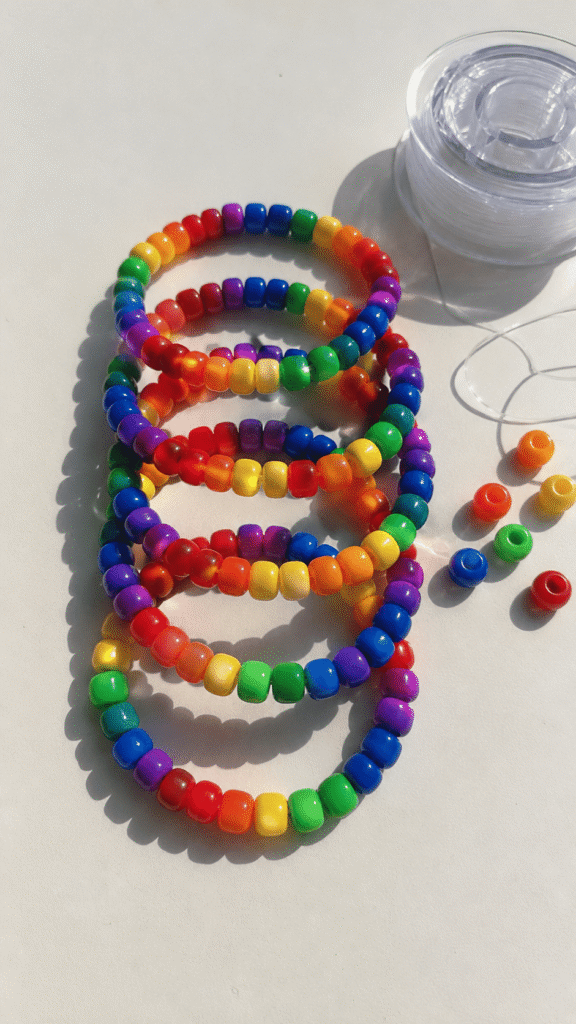
The classic single strand kandi bracelet is where everyone starts and honestly it never gets old because the simplicity of it is part of its charm. A single strand of pony beads on elastic cord is the foundation of all kandi culture and making a rainbow one is the perfect first project. Cut a length of elastic cord about ten inches long and thread a beading needle onto one end. String pony beads in the classic rainbow color order, red, orange, yellow, green, blue, and purple, repeating the sequence until the bracelet is long enough to fit comfortably over your hand. Tie the ends together with a secure surgeon’s knot, trim the excess cord, and tuck the knot inside an adjacent bead. Stack several rainbow bracelets together for maximum color impact.
2. A Perler Bead Charm Kandi Bracelet
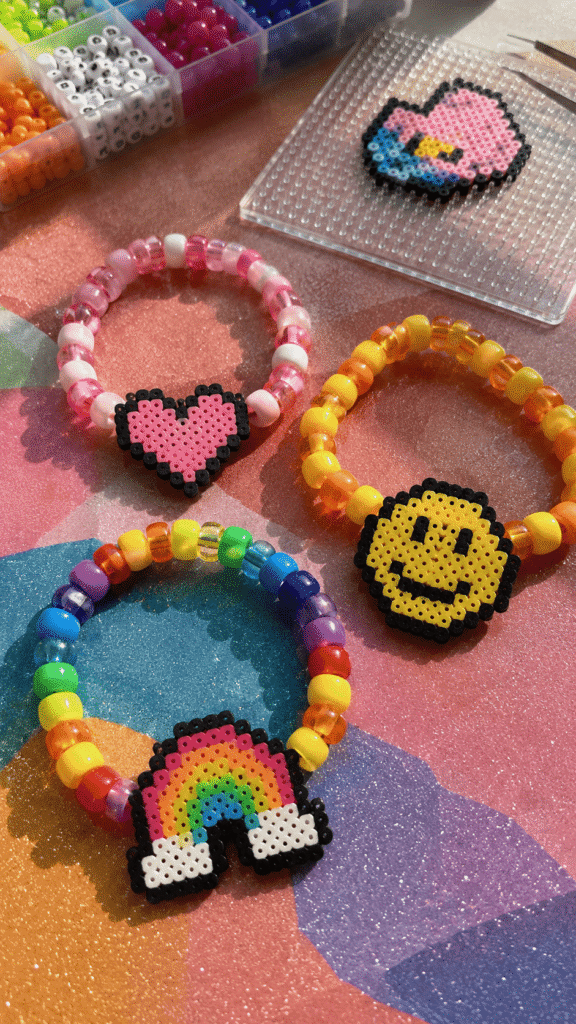
Adding a flat Perler bead or hama bead charm to a kandi bracelet takes it to a whole new level of creativity and personalization. Make your charm first by arranging Perler beads in a pixel art pattern on a pegboard, choosing a design that means something to you or the person you are making it for. Popular charm designs include simple hearts, stars, peace signs, smiley faces, small animals, food items, or game characters. Iron the beads to fuse them, let the charm cool, and then punch a small hole through one of the edge beads using a hot needle or a small drill bit. Thread your elastic cord through the hole and then string the rest of your pony beads around it to complete the bracelet. The flat pixel art charm sits as a focal point on the bracelet.
3. A Multi-Strand Kandi Cuff

A multi-strand kandi cuff is the next level up from a single bracelet and the result is this beautiful wide band of beads that covers a good portion of your wrist and looks incredibly impressive. A basic three-strand cuff uses three parallel strands of pony beads connected together at regular intervals by a shared bead or a connector bead threaded through all three strands at once. The connecting beads lock the strands in place and create the wide cuff structure. Choose a cohesive color palette for your cuff, maybe all one color, a gradient from light to dark, or a simple repeating pattern across all three strands. Once you have the basic three-strand cuff technique mastered you can expand to five, seven, or even more strands for truly dramatic wide cuffs.
4. A Letter Bead Name or Word Kandi Bracelet
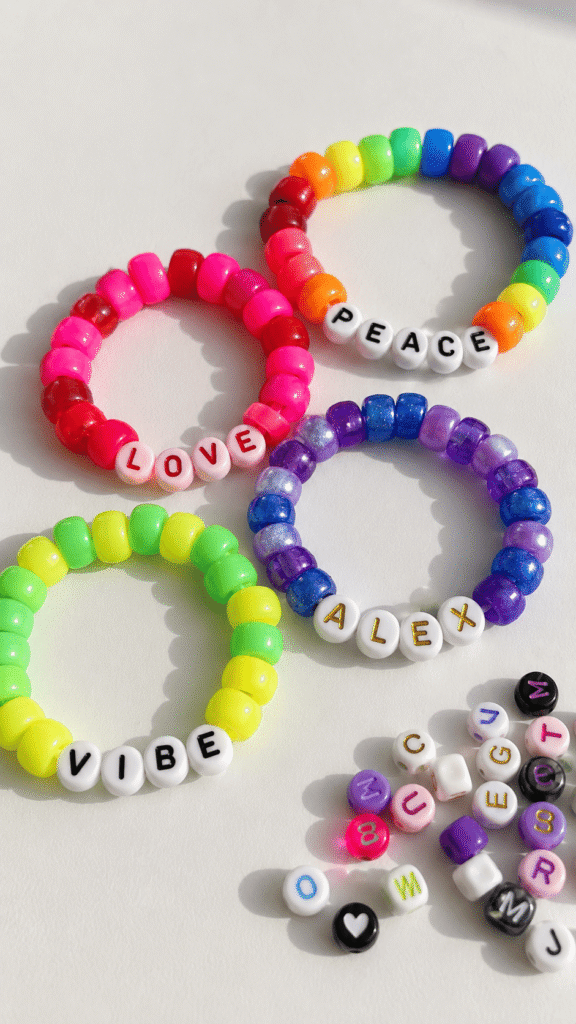
Kandi bracelets with letter beads spelling out names, words, or phrases are some of the most personal and meaningful pieces you can make and give. The simplest version just spells a name or a single word using letter pony beads mixed into a single strand with regular colored pony beads on either side. More elaborate versions spell out a full phrase with decorative beads between each word. Popular choices include someone’s name, a word like love, free, vibe, or peace, a song lyric snippet, an inside joke phrase, or a reference to a shared interest. Choose letter bead colors that contrast well with the background bead colors so the text is easy to read when wearing the bracelet.
5. A Glow in the Dark Kandi Stack
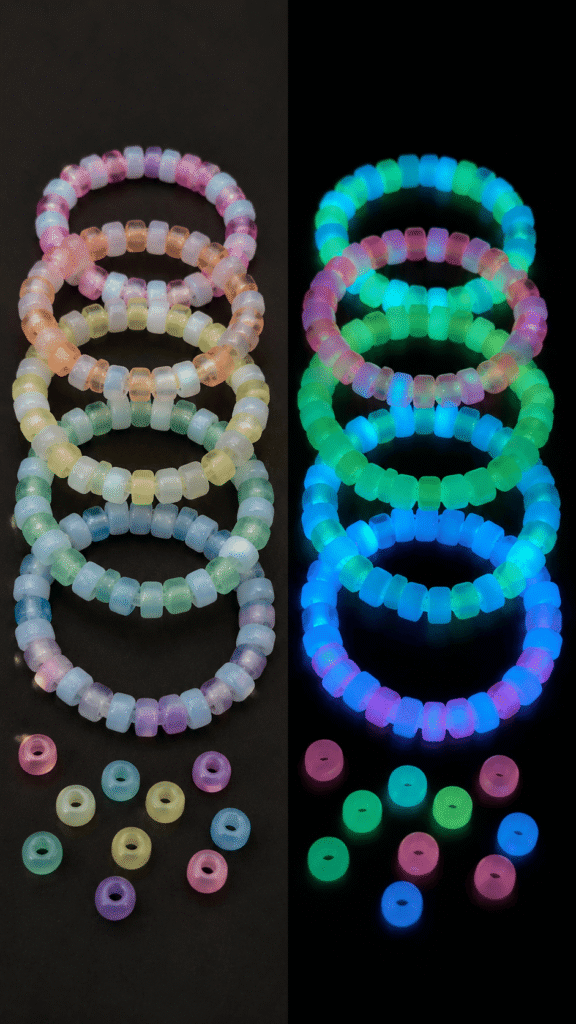
Glow in the dark kandi bracelets are absolutely perfect for festivals, raves, and any nighttime event where you want your accessories to stand out in the most dramatic and fun way possible. Glow in the dark pony beads are widely available in craft stores and online and they look like regular slightly translucent white or pale colored beads in daylight. But charge them under a light source for a few minutes and in the dark they glow in the most beautiful green, blue, pink, or white tones. Make a full stack of five or six bracelets entirely from glow in the dark beads, or mix them with regular neon colored beads for a bracelet that looks great in the light and glows beautifully in the dark.
6. A Themed Kandi Set for a Specific Festival or Event
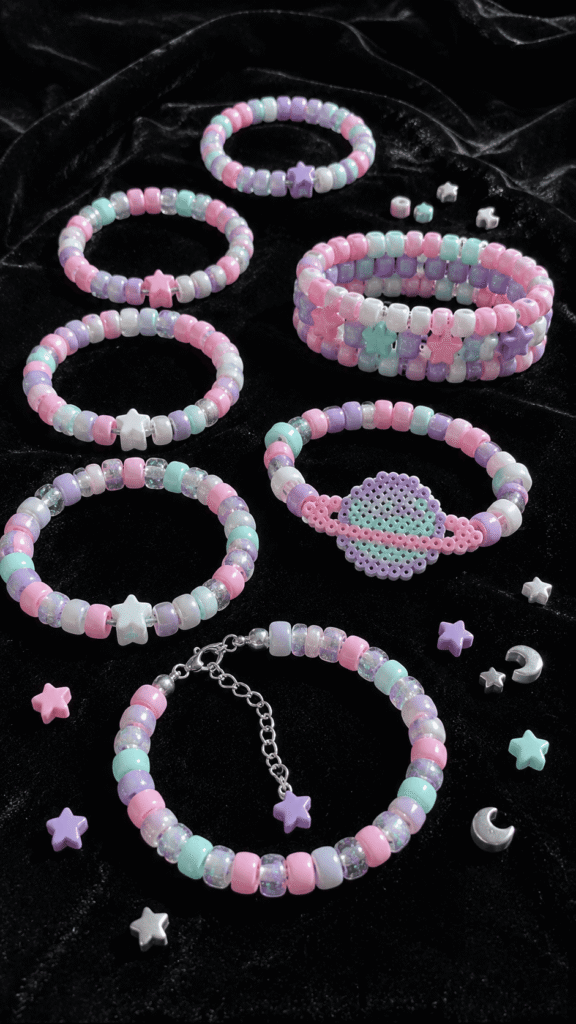
Making a full themed kandi set where every piece coordinates around a specific theme, color palette, or concept is one of the most satisfying kandi projects you can do. Choose a theme that excites you. A pastel fairy theme with soft pink lavender mint and white beads and small star and moon charms. A neon jungle theme with hot green electric blue and vivid orange beads and animal-shaped charms. A space theme with black navy deep purple and silver beads with star and planet Perler charms. A beach theme with turquoise white sandy tan and coral beads with shell charms. Make five to eight pieces for the set including single bracelets, at least one cuff, and maybe a matching headband or anklet. Wearing a fully coordinated themed kandi set is genuinely show-stopping.
7. A Kandi Mask
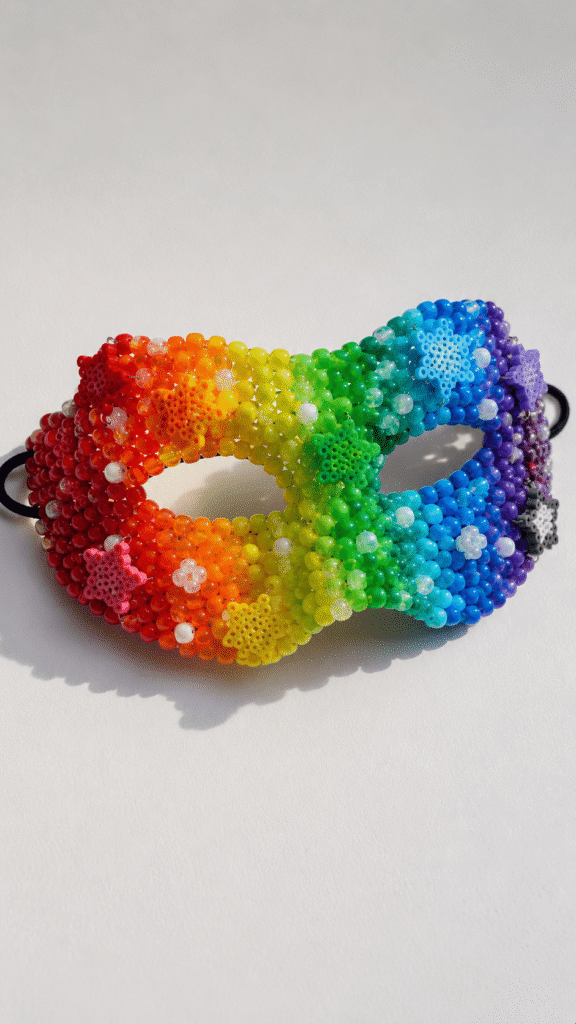
A kandi mask is one of the most ambitious and visually stunning kandi projects you can make and wearing one to a festival or event is absolutely guaranteed to turn heads. A kandi mask uses a plastic masquerade mask base as a foundation and covers it entirely with rows of pony beads threaded through drilled holes or attached with wire. The result is a completely beaded mask that is heavy with color and catches the light in the most incredible way. Choose a color palette that suits your style, all neon brights, a specific theme like tie dye or rainbow, or a more sophisticated palette like black and gold. Add Perler bead charms, larger focal beads, or glow in the dark accents for extra detail. A fully beaded kandi mask takes patience but the result is genuinely extraordinary.
8. A Kandi Headband
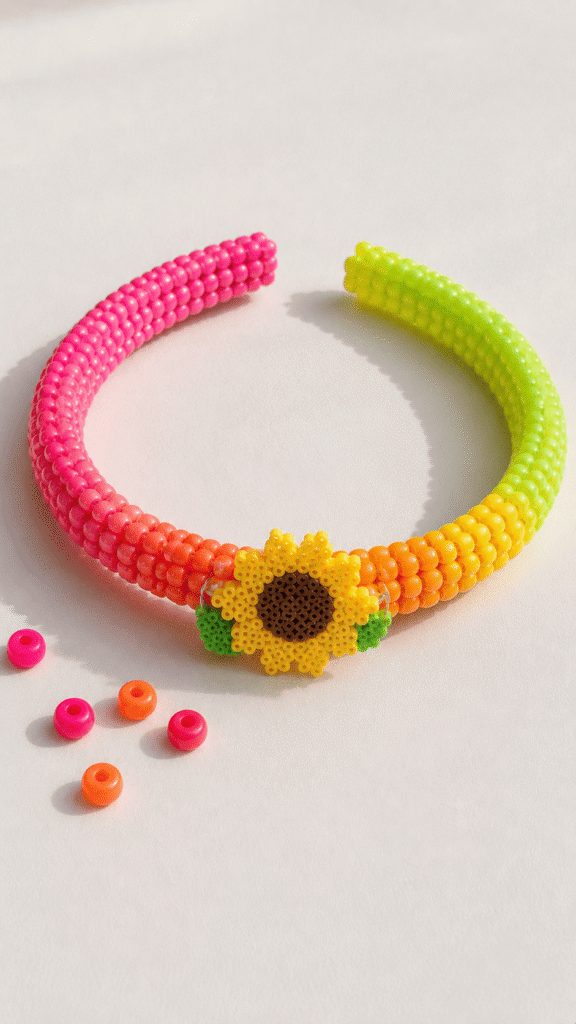
A kandi headband is a really fun and wearable kandi project that goes beyond bracelets and anklets and gives you a way to incorporate kandi into your hair accessories. The basic technique involves covering a plain plastic or fabric headband completely in rows of pony beads by wrapping elastic cord threaded with beads tightly around the headband from one end to the other, securing the cord at each end. Choose a simple solid color for a clean look, a rainbow gradient for maximum color, or a repeating pattern for something more intricate. Add a few larger focal beads, a Perler bead charm wired to the center front of the headband, or some glow in the dark beads mixed throughout. A fully beaded kandi headband is so comfortable to wear and looks absolutely amazing.
9. A Kandi Anklet Stack
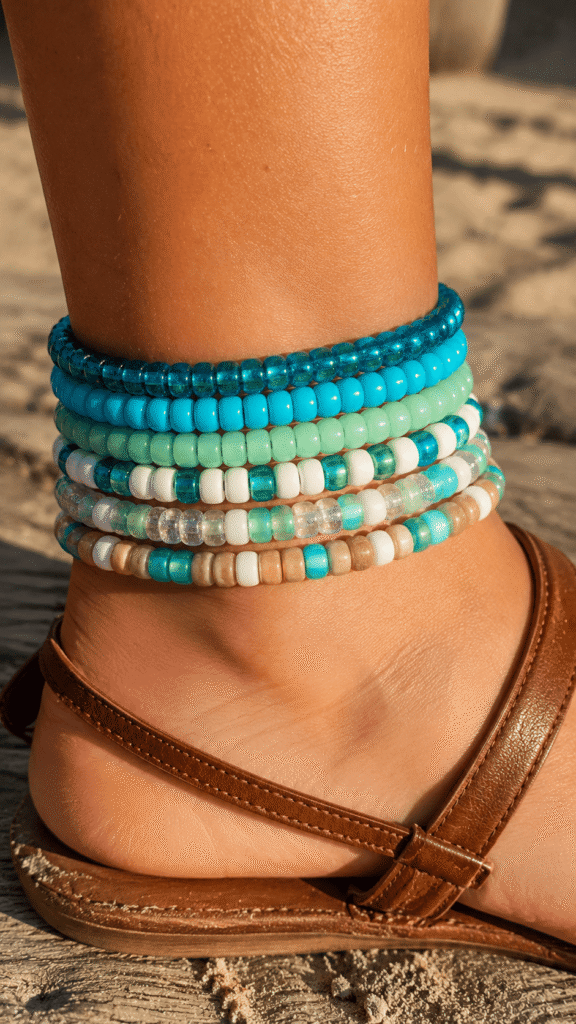
Most people think of kandi as a wrist thing but a kandi anklet stack is such a beautiful and underrated way to wear beaded jewelry especially in summer when you are wearing sandals or going barefoot. Make five or six single strand kandi bracelets sized slightly larger than your wrist measurement so they fit comfortably around your ankle. You can use the same color palettes and bead combinations you would use for wrist kandi, or you can create a specific ankle-inspired theme like ocean colors in blue green teal and white, or earthy summer tones in coral sandy tan and gold. Stack all the anklets together on your ankle and the effect of multiple strands of colorful beads above a sandal or bare foot is genuinely gorgeous.
10. A PLUR Trading Kandi Bracelet Set

Making a batch of kandi bracelets specifically to trade with other people at festivals is one of the most joyful and community-focused kandi projects you can do. The tradition of PLUR trading, where two people perform a specific handshake sequence while transferring a bracelet from one wrist to the other, is at the heart of kandi culture and making bracelets specifically for trading means putting intention and care into each one knowing it will end up on a stranger’s wrist as a gift and a connection. Make twenty or thirty simple single-strand bracelets in a wide variety of colors and patterns, some with letter beads spelling out PLUR or peace or love, some with simple color patterns, some in rainbow colors. Pack them in a small bag to take to your next event.