Reverse tie dye is honestly one of those craft trends that looks incredibly impressive but is actually much easier than regular tie dye in a lot of ways. Instead of adding color to a white shirt, you are removing color from a dark or colored shirt using bleach, and the results can be absolutely stunning. The contrast between the original dark fabric and the lightened bleached areas creates this really bold and graphic effect that looks genuinely professional and totally unique every single time.
What makes reverse tie dye so satisfying is the element of surprise. When you are doing regular tie dye you have a pretty good idea of what colors will go where. With reverse tie dye you fold or twist or scrunch your fabric, apply your bleach, and then wait to see what appears as the bleach works. The reveal moment when you unfold the fabric and see the pattern for the first time is genuinely exciting every single time, and because every piece of fabric reacts slightly differently to bleach, no two pieces ever look exactly the same.

Another thing that makes reverse tie dye so appealing right now is the color palette it creates. Instead of the rainbow brights of traditional tie dye, reverse tie dye gives you these really beautiful earthy and faded tones. A black shirt bleached in a spiral pattern might reveal shades of orange, rust, and cream. A navy blue shirt might bleach to a beautiful soft sky blue or lavender. A dark green shirt might reveal warm yellow-green tones. The colors are organic, complex, and genuinely beautiful in a way that feels very wearable and very on trend right now.
The basic supplies you need are very simple. Dark colored 100 percent cotton clothing or fabric, regular household bleach, rubber bands, gloves, and a spray bottle or squeeze bottle. That is genuinely all you need to get started
1. The Classic Bleach Spiral on a Black Shirt
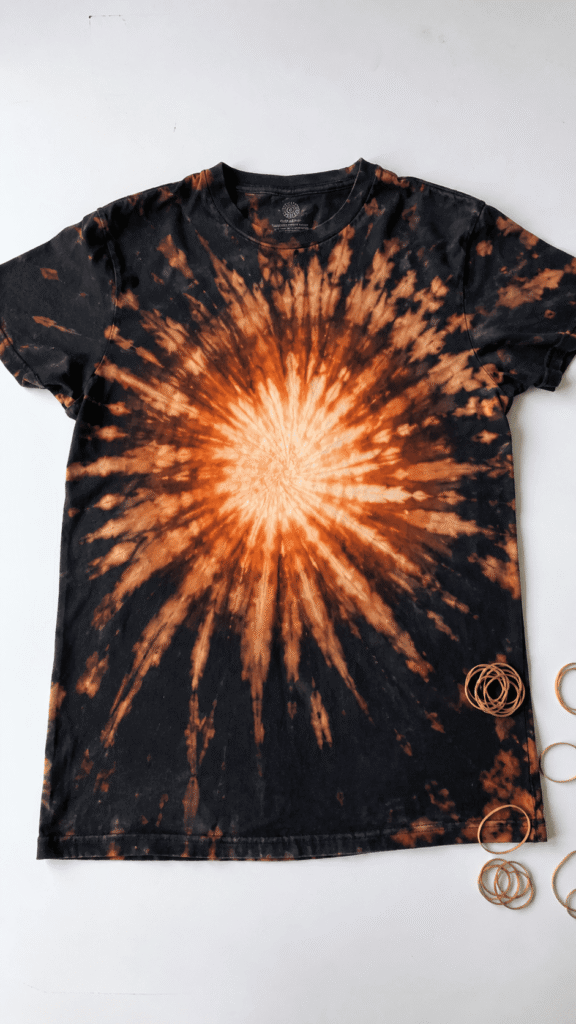
The spiral is the most iconic tie dye pattern and it translates absolutely beautifully into reverse tie dye on a dark shirt. Lay your black cotton shirt flat on a protected surface. Pinch the center of the shirt where you want the spiral to start and twist the entire shirt around that center point until it forms a tight flat disc shape. Secure the disc with three or four rubber bands crossing through the center like the spokes of a wheel, dividing it into equal sections. Fill a spray bottle with undiluted bleach and spray each section of the disc generously, making sure the bleach soaks through to the layers underneath. Leave it to work for fifteen to thirty minutes checking regularly, then rinse thoroughly and wash. The reveal is always spectacular.
2. A Bleach Crumple Pattern for an Abstract Look
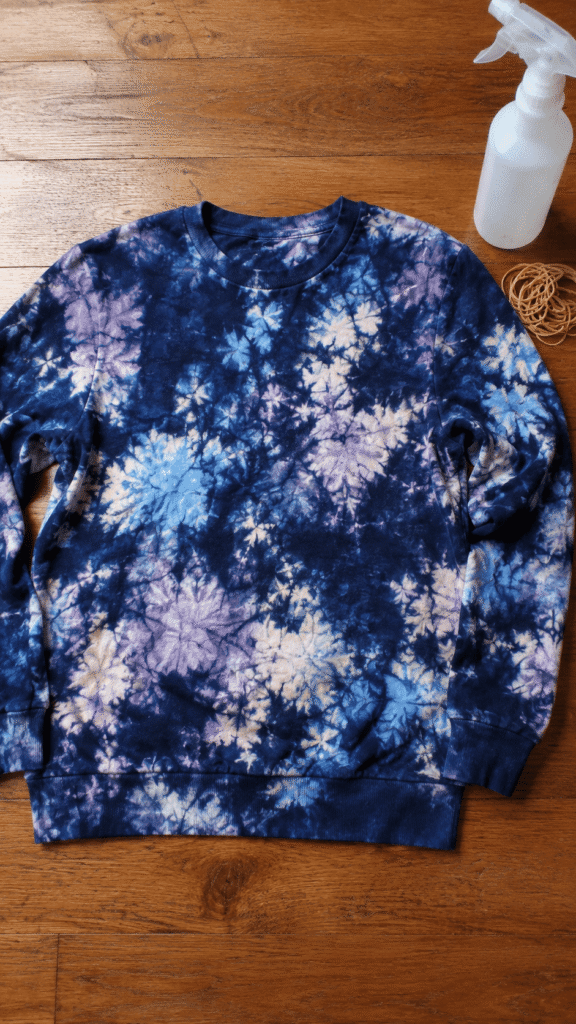
The crumple technique is the most random and unpredictable reverse tie dye method, and it produces the most beautifully organic and abstract results. There is genuinely no wrong way to do it. Take your dark shirt and scrunch and crumple it randomly into a rough ball shape, then secure it loosely with a few rubber bands just to hold it roughly in place. Spray or pour bleach over the crumpled ball, turning it over to hit all sides. The bleach will seep into some of the folds and not others, creating a completely random and organic pattern of light and dark areas across the fabric. No two crumple pattern shirts ever look the same and every single one looks like an intentional abstract art piece.
3. Bleach Stripe Pattern Using Accordion Folds
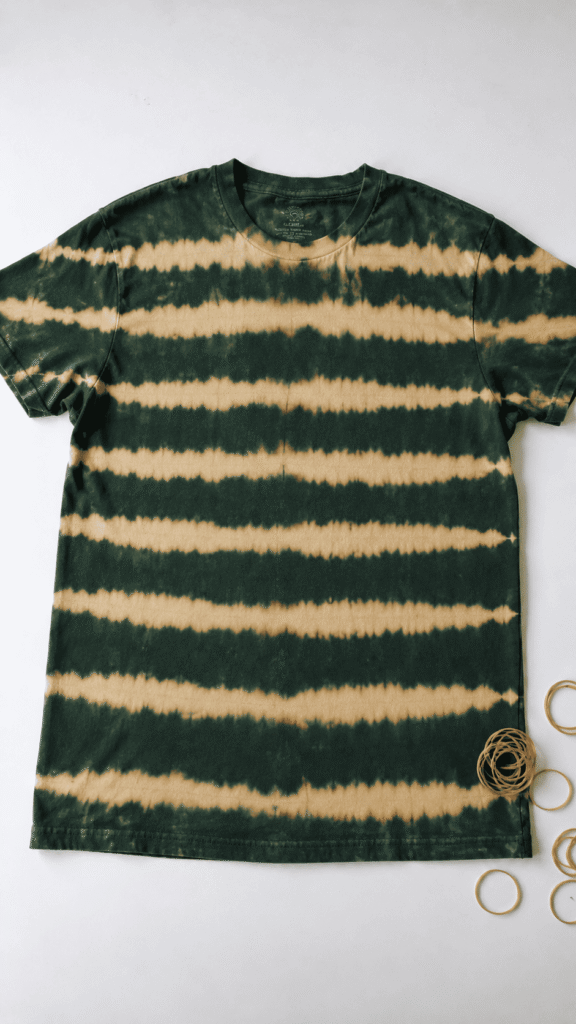
An accordion fold pattern creates the most clean and graphic stripe design in reverse tie dye and the result looks incredibly bold and modern. Lay your dark shirt flat and fold it in tight accordion pleats from the bottom hem all the way up to the collar, folding back and forth as if you are folding a paper fan. Once the entire shirt is folded into a long flat rectangle of pleats, secure it tightly with rubber bands at regular intervals along its length. Apply bleach to both flat sides of the folded rectangle, letting it soak through the layers. When you unfold it after rinsing, you will have perfect parallel stripes running horizontally or vertically across the shirt in the bleached tone against the original dark color.
4. A Bleach Sunburst Pattern on a Dark Hoodie
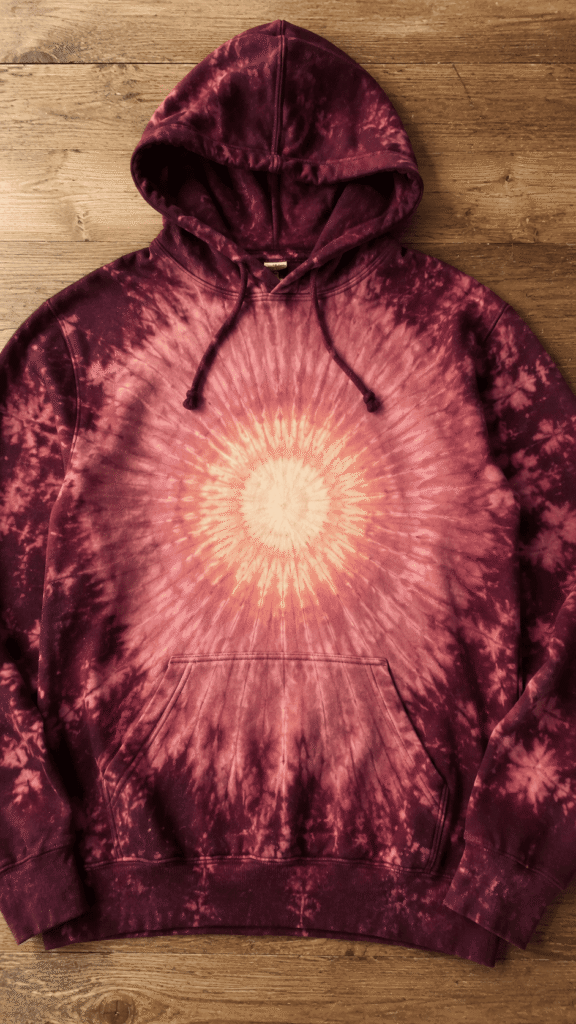
A sunburst pattern on a dark hoodie looks incredibly cool and has this very vintage band merchandise quality that is genuinely wearable and stylish. Choose where you want your sunburst to appear, the center chest is a classic placement, and pinch the fabric at that exact point. Gather the fabric into a cone shape radiating outward from the pinch point and secure it tightly with several rubber bands at different distances from the tip, creating concentric circles of binding. Apply bleach to the gathered tip section generously and let it work its way down through the bands. The tip will bleach the most intensely and the color will fade gradually as you move down through the rubber band rings creating a beautiful sunburst gradient effect.
5. A Bleach Dip Dye Ombre Effect
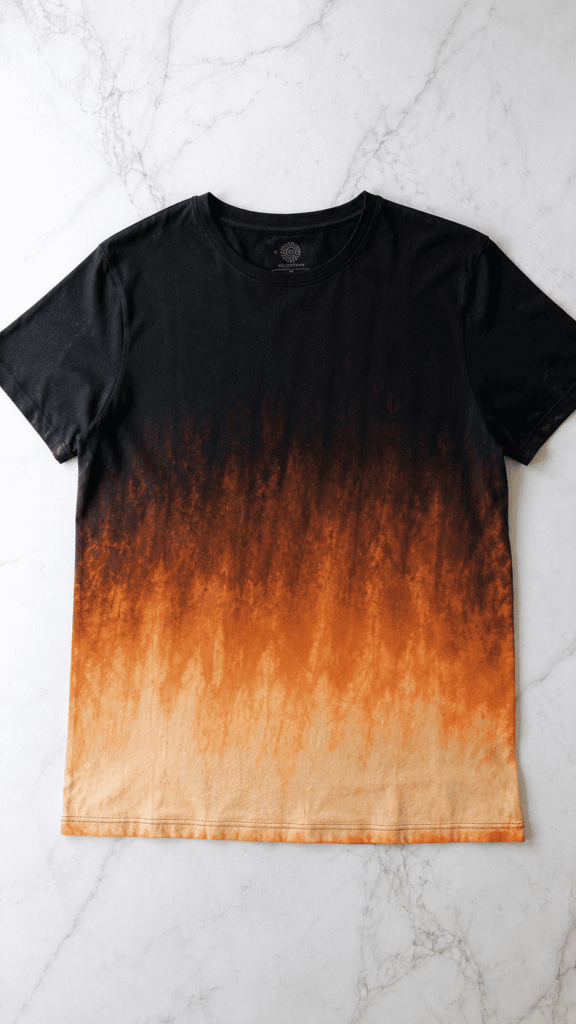
A bleach dip dye creates a beautiful ombre effect on dark fabric where the color gradually fades from dark at the top to light at the bottom, or the reverse. This is one of the simplest and most elegant reverse tie dye techniques because it requires no folding, no rubber bands, and no complicated process. Simply mix a bleach solution of about one part bleach to three parts water in a bucket deep enough to submerge the lower half of your shirt. Dip the bottom half of your folded shirt into the bleach solution and hold it there, slowly pulling it upward over the course of several minutes so the very bottom is exposed the longest and bleaches the most. The result is a beautiful gradient from light at the hem to the original dark color at the shoulders.
6. Bleach Stencil Designs on Dark Fabric
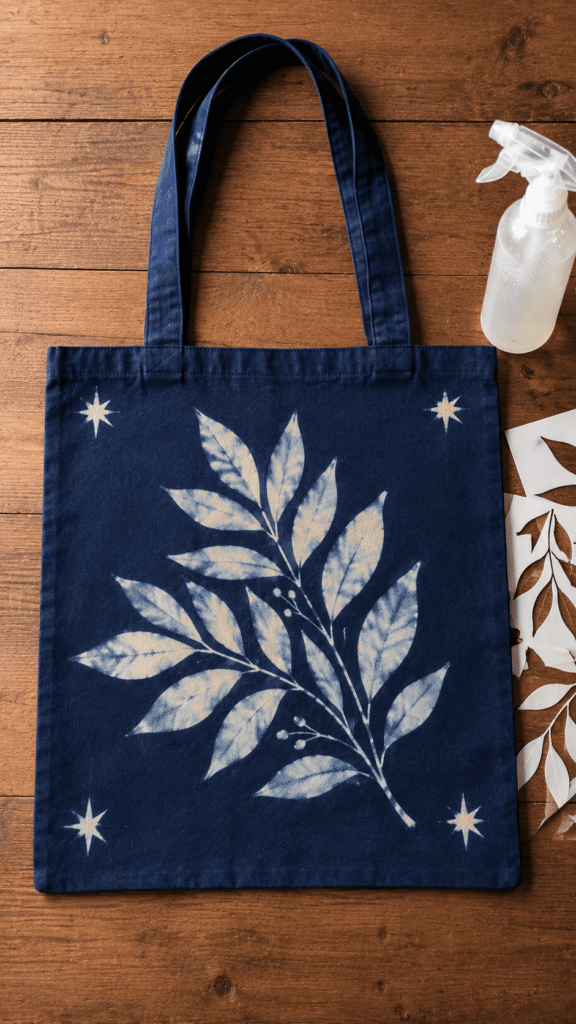
Using a stencil with bleach on dark fabric creates the most precise and graphic reverse tie dye designs and the results look genuinely professional and intentional. You can use purchased plastic stencils or cut your own from contact paper or freezer paper. Press your stencil firmly onto the dark fabric, making sure all the edges are sealed down so bleach cannot seep underneath. Spray or dab bleach carefully over the stencil opening and leave it to work. Remove the stencil before rinsing to avoid bleeding. Simple designs like stars, moons, geometric shapes, botanical leaves, or simple text all look incredible bleached onto a dark fabric background. The crisp edges of a stencil design look very different from the soft organic edges of a folded tie dye pattern.
7. A Bleach Scrunch Pattern on Dark Denim
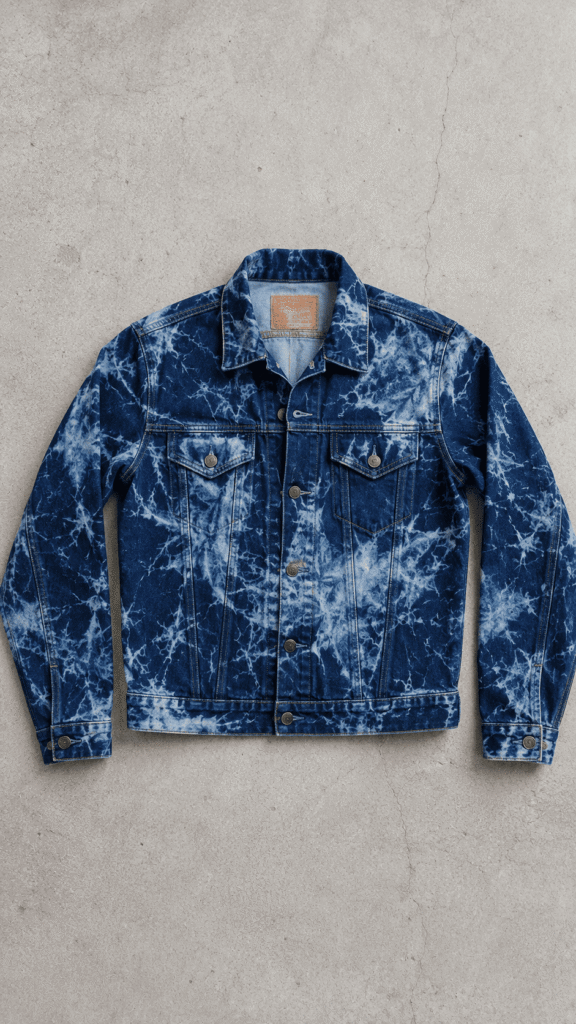
Reverse tie dye on dark denim fabric produces some of the most interesting and beautiful results of any fabric because denim bleaches in such a unique way, revealing those familiar lighter blue and white tones that feel very natural and authentic to the material. Take a pair of dark wash denim jeans, a denim jacket, or a denim skirt and scrunch sections of the fabric randomly before applying bleach with a spray bottle or a sponge. You can also try folding specific sections in a more controlled pattern for a more deliberate effect. The bleach works quickly on denim so check every five minutes. The resulting pattern looks incredibly cool and has this very authentic vintage distressed denim quality.
8. A Bleach Mandala Pattern Using a Circular Folding Technique
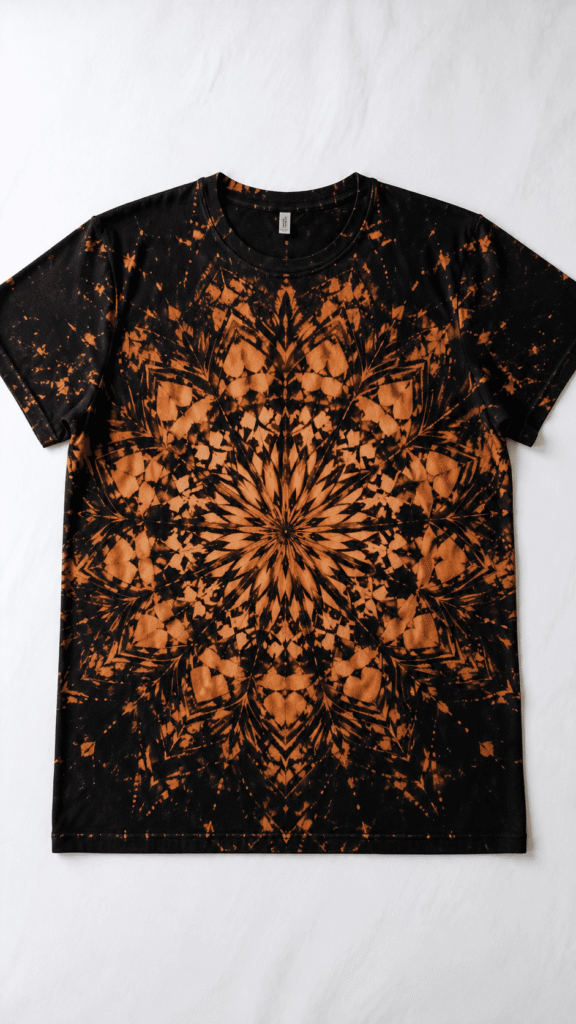
A bleach mandala is one of the most beautiful and intricate-looking reverse tie dye patterns you can create, and while it requires a little more patience in the folding process the results are absolutely extraordinary. Fold your shirt in half vertically, then fold it in half again horizontally so it is in quarters. Continue folding it in a series of triangular folds until you have a small tight triangular package. Secure it with rubber bands, then apply bleach to the folded edges and surfaces. When you unfold the shirt after rinsing, the pattern will be a complex and beautiful symmetrical mandala-like design that radiates from the center of the shirt with the most stunning geometric precision.
9. Reverse Tie Dye on a Dark Canvas Tote Bag
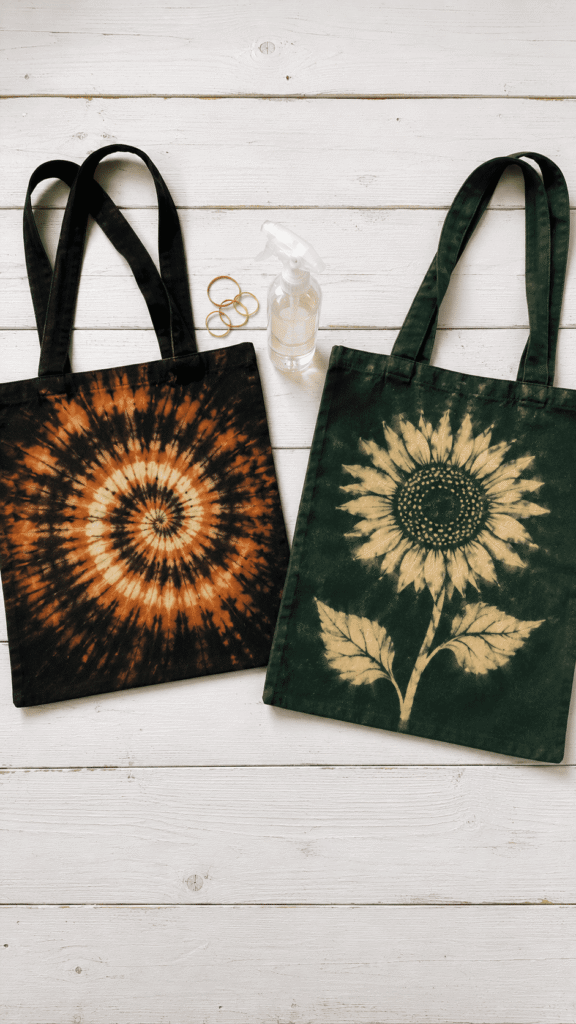
Dark canvas tote bags are a fantastic alternative to clothing for reverse tie dye experiments, especially if you are new to the technique and want to practice before working on a piece of clothing. A plain dark canvas tote, either black, navy, or dark green, takes bleach really well and the results are incredibly wearable and useful. Try a spiral pattern centered on the front of the bag, a simple crumple pattern for an abstract look, or use a stencil to bleach a specific design like a sun, a flower, or a simple word onto the bag front. The finished bag looks genuinely like a boutique purchase and is much more personal and unique than anything you could buy in a store.
10. A Mixed Color Reverse Tie Dye Using Bleach and Fabric Dye Together
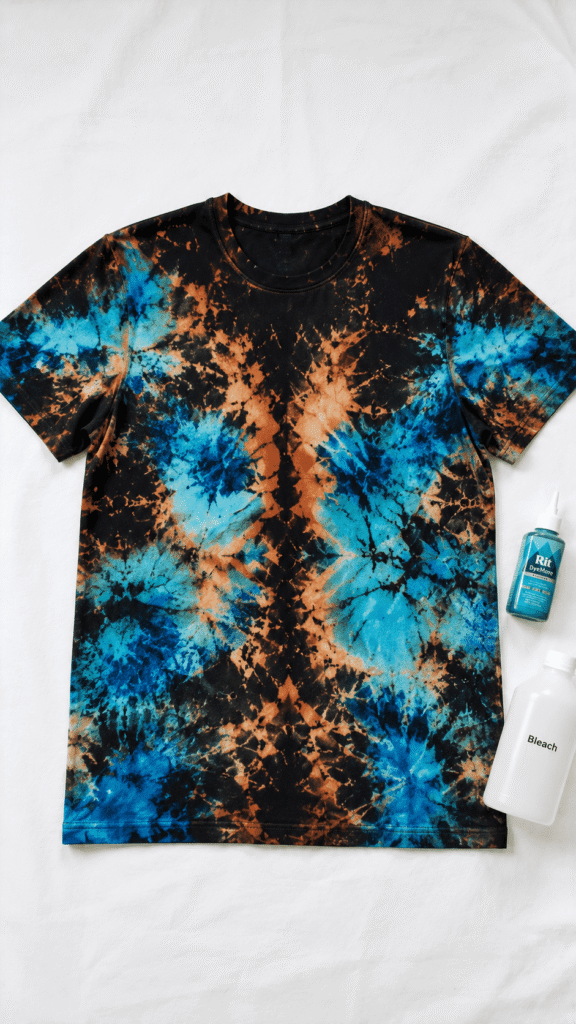
Taking reverse tie dye one step further by combining the bleach removal technique with the addition of new fabric dye colors creates results that are genuinely incredible and completely unique. First do your reverse tie dye folding and bleaching process on a dark shirt as normal, then after rinsing out the bleach but while the fabric is still damp and still folded or refolded in a new pattern, apply fabric dye in one or two colors to specific sections. The dye absorbs into the bleached areas much more intensely than into the unbleached dark areas, creating a layered effect of the original dark color, the bleached intermediate tones, and the new dye colors all visible together in one complex and stunning pattern.