Air dry clay is honestly one of the most satisfying crafting materials you can work with, and the reason it has become so incredibly popular over the last few years is that it requires no kiln, no special equipment, and no studio space. You work with it right on your kitchen table, let it dry at room temperature over a day or two, paint and seal it, and end up with something that looks genuinely ceramic and professional.
The accessibility of air dry clay is what makes it so special. It is inexpensive, widely available in craft stores and online, easy to work with even for complete beginners, and the creative possibilities are genuinely endless. Children can use it just as successfully as adults, and people with no crafting experience at all consistently produce beautiful results with it because the material is so forgiving and so responsive to simple shaping techniques.

What I love most about air dry clay projects is that they sit in this wonderful intersection between functional and decorative. So many of the things you can make with air dry clay are things you will actually use every day. A ring dish on your bedside table, a small planter on your windowsill, a set of pinch pot bowls on your kitchen counter, a personalized ornament on your Christmas tree. These are not just craft projects that get made and then sit in a drawer. They become genuine parts of your home and your daily routine.
Air dry clay does have a few characteristics worth knowing before you start. It shrinks slightly as it dries so keep that in mind for any precise sizing. It can crack if it dries too quickly so cover your work loosely with plastic wrap if you need to pause mid-project. And it is not waterproof when dry so pieces that will hold water need to be sealed with a waterproof varnish or mod podge.
1. A Pinch Pot Ring Dish
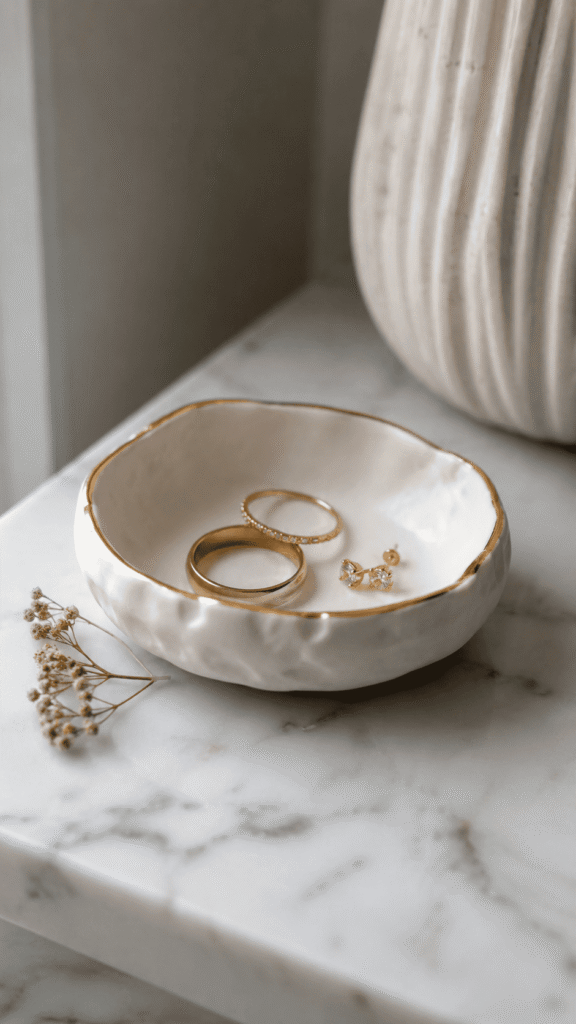
A pinch pot ring dish is probably the most classic and beloved air dry clay project and for very good reason. It is simple enough for a complete beginner to make beautifully on their first attempt, it is genuinely useful as a place to put your rings and jewelry, and it looks absolutely beautiful on a bedside table or a bathroom shelf. Take a ball of air dry clay about the size of a golf ball and press your thumb into the center. Slowly pinch and rotate the clay between your thumb and fingers, working upward from the base to create a small shallow bowl shape. Smooth the interior and exterior with a damp finger. Press the outside of the bowl gently against your work surface to flatten the base so it sits stably. Let dry completely, then paint in gold, white, or soft pink and seal with varnish.
2. Pressed Flower Clay Decorations
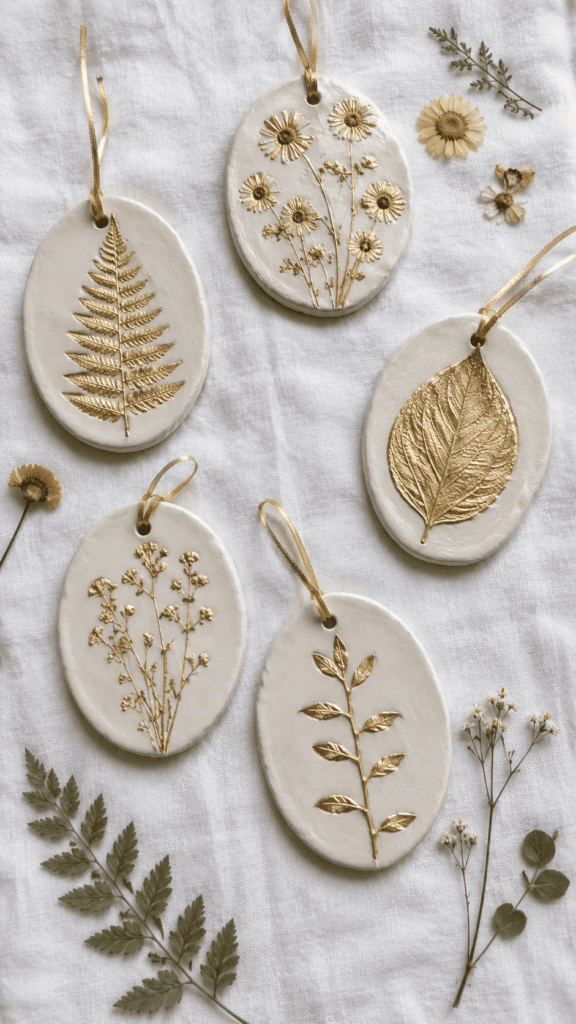
Pressing real flowers and leaves into air dry clay creates some of the most delicate and beautiful decorations you can make, and the technique is incredibly simple. Roll out a piece of air dry clay to about a quarter inch thickness using a rolling pin on a smooth surface. Press real flowers, leaves, ferns, or botanical elements firmly into the surface of the clay to leave a clear impression. Remove the botanicals carefully and cut around the impressed clay in a circle, oval, or organic shape using a knife or cookie cutter. Use a straw to punch a small hole near the top for hanging. Let dry completely, then paint with a thin wash of gold or white paint to highlight the botanical impression detail. The results look genuinely stunning as wall decorations or ornaments.
3. A Small Clay Planter or Pot
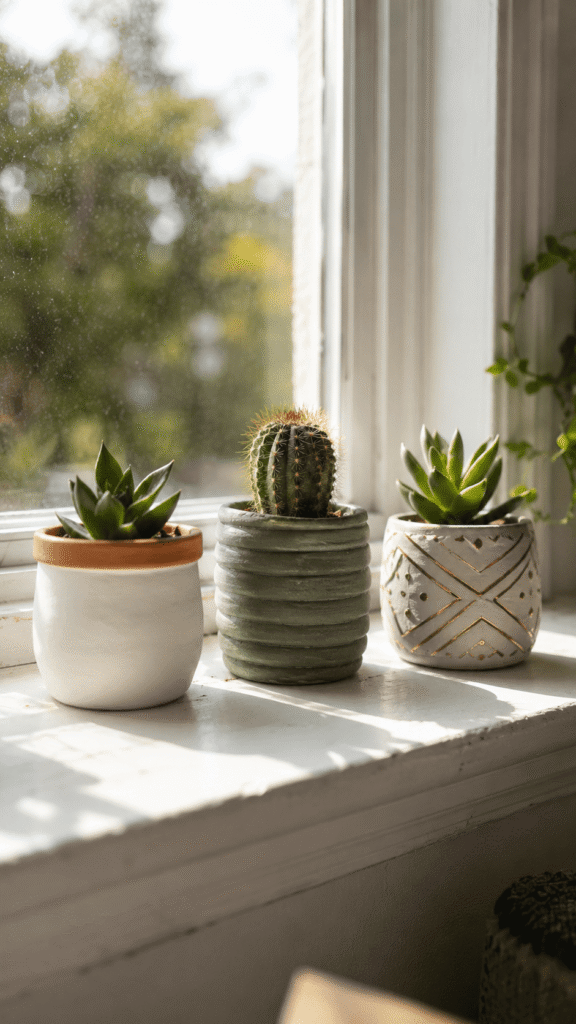
Making your own small clay planters and pots for succulents or small plants is such a satisfying project because you end up with something genuinely functional that sits on your windowsill every day looking beautiful. The simplest method for a beginner is the coil building technique where you roll long snakes of clay and stack them in circles on top of each other, smoothing the coils together on the inside to build up the walls of the pot. Build up the walls gradually to whatever height you want, smooth the exterior for a clean look or leave the coil texture visible for a more handmade quality, and flatten the base by pressing it gently on your work surface. Once dry, paint and seal, and remember to add drainage holes before planting if you want to use it as a real planter.
4. Clay Letter or Number Tiles
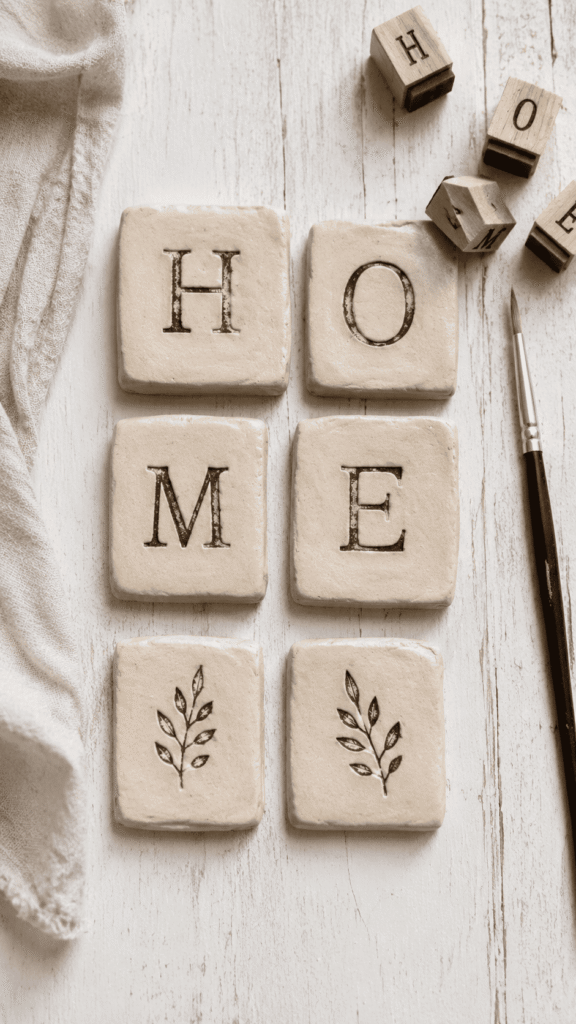
Hand-stamped or carved clay letter and number tiles make beautiful personalized home decorations and meaningful gifts. Roll out air dry clay to about a half inch thickness and cut into small square or rectangular tiles using a knife and ruler. While the clay is still soft, press letter stamps, number stamps, or carved designs into the surface of each tile. You can spell out a family name, a meaningful word, an address number, or a simple short phrase across a series of tiles. Smooth the edges of each tile with a damp finger and let dry completely. Paint the tiles in white, cream, or a color that suits your home and use a contrasting paint color rubbed into the stamped impressions and then wiped back to highlight the lettering detail. Mount on a wall or display on a shelf.
5. Decorative Clay Wall Hangings
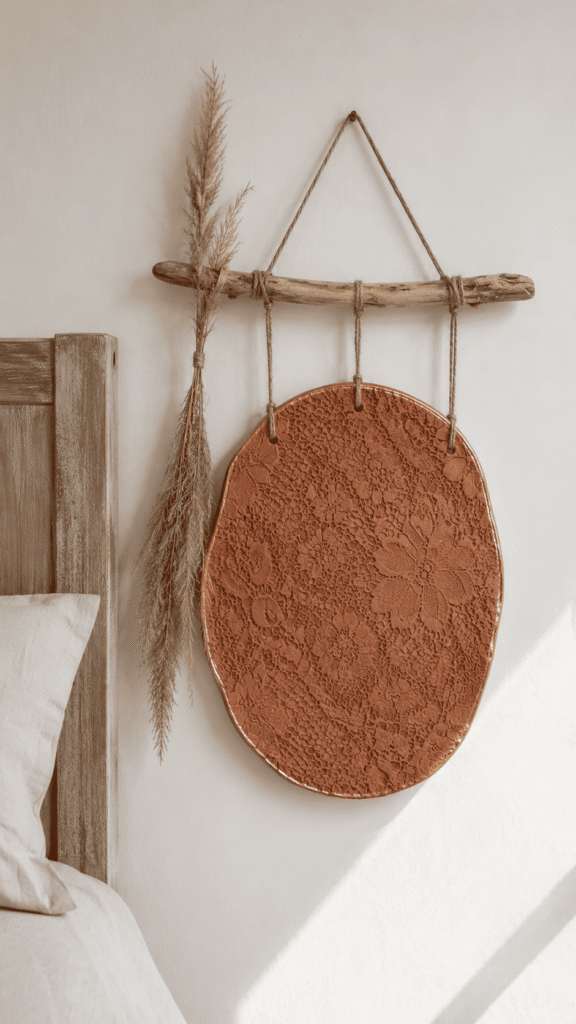
Air dry clay wall hangings are one of the most popular and beautiful clay projects right now and they look genuinely stunning hanging on a white wall. Roll out a piece of clay and cut it into an interesting shape, an organic oval, a half moon, a simple arch, or an irregular free-form shape. While the clay is still soft, press textures into the surface using lace fabric, a leaf, a piece of burlap, or a carved stamp. Use a straw to pierce two or three holes along the top edge for hanging. Let dry completely, then paint in a single earthy tone like terracotta, sage green, dusty rose, or cream and add a thin gold edge around the perimeter with a fine brush. Thread a length of natural cord or leather through the holes and hang from a wooden dowel or a piece of driftwood.
6. Clay Candle Holders
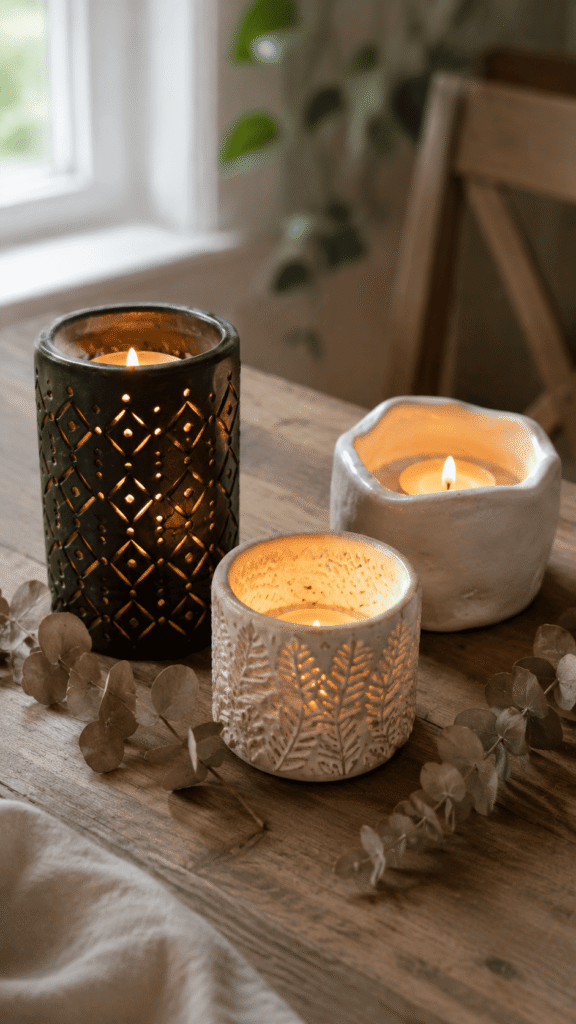
Making your own clay candle holders gives you complete control over the size, shape, and finish and the results look genuinely like expensive designer pieces you would find in a boutique home store. For a simple votive holder, form a cylinder of clay around a glass jar or a candle to get the right interior size, then remove the glass and let the clay cylinder dry and harden in shape. Add texture to the exterior by pressing patterns, geometric designs, or botanical elements into the clay before it dries. For a more sculptural approach, build the walls freehand with pinching and coiling techniques for a more organic form. Paint and seal when dry, replace the glass votive inside, and add a tea light for a beautiful warm glow effect through any texture you have created.
7. Clay Fruit and Food Sculptures
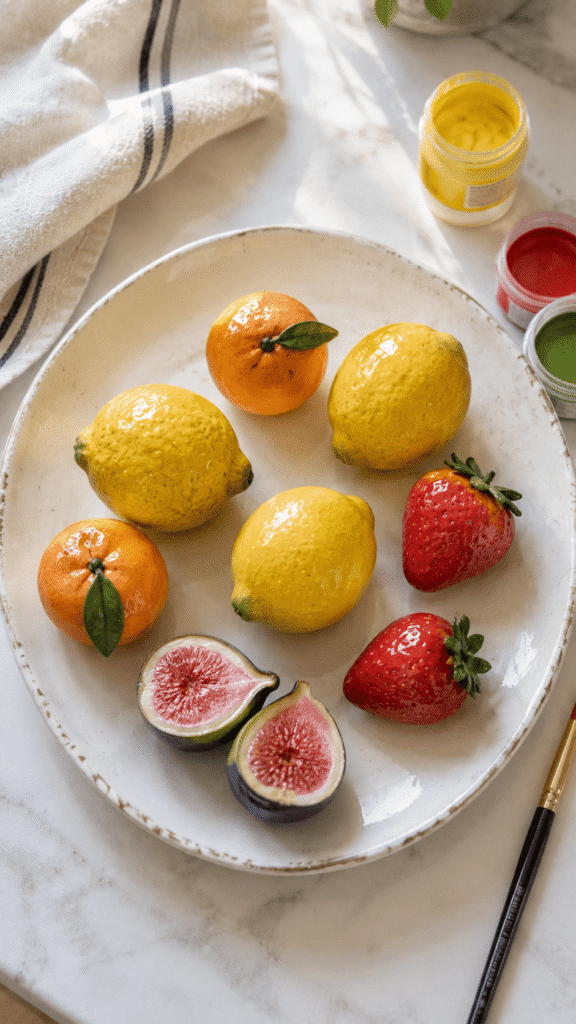
Making miniature clay fruits and food items is one of the most charming and fun air dry clay projects, and the results make the most delightful decorations for a kitchen shelf, a tiered tray, or a bowl display. Sculpt simple fruit shapes like lemons, oranges, strawberries, figs, and avocados by rolling clay into the appropriate basic forms and adding small details like dimpled citrus texture by pressing the clay against a real lemon, a small leaf cutout at the stem end, and tiny seed details. Once dry, paint each piece with acrylic paints in realistic colors, adding shading and highlighting for depth and realism. Seal with a glossy varnish for a beautiful lifelike finish. A bowl of handmade clay lemons or a cutting board display of mixed clay fruits looks absolutely gorgeous in a kitchen.
8. Personalized Clay Gift Tags
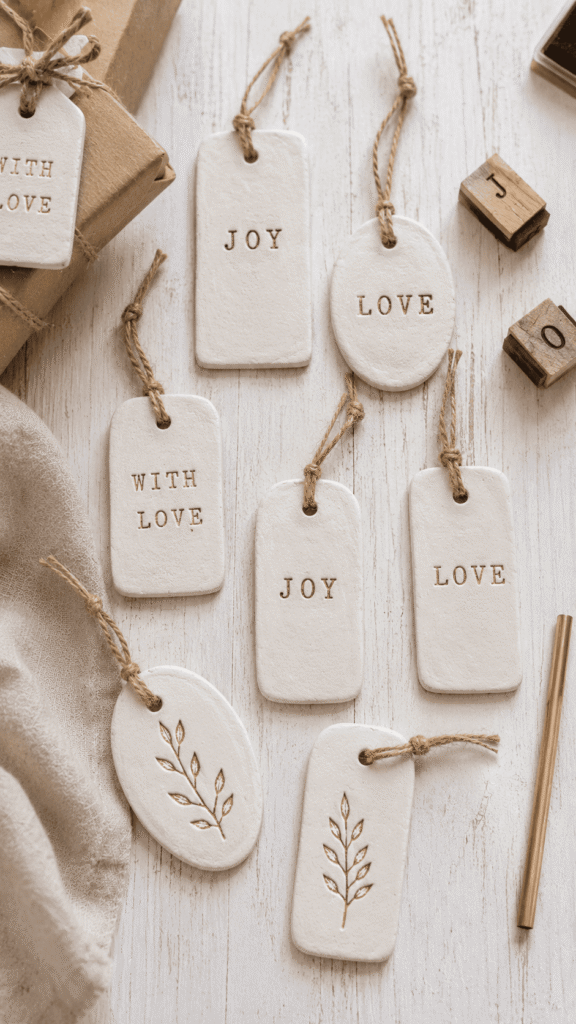
Handmade clay gift tags add the most beautiful personal touch to a wrapped gift and they are so quick and easy to make in batches that you can prepare a whole collection to use throughout the year. Roll out clay thinly and cut small rectangular, oval, or rounded tag shapes using a knife or cookie cutters. Press a name, a word, or a simple design into the surface of each tag while the clay is still soft using letter stamps or a pointed tool. Punch a hole near the top of each tag with a straw before the clay dries. Once dry, paint in white, gold, or a seasonal color, highlight the stamped details with a contrasting wash, and seal. Thread a length of thin ribbon, twine, or gold cord through the hole and tie to a gift. The recipient almost always keeps the tag as a small keepsake.
9. Clay Soap Dish
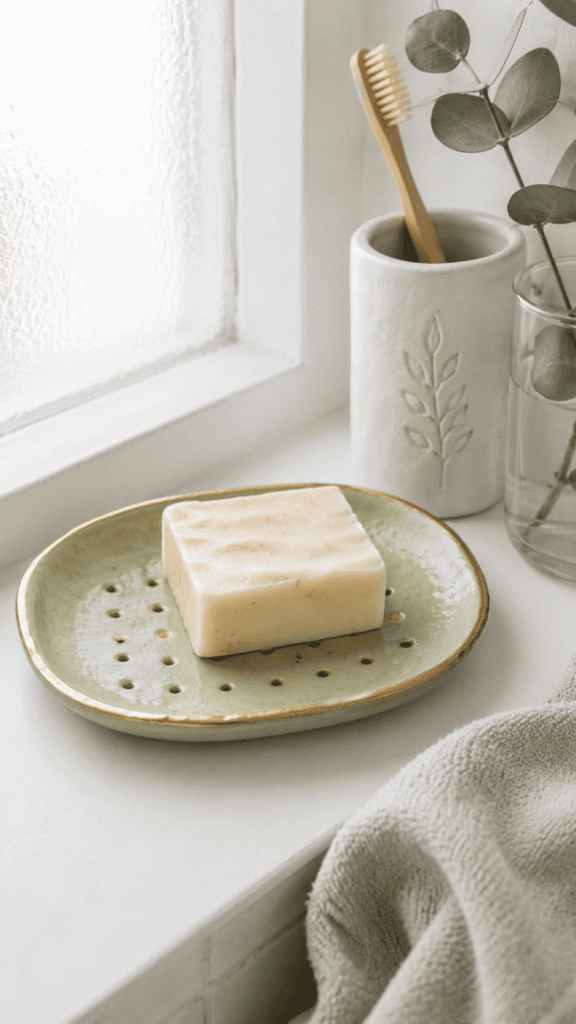
A handmade clay soap dish is such a practical and beautiful bathroom accessory and making your own means you can create something that perfectly matches your bathroom aesthetic. Roll out a piece of clay to about a quarter inch thickness and cut it into an oval or rectangular shape slightly larger than your soap bar. Press a pattern of small holes through the clay using a straw or a pencil to allow water drainage, arranging the holes in a neat grid or a more organic scattered pattern. Curl the edges of the dish upward very slightly to create a shallow lip that will keep the soap in place. Let dry completely flat, then paint in white, sage green, dusty pink, or a color that suits your bathroom. Seal thoroughly with a waterproof varnish since this piece will get wet regularly.
10. A Clay Moon Phase Wall Display
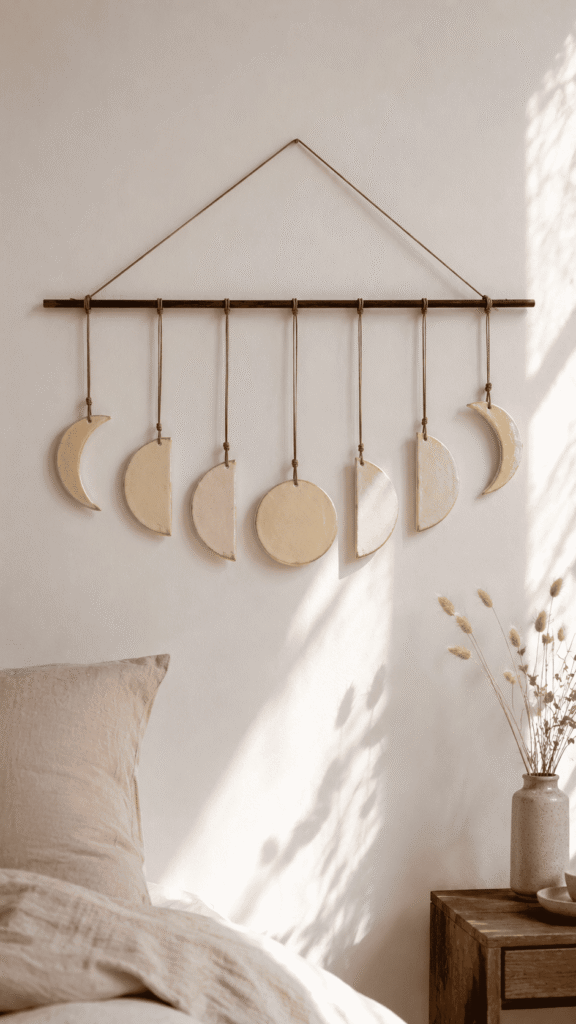
A moon phase wall display made from air dry clay has become one of the most popular and beautiful clay projects on Pinterest right now, and it is easy to see why. The series of moon shapes from new moon through crescent, half moon, gibbous, and full moon creates a beautiful rhythmic display that looks like genuine wall art. Roll out your clay and cut each moon phase shape using round cookie cutters and a knife to cut the crescent and gibbous shapes by overlapping circles. Smooth all the edges and pierce a small hole near the top of each piece. Let all pieces dry completely flat. Paint in white, cream, or a soft gold and seal with varnish. Hang all the pieces in sequence on a length of thin cord or leather attached to a wooden dowel for the most beautiful display.